

0. Introduction: one engine, many features
Fotillo is one of the leading software packages for photo booths and postcard kiosks. This manual describes all of the program's features - so that you can make full use of your hardware and quickly solve any configuration problems.
The most important things to start with
Fotillo works like an engine that is always the same. Around it, optional, paid features are added (camera, printer, payments, sharing, printing from a phone…). That is why every Fotillo package may have a different set of capabilities - depending on what you have downloaded and paid for.
In this manual we describe every feature. If you cannot see one of the options in your own program, it simply means it is not included in your package - not that something is wrong.
What hardware does Fotillo work with?
The program runs on Windows 11, does not require a modern computer and puts little load on system resources. It works with:
| Category | Supported devices |
|---|---|
| Printers | Any printer installed in Windows. Full functionality (two-way communication, roll status, print formats, paper finish) with Citizen CY / CY-02 / CX-02 / CZ-01 and DNP RX1 / RX1HS. The program supports two printers at once and sends each template to the one with the right paper. |
| Camera | Any built-in camera or camera connected via USB. In addition, dedicated Canon EOS DSLR and mirrorless cameras (including the 1D X, 5D, 6D, 7D, 80D/90D, 200D/250D, 800D series and the EOS M series). |
| Payments | RM5 Evo / RM5 HD coin acceptors (USB, CCTalk), Innovative Technology NV10 USB+ / NV9 USB+ banknote readers (8‑bit CCTalk), Valina card terminal. |
| Control | Any audio device connected via Bluetooth (wireless support - see chapter 10). |
1. Installation and start-up ↑ top
Fotillo is developing rapidly and is updated regularly. Always download the latest version - only there will you find all the features described here.
1a. Downloading the program - the configurator new
You download and configure the program in one place: the online configurator at builder.fotillo.com. Step by step you assemble a package tailored exactly to your needs, and then download the finished file. You no longer choose a "fixed" version of the program - you decide yourself which features it contains.
Step by step in the configurator
- Site language and documents - you start at the top of the page: choose the language in which the configurator itself should run, and accept the required documents (terms and conditions, privacy policy). Only then do you move on to assembling the package.
- Device - you choose the device type (see the table below).
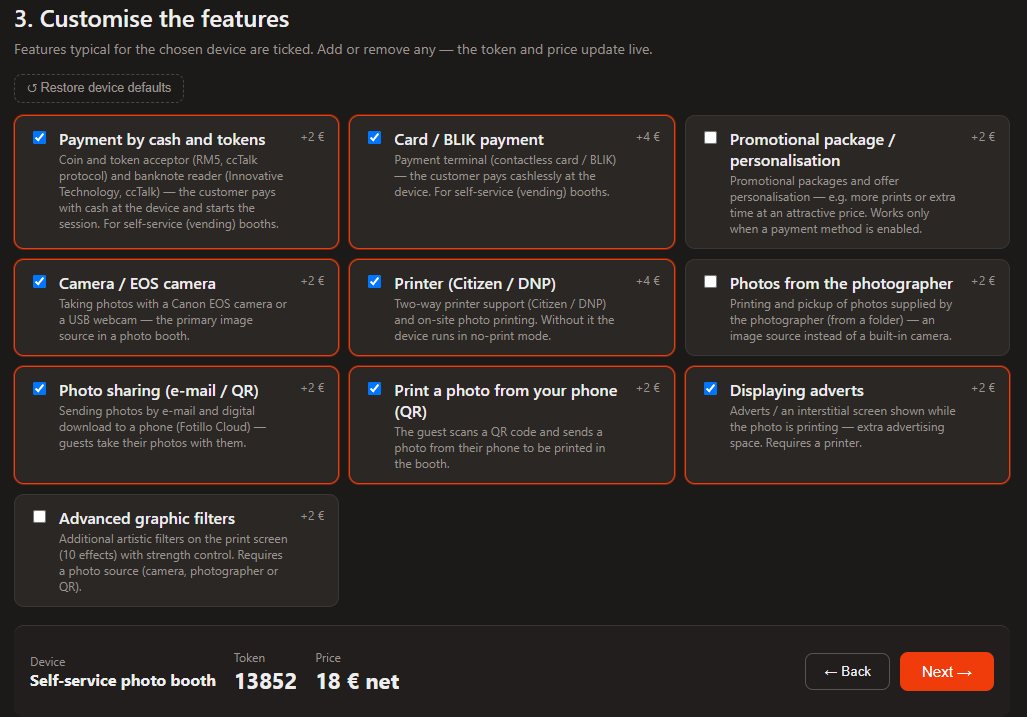
- Features - you tick the features you need (camera, printing, payments, sharing, printing from a phone…). They determine the contents of the package and the price of the activation code.
- Theme - you choose the look of the device: a ready-made set of screen backgrounds and collage templates (photo layouts on the print) matched to the occasion - for example a wedding, Halloween, Christmas or a corporate event - or a neutral/classic theme. The number of available themes depends on the device type, and you can preview each one before choosing. The theme also sets the interface colour scheme (see also chapter 9).
- Program languages - you choose the default language (the one the program starts in) and any additional languages to be included in the package. This setting applies to the program, not to the configurator website (step 1). 13 languages are available; in the program the user switches between them instantly using the flag icons (see chapter 1d).
- Download - you enter your e‑mail address and receive a download link valid for 24 hours. From there you download the ZIP package with exactly the features, theme and languages you selected.
You can also change the theme and language later
The choice made in the configurator is a convenient starting point. You can later swap the theme (backgrounds, collages, colours) in the program files, and add another language by extracting a language pack into the Langs folder - without assembling a new package. Details in chapters 1d and 7-8.
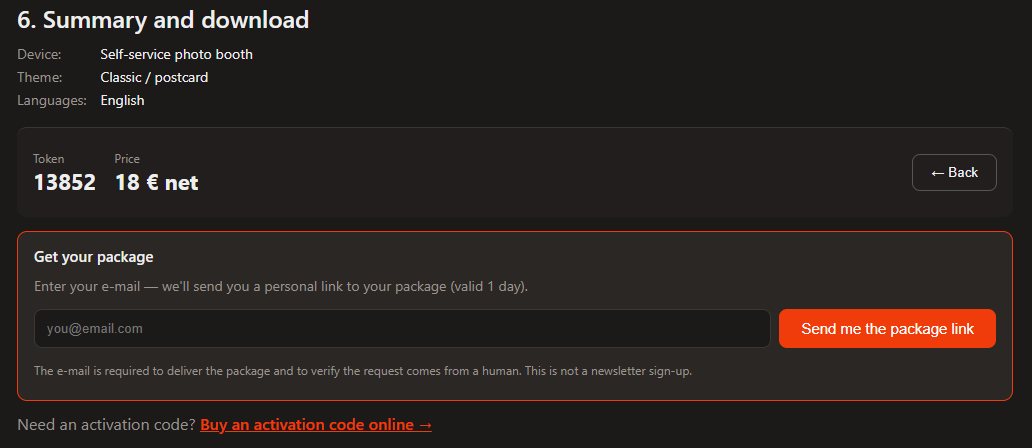
E‑mail = a technical requirement
The e‑mail address is used solely to send the download link. Signing up for the newsletter is separate and entirely optional.
Device types in the configurator
In the first step you choose the device type. Your choice sets a typical set of features and suggests matching themes - you can fine-tune everything afterwards (add or remove any feature).
| Type | What it is for |
|---|---|
| 📸 Event photo booth | A classic photo booth: takes pictures with a camera, prints them and shares them digitally (e‑mail / QR code). No payments - typically for hire at parties and events. |
| 🎟️ Self-service photo booth | A photo booth that earns on its own: camera + printing + payment (card terminal / BLIK or a coin and banknote acceptor). The customer pays at the device and starts the session themselves. |
| ✉️ Postcard booth / PostCard Kiosk | Postcard device: a photo from the camera (postcard booth) or uploaded from the phone via a QR code (PostCard Kiosk); prints a postcard, with payment. Full list of features to choose from. |
| 🖼️ Photo kiosk | No camera: the customer uploads photos from their phone (QR code) or picks photos from the photographer, and the device prints them - with payment and packages. Its own vocabulary (prints). |
| ❤️ Donation kiosk | No camera: collecting donations with payment (cash / card), optionally with a thank-you screen or a photo. |
| 🖨️ HOT FOLDER | No camera: the device prints by itself the photos sent by a photographer through Fotillo Cloud or - in the party mode - by party guests, from a paid package. Printer and HOT FOLDER, optionally card payment together with the promotional package (no cash), print from phone (QR) and advanced filters. |
| 🪞 Photo mirror | Mirror with a touch screen: animations with sound guide the guest instead of a live preview; camera photo and print. Fixed feature set (camera, printer, animations), no payment. |
From DEMO to the full version - the activation code (token)
The downloaded package starts in DEMO mode (see 1c). To unlock it, you buy an activation code on a dedicated product page. The code corresponds exactly to the set of features chosen in the configurator - technically this is a token, i.e. the sum of the selected features. You know the price already at the feature selection stage - it is shown in the configurator and does not change later. The configurator takes you straight to the right product in the shop. If your particular combination of features is not yet available there as a ready-made product, you fill in a short enquiry form - we will review your needs and publish a product for your token in the shop so that you can buy an activation code (at the same price you already know).
Important - the code is tied to the hardware
The activation code is matched to the token (the set of features) and to the hardware identification number. That is why you provide your device ID when buying - you will find it in the program.
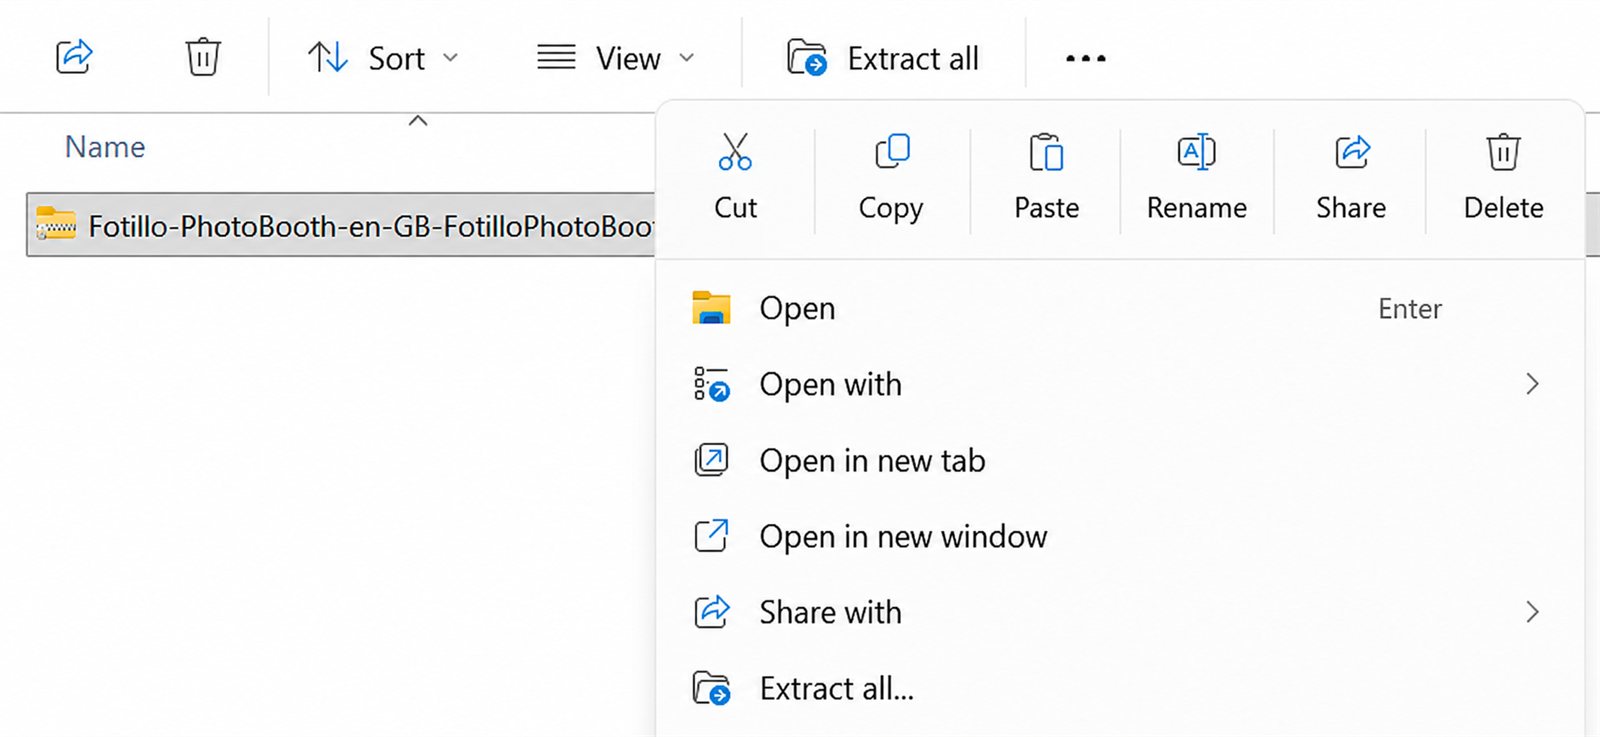
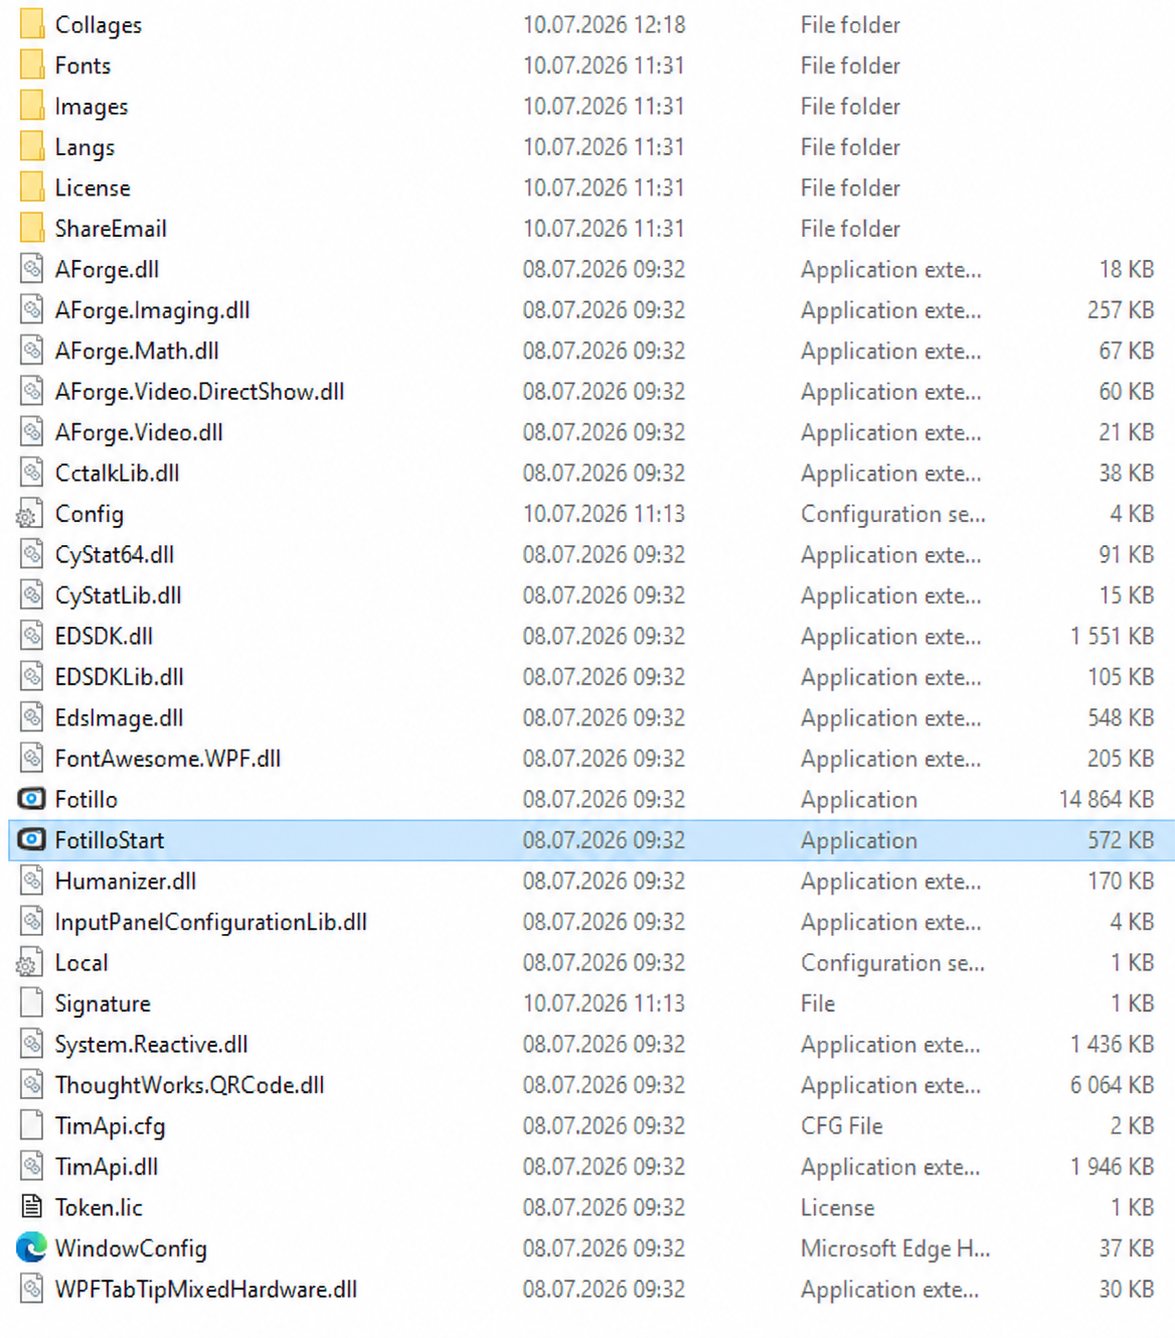
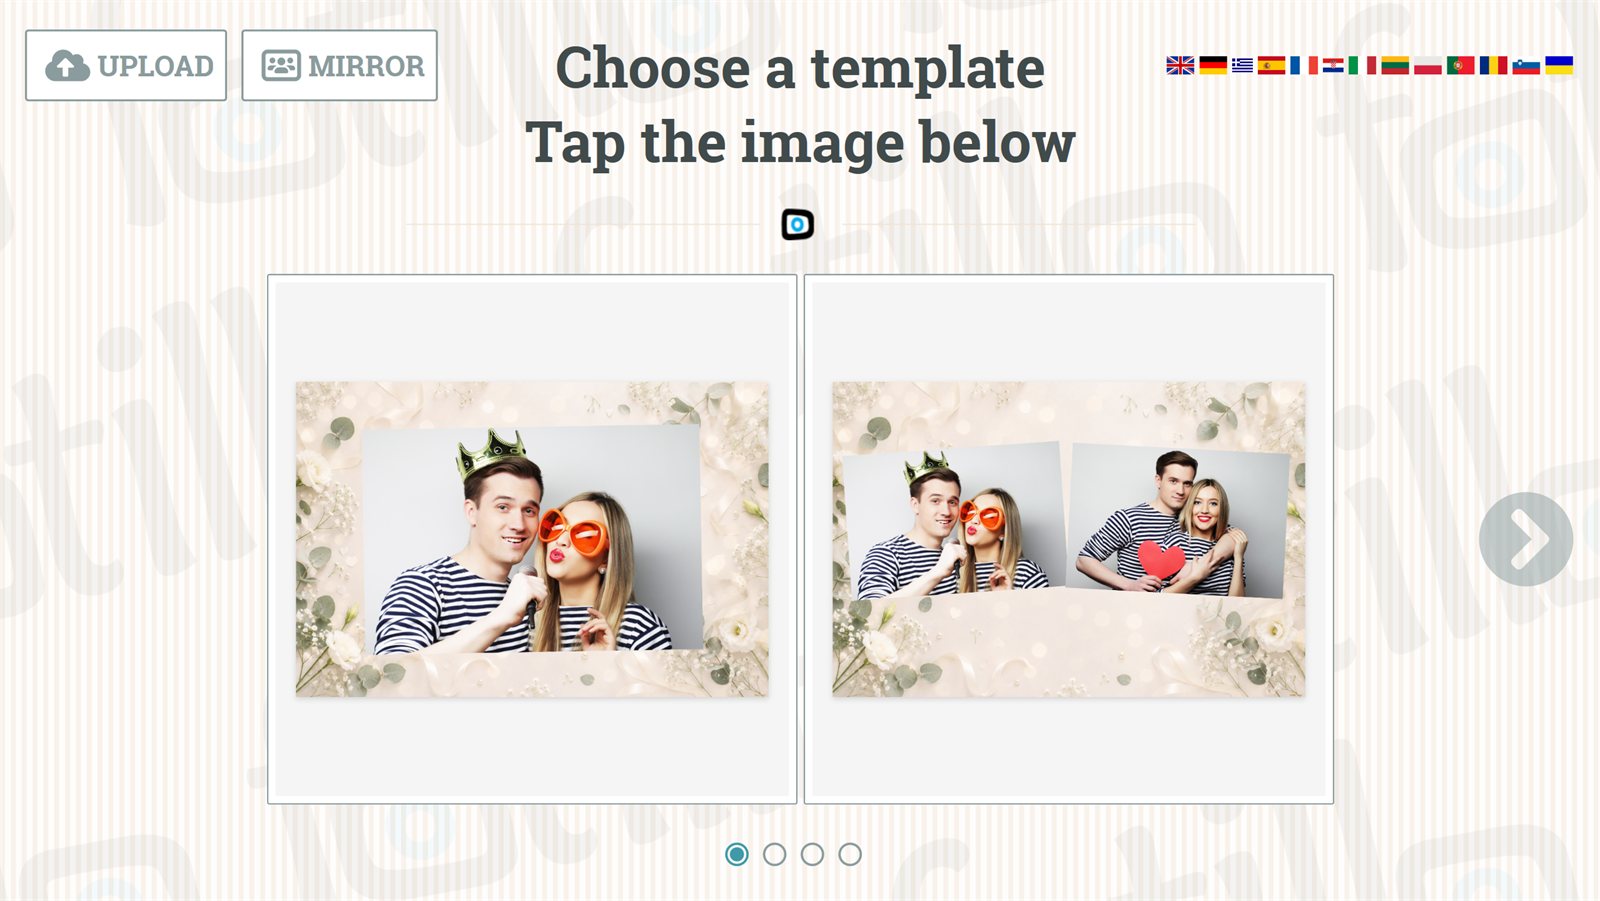
Unpack the ZIP on the photo booth computer
Unpack the package directly on the Windows computer that will run the program. Do not unpack it on a Mac and do not move unpacked files on a USB stick - macOS adds hidden ._name and .DS_Store files to every folder, and the program will not start with them. If you download on another computer, move the ZIP file itself or open the e‑mail link in the browser on the photo booth.
1c. DEMO version (free)
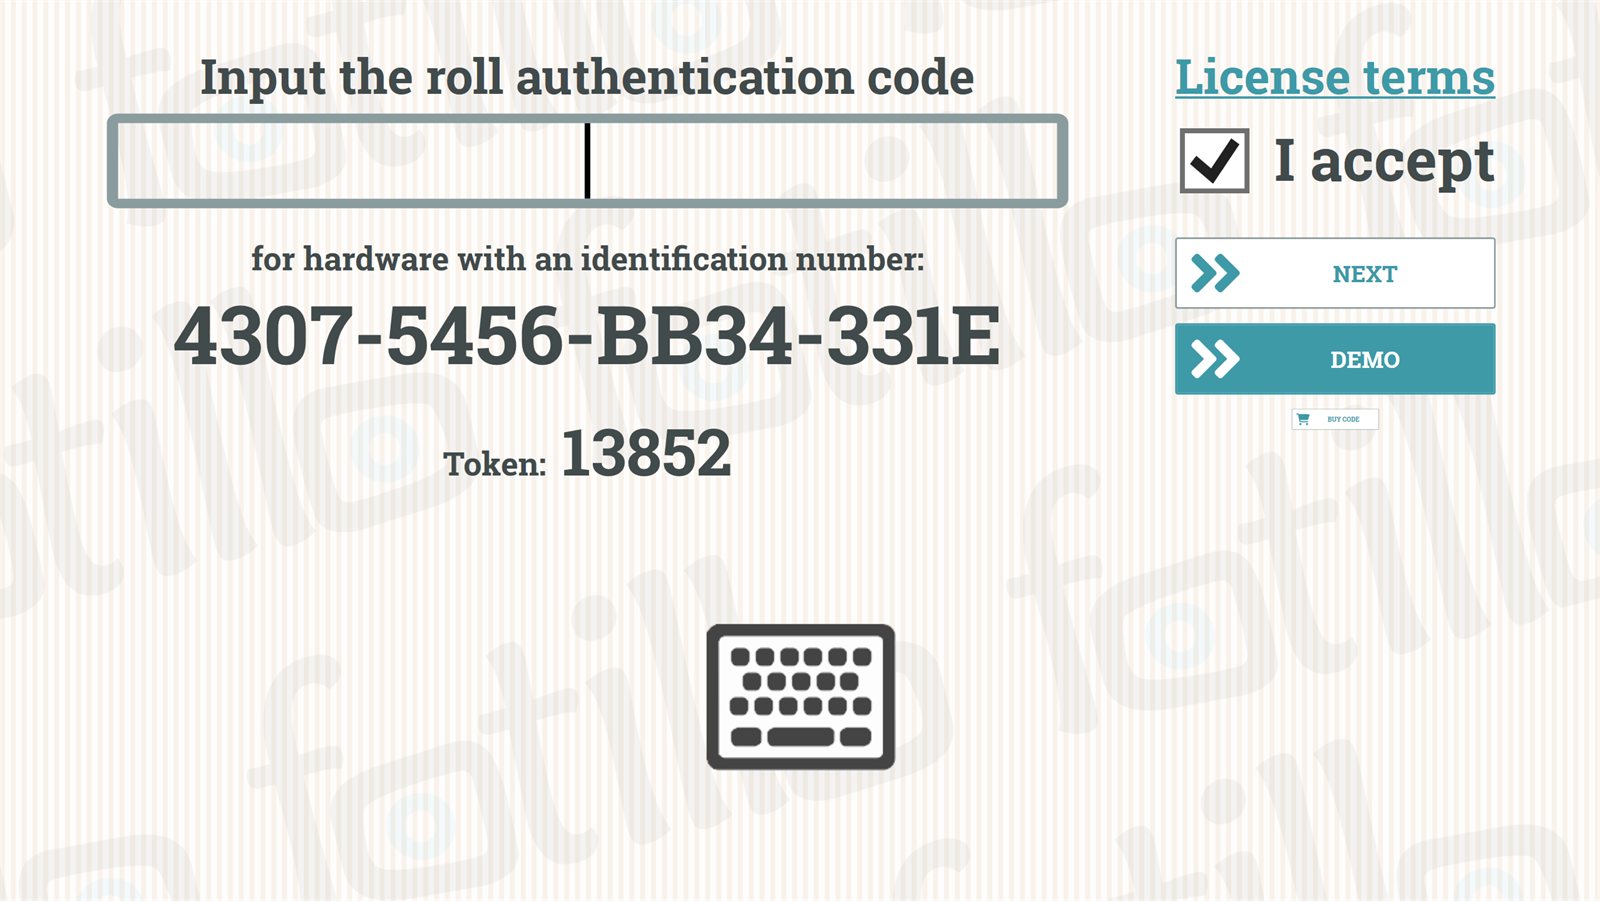
The demonstration version lets you test all features at no cost. The only limitation: you cannot print full-size photos - they will be covered with the word "DEMO". You can, however, check how the program runs on your hardware, what the operation and configuration look like, and the whole process in a photo booth or postcard kiosk.
To start DEMO mode, select the "DEMO" button on the right of the welcome screen. To move to the full version, enter your activation code (bought on the dedicated product page and matched to your selected features - see 1a) and click "NEXT".
1d. Language versions
Fotillo supports devices in any language.
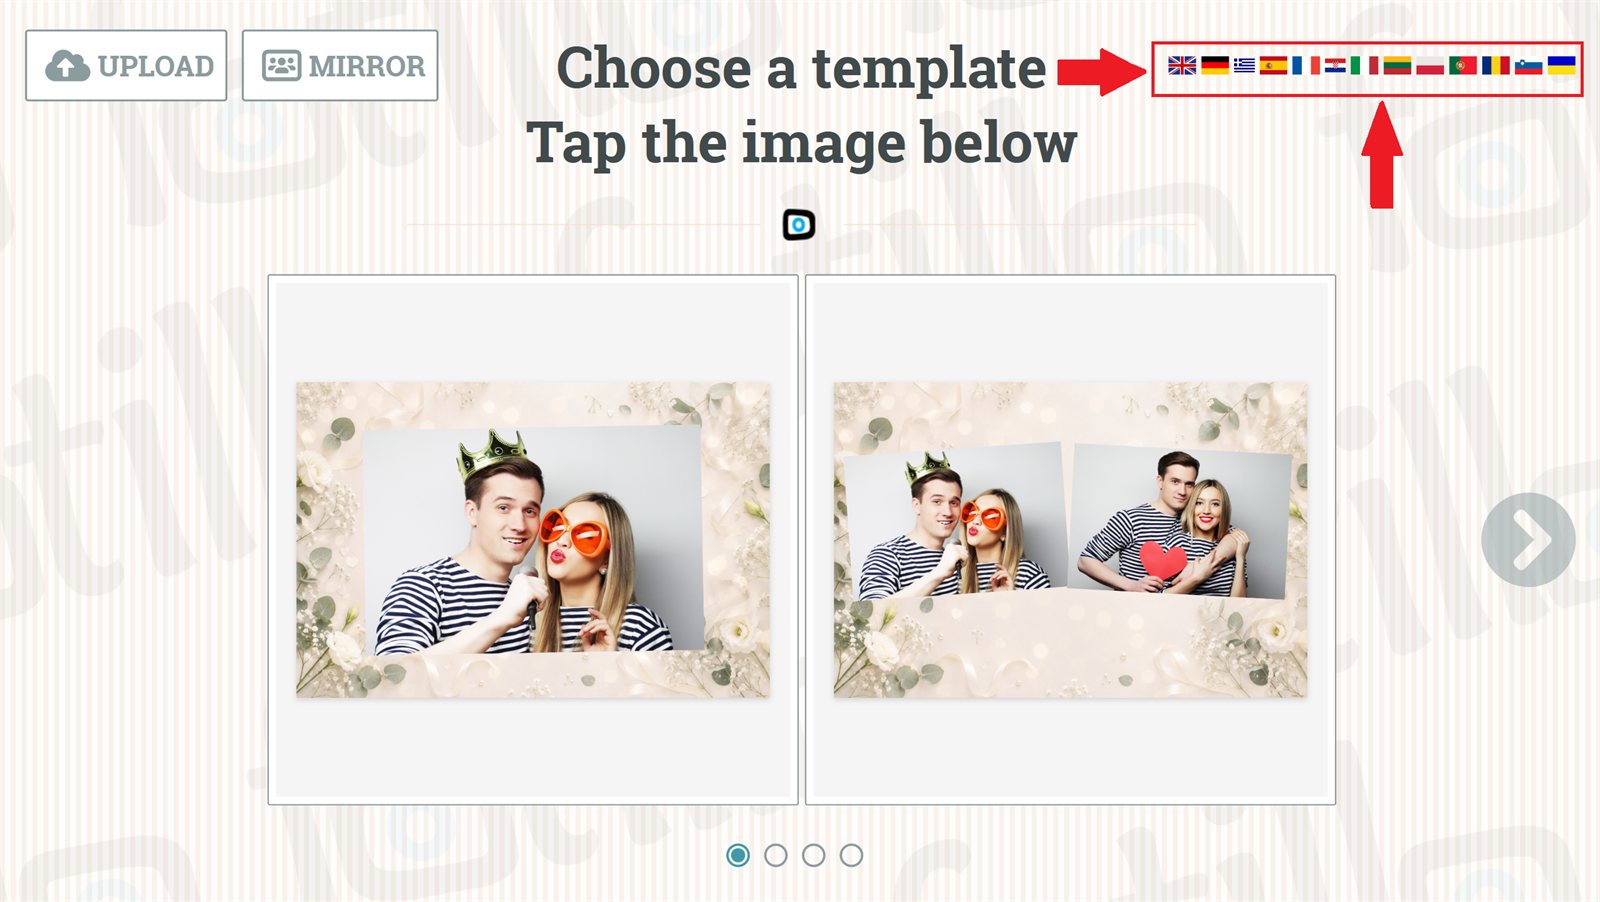
- You choose the language (or several languages) already in the configurator while assembling the package - you receive the program with the right translations straight away. You switch between the languages included in the package using the flag icons in the top right corner of the program (the change is instant).
- You can also add another language later by extracting a language pack into the
Langsfolder in the program directory - the program will recognise it and show the flag after a restart. - You can also prepare your own translation (files in
Langs) or order one at contact@fotillo.com.
Keyboard layouts in Windows
The program switches the Windows on‑screen keyboard to the program language (e.g. Cyrillic for Ukrainian) and, on the e‑mail address screen, to the English layout with a visible @. This only works for layouts installed in Windows. During system installation (or later: Settings → Time & language → Language & region → Add a language / Options → Keyboards) add layouts for every language the booth will run in, plus English (United States). If a layout is missing, the program switches to the Windows default layout and writes “brak ukladu klawiatury” to Trace.txt. When a language has several layouts (e.g. US and US‑International), the program keeps the one already active and otherwise takes the Windows default.
What's new new
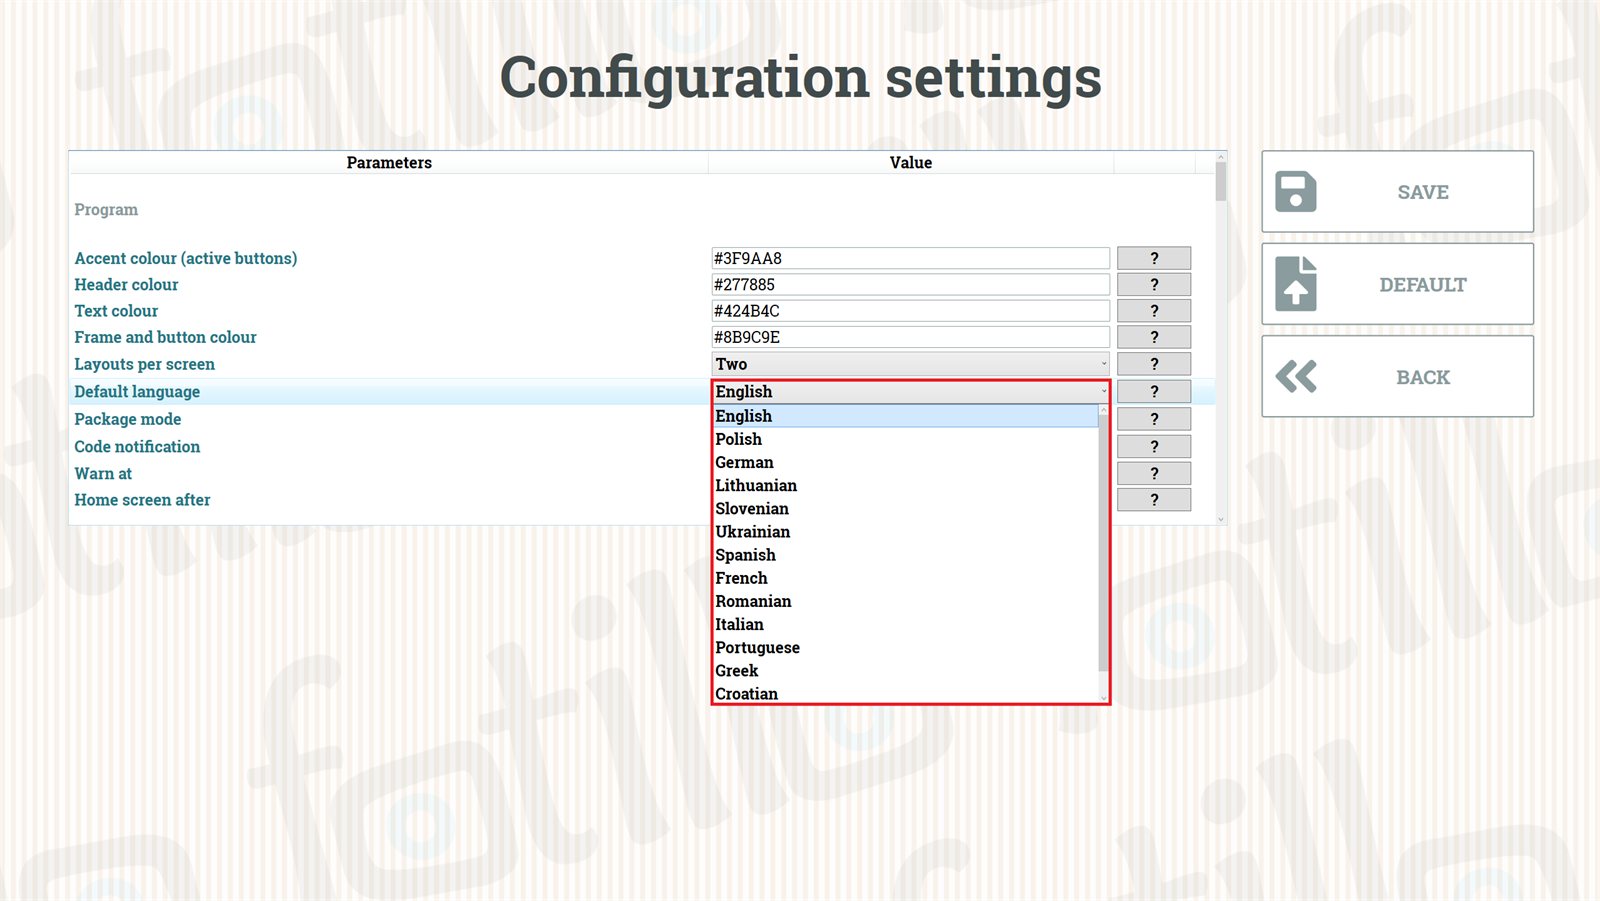
The program is currently distributed in 13 languages (including PL, EN, DE, LT, UA, ES, FR, IT, PT, RO, HR, SL, EL). To make the program always start in a particular language, press F4 and select it in the "Default language" field. The list only shows languages actually installed in the Langs directory.
Important
For the default language (and other changes in F4) to take effect, save the changes and restart the program (to close: ALT+F4).

Langs folder and the "Default language" field in F4.2. Configuration: F2 / F3 / F4 / F5 menus ↑ top
The program has four menus hidden behind function keys. You open them from the main screen, the same one on which the guest picks a template:
- F2 printer: device status, print counters, prints left from the activation code and the lock after a given number of photos.
- F3 labels: the texts the program adds to the print - title, date, names, hashtag.
- F4 program settings: from language and colours, through photos, filters and payments, to the connection with Fotillo Cloud. This is the largest menu and most of this chapter is about it.
- F5 print profile: your own image setting for printing. The screen works only with the Advanced filters / AI backgrounds feature; we describe it in 2e.
Not every program has every setting. You only see the ones that belong to the features bought in your package - the rest is neither on the screen nor in the configuration files.
2a. Printer menu F2
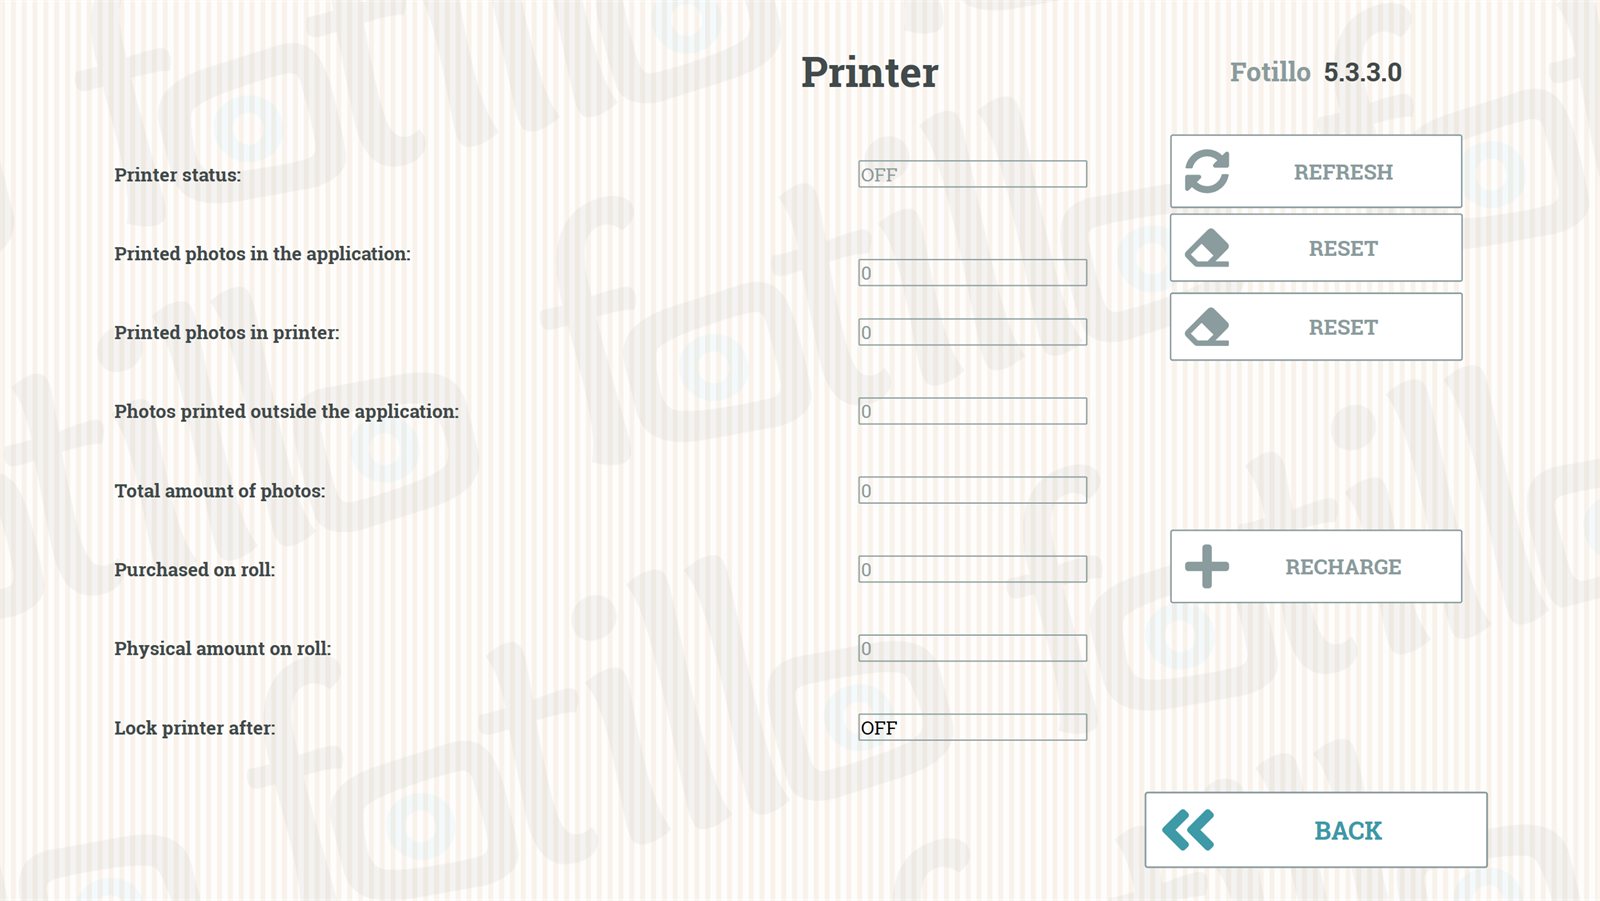
Shows the printer status and print statistics, and lets you lock the printer after a specified number of photos.
| Field | Meaning |
|---|---|
| Printer status | Whether the printer is connected and communicating (applies to two-way printers Citizen CY / CY-02 / CX-02 / CZ-01, DNP RX1 / RX1HS). |
| Photos printed in the program | How many photos have been produced in Fotillo. |
| Printed on the printer / outside the program / total | Printer statistics shown directly in the program, including prints made without Fotillo. |
| Purchased number of prints | Prints remaining from the current package. You can top them up at any time. |
| Physical amount on the roll | How many photos can still be printed on the loaded roll - media monitoring. |
| Lock printer after | Hiring out the photo booth for an event? Set a limit - once it is reached the program will block further printing. |
Printer list, paper and hidden templates
When the device runs two printers, a list appears at the top of the screen and every counter below refers to the printer selected there. With one printer the list is inactive.
Next to the status you now see the printer model and its firmware version, and next to the roll counter which paper is loaded. With two printers the purchased-prints counter is compared against the total paper on both rolls.
A red line at the bottom appears when some templates will not come out on this paper. It names the missing format, for example Templates hidden - no paper in this format: 15x20 cm. Load the right roll and open this screen again - the list recalculates itself. The names of the hidden templates are in Trace.txt.
2b. Labels menu F3
Lets you add texts printed on the photo - for example Title, Date, Names, Hashtag. Where does this list come from? Labels are part of the template (collage), not of the program: each template declares for itself which labels it supports and where it places them on the print, and F3 shows the labels collected from all templates installed in the Collages directory. That is why the list of fields can differ between devices. The text you enter is printed on every photo (in templates that support that particular label) until you change or delete it. The DEFAULTS button clears the entered texts along with the remembered list of labels; when you are finished, choose SAVE.
Labels also go into the file metadata
The label texts are written not only on the print but also into the metadata of the saved JPG file as keywords (the “Tags” field in Windows Explorer, also searched by Google Photos). Only labels typed in F3 become keywords; the template’s default text (e.g. “www.fotillo.com”) is not written. Every file additionally receives the program name with version, the description Created by Fotillo (fotillo.com) and the date taken. Digital copies of the photos (sharing, e‑mail, Album, backup) also carry a discreet fotillo.com signature in the bottom‑right corner; the paper print has no signature. These entries cannot be switched off.
Can't see any labels in the list?
An empty list in F3 usually has one of two causes. 1) Templates without labels - if none of the installed collages defines any labels, F3 has nothing to show (this applies to some template sets). 2) A remembered old list - the program builds the label list on first start-up and remembers it. If you have since replaced the contents of Collages (for example added templates that do have labels), click the DEFAULTS button in F3 and restart the program - the list will be rebuilt from the current templates.
Important - fonts
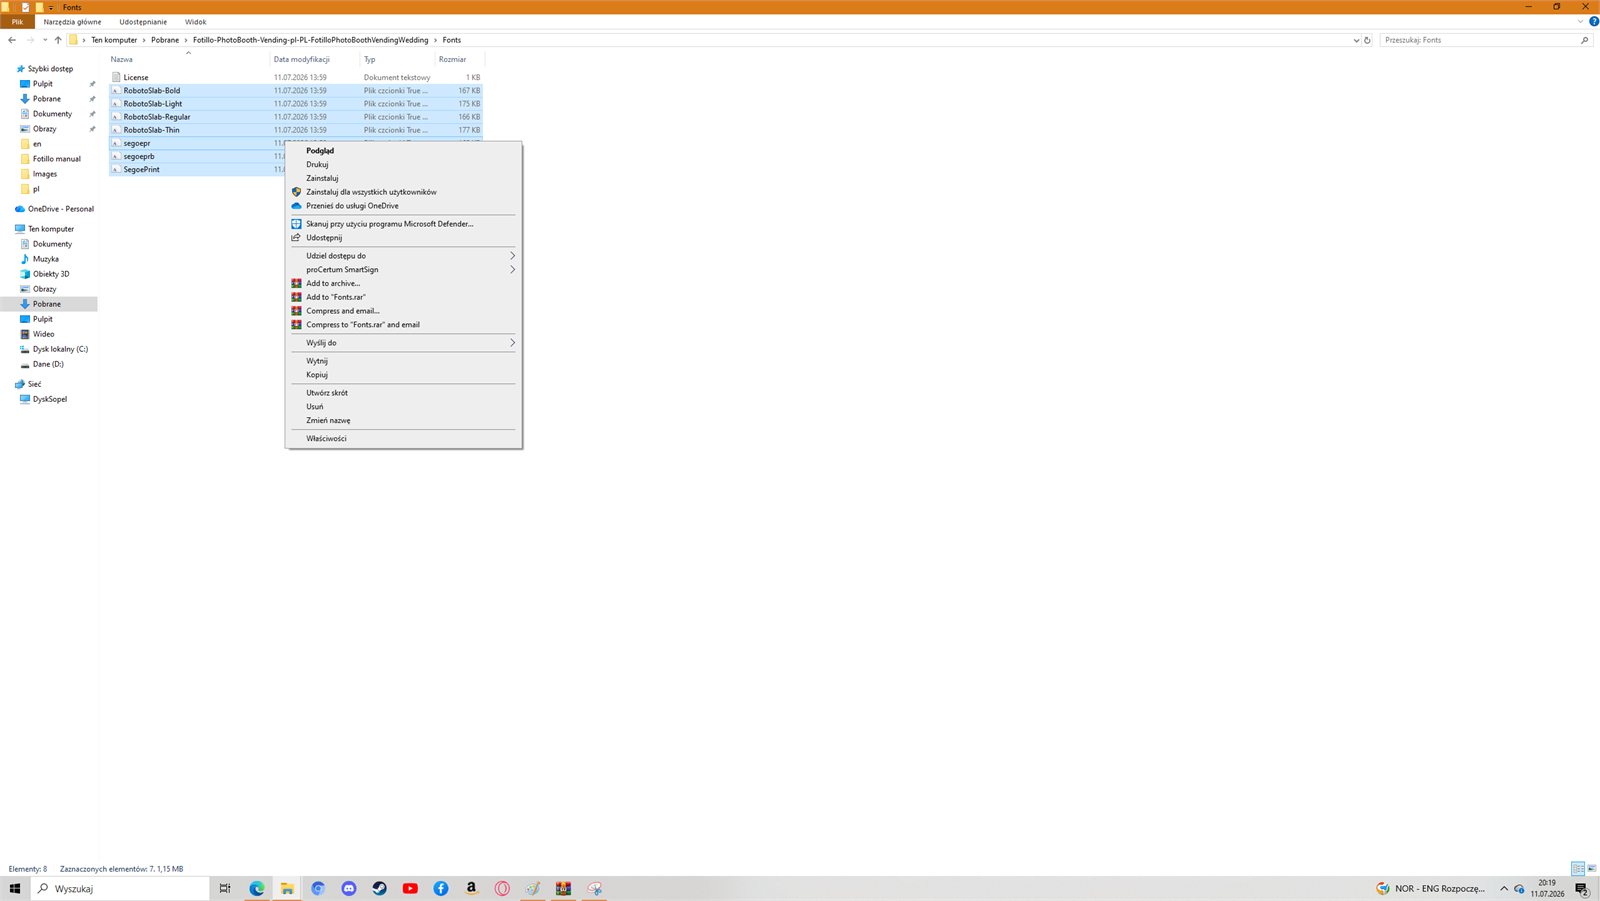
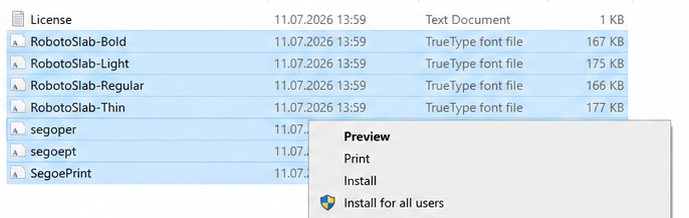
The default font is RobotoSlab. If it is not present on the system, you will find it in the Fonts directory in the program package. Select all 4 files → right-click → Install for all users. This significantly improves the look of the text in every template.
Changing the party theme new
If Collages contains a THEMES folder with party themes (chapter 8), a PARTY: Wedding button with the current occasion appears in the right-hand column of F3. It opens the same selection screen the guest sees: the Continue tile leaves everything as it is, an occasion tile switches the theme, and NO PARTY turns it off and brings back the usual templates. The background and colours change at once, on the F3 screen too. Changing the theme does not clear the texts - you correct them in the table next to it, each one separately.
2c. Configuration menu F4 - the full list of settings
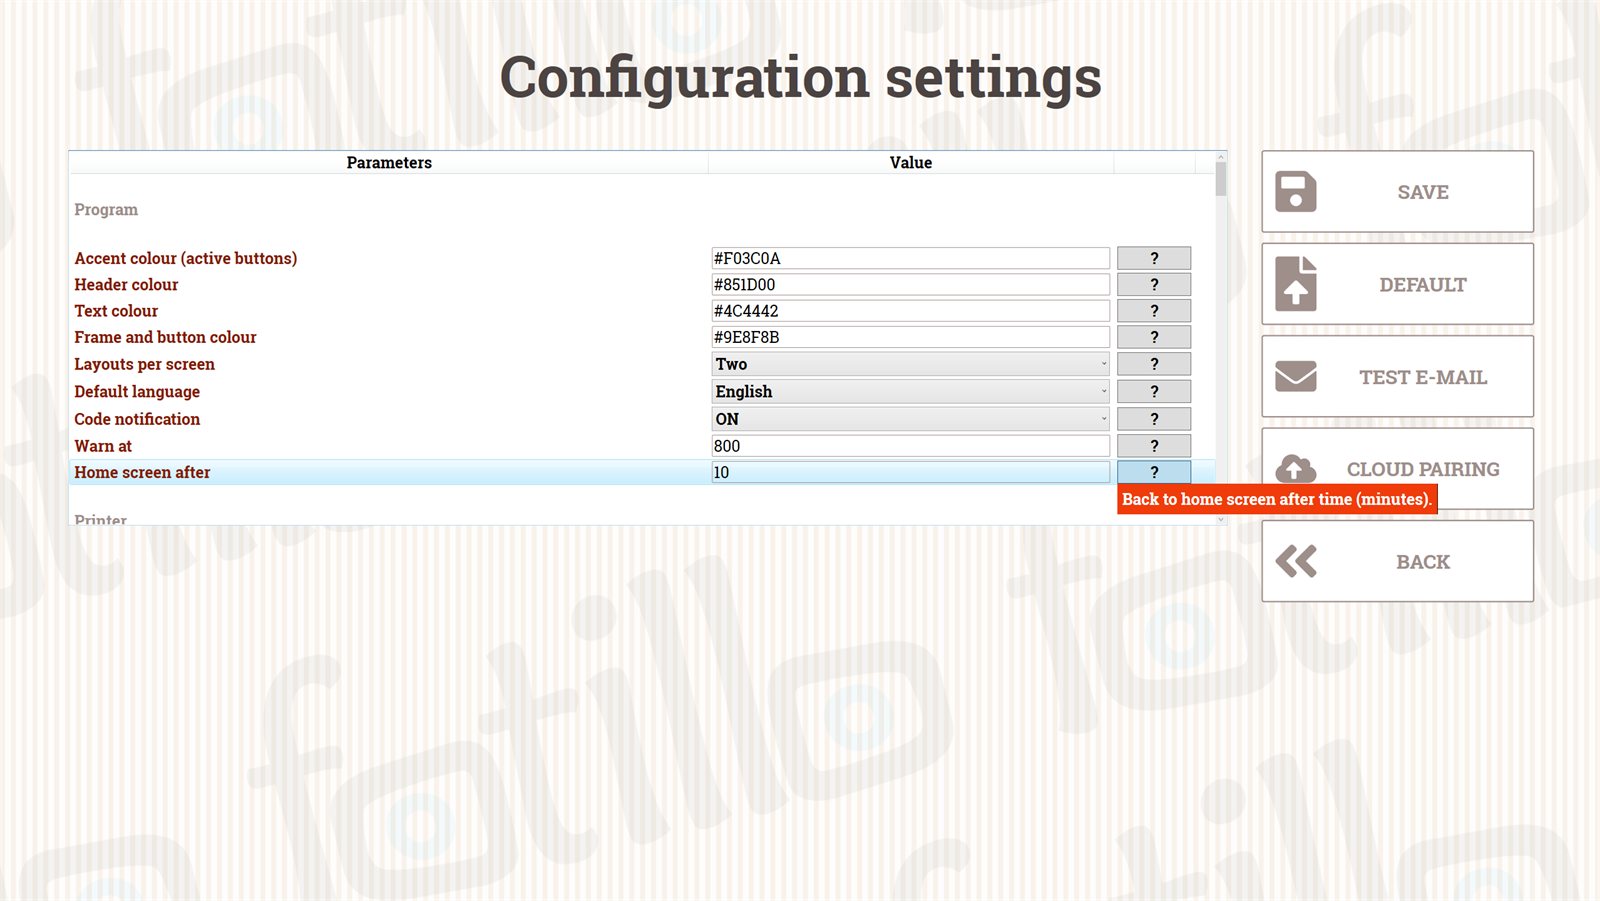
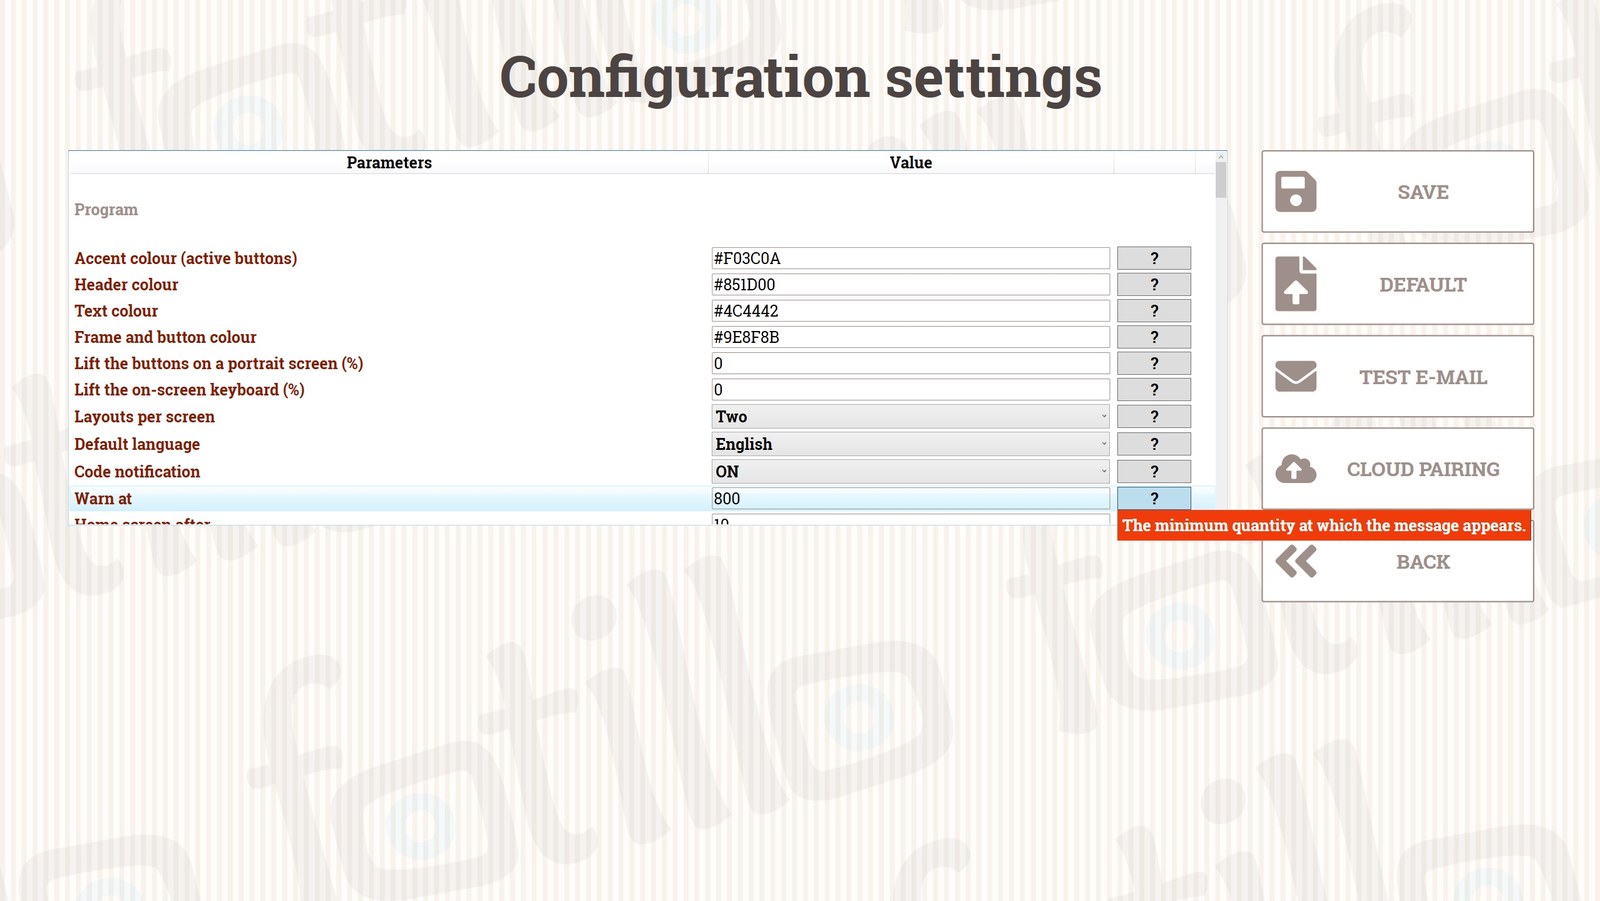
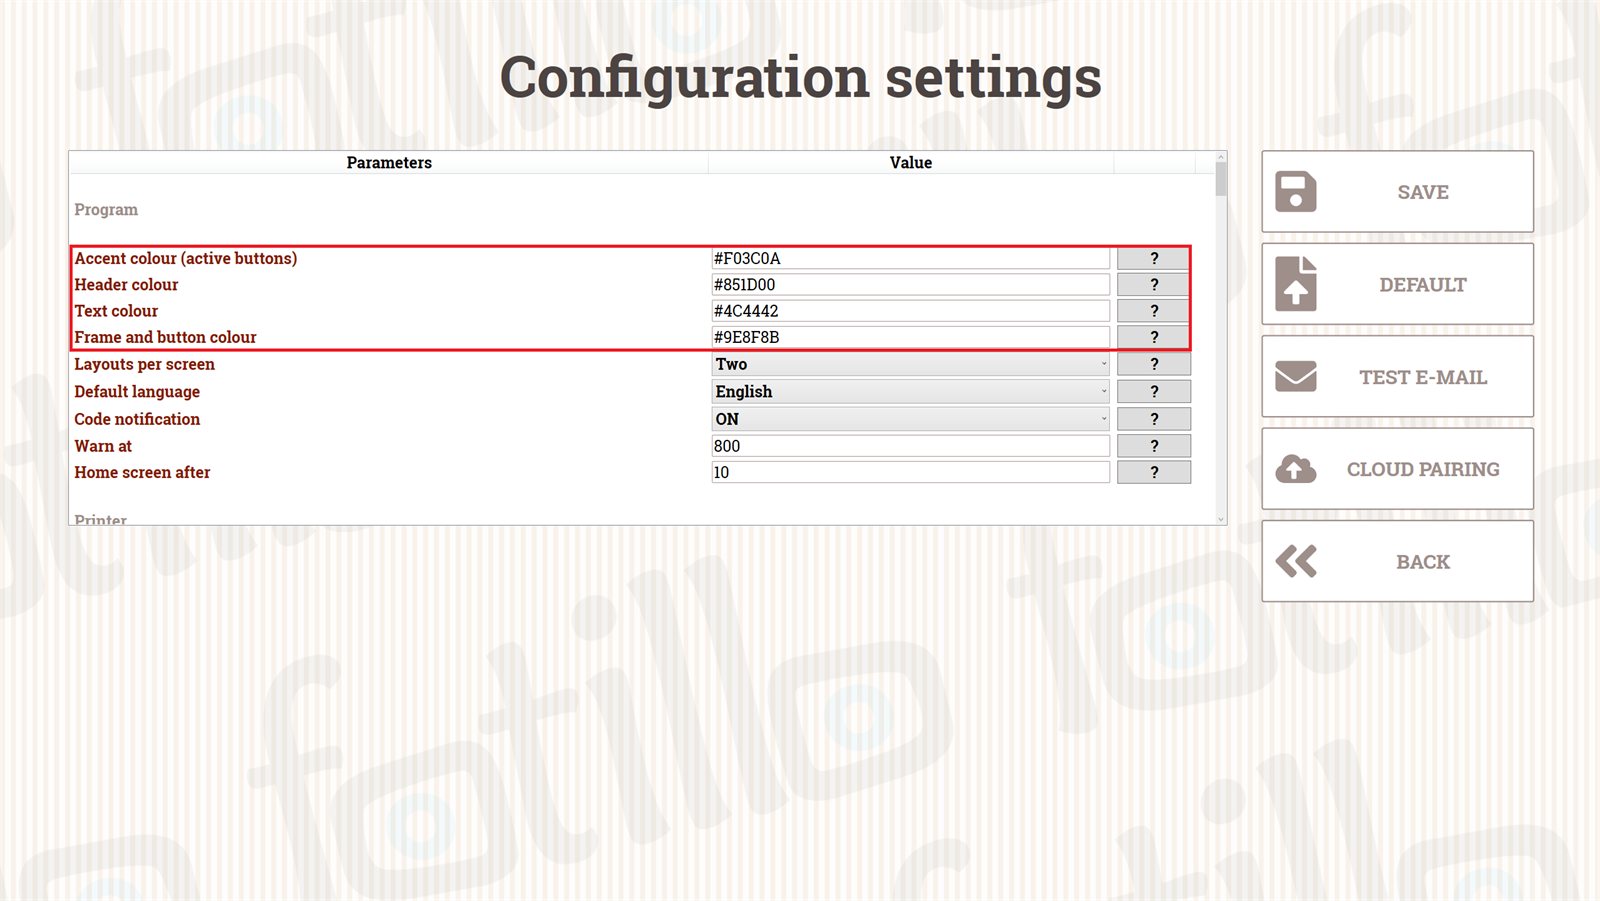
This is the program's main settings menu: from general parameters (language, colours, prices), through e‑mail notifications, to external devices (printer, payments). Each row has a question mark "?" on the right - click it and the program will show a short hint. Below we describe all F4 sections and parameters in the order in which they appear in the program.
Remember
Not every program has every parameter - it depends on the features in the package (a version for e‑mail delivery only has no printer settings, and a free event photo booth may have no payment section). Saved changes take effect after a restart. If you spend more than 5 minutes configuring, the program will return to the main screen without saving.
Program
| Parameter | Description |
|---|---|
| Accent colour new | The colour of active buttons and selections. Format #RRGGBB (default #F03C0A). |
| Heading colour new | The colour of headings on the screens. Default #000000. |
| Text colour new | The colour of text, labels and values. Default #4B4645. |
| Border and button colour new | The colour of borders, lines and inactive buttons. Default #858180. |
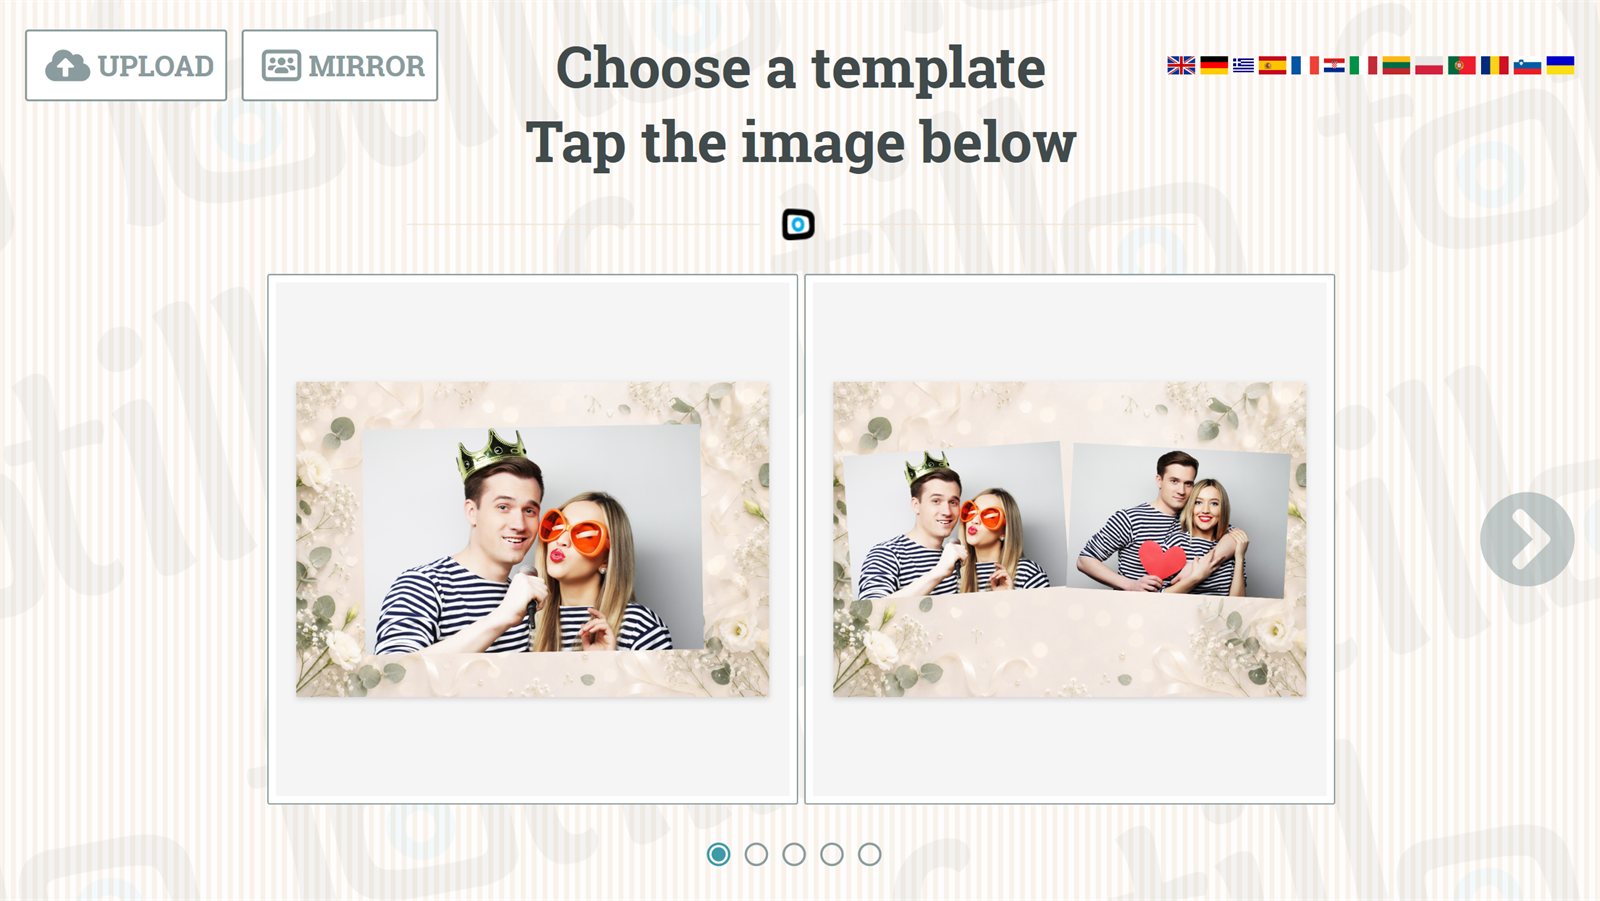
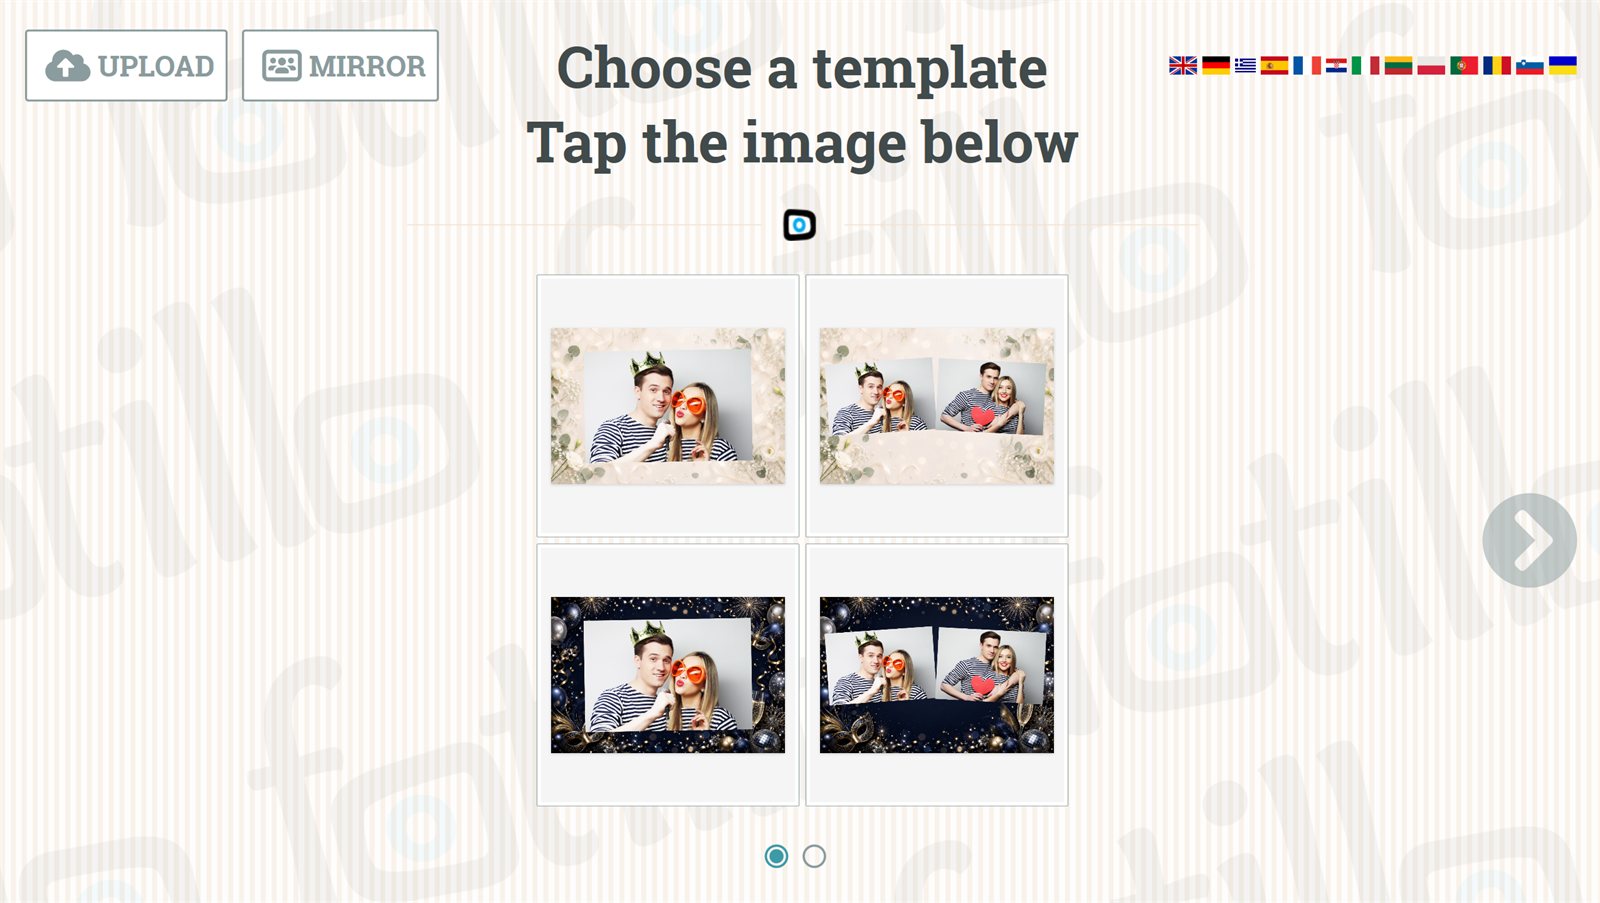
| Number of templates on screen | How many templates to show on the welcome screen. Choose from 1-6. |
| Default language | The language the program starts in (you select the others with the flags). The list only shows languages installed in the Langs directory. |
| Print-code message | Enables the message about the number of prints running low (a reminder to buy an additional code at fotillo.com). |
| Warn at | The number of remaining prints at which the above message appears. |
| Main screen after | The time (in minutes) after which the program returns to the main screen - this protects the privacy of the previous customer's photo. |
| Lift the buttons on a portrait screen (%) new | Applies ONLY to a monitor mounted vertically (photo mirror) - it does nothing on a landscape one. Enter what percentage of the screen height should stay empty at the bottom: the whole layout then moves up and the buttons land in a band a standing guest reaches without effort, children and wheelchair users included. 0 = layout unchanged. For a 65-inch monitor mounted 35 cm above the floor enter 30; mounted higher it needs a larger value. Set it once, by looking at the screen. |
| Lift the on-screen keyboard (%) new | Where the Windows on-screen keyboard should appear, for example when typing an e-mail address. Enter a percentage of the screen height measured FROM THE TOP: a SMALLER number lifts the keyboard HIGHER. On a portrait monitor the keyboard places itself at floor level and the guest has to crouch. Start with 60 and adjust by looking at the screen. 0 = leave Windows settings alone. NOTE: any value other than 0 changes a Windows setting on this computer and persists after the program closes. |
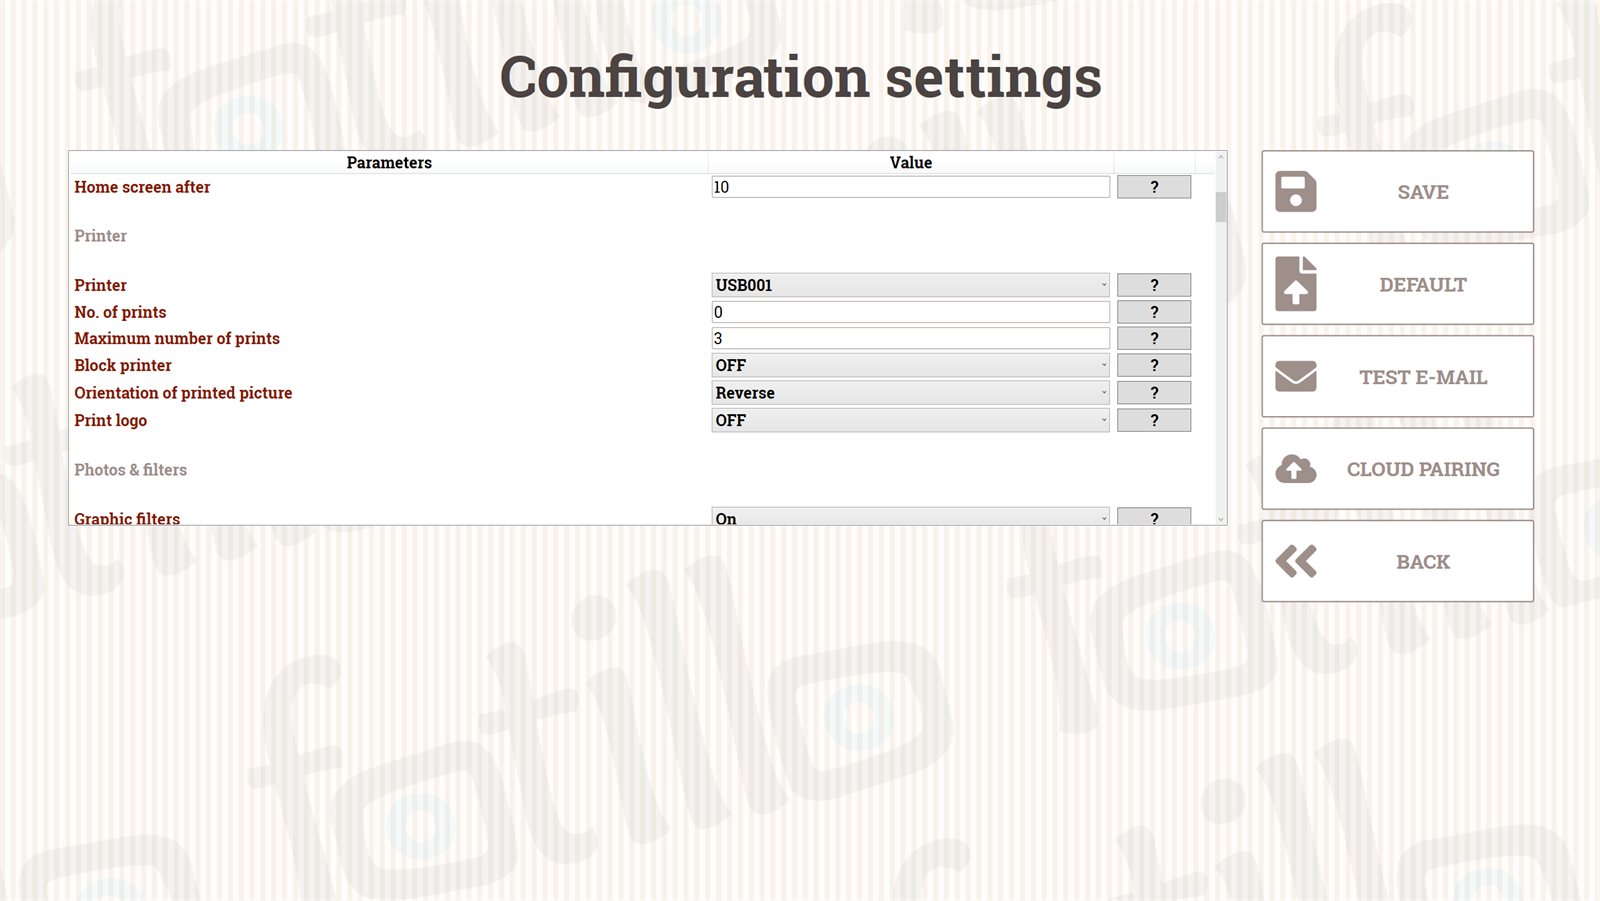
Printer
| Parameter | Description |
|---|---|
| Main printer new | Pick the device from a live list of printers installed in the system. The communication mode and USB port are set automatically (Citizen CY, CX-02, CZ-01, DNP RX1 or a standard Windows printer). If the saved port no longer holds a printer and exactly one Citizen printer is connected, the program takes it by itself and saves it - an operator moving booths between events does not have to change anything here. |
| Additional printer new | A second printer in the device, for example for a different photo size. The program sends each template to the printer with the right paper. Most devices have one printer - leave OFF then. |
| Fixed number of prints | How many prints each person receives. 0 = the customer chooses. |
| Maximum number of prints | The upper limit when the above = 0. |
| Lock printer | Enables the lock in F2 after a set number of photos. |
| Orientation of the printed photo | Reversed (recommended for most), according to the collage, or according to the printer settings (recommended for Citizen and DNP). |
| Print logo | Overlays the FrameL.png frame on the print; the digital version is saved without the frame. |
Prints versus strips
The print counts refer to full-size photos (10×15 or 15×20). A template with strips gives twice as many pieces - the program will offer 2/4/6 strips but will count this as 1/2/3 prints.
Photos and filters new
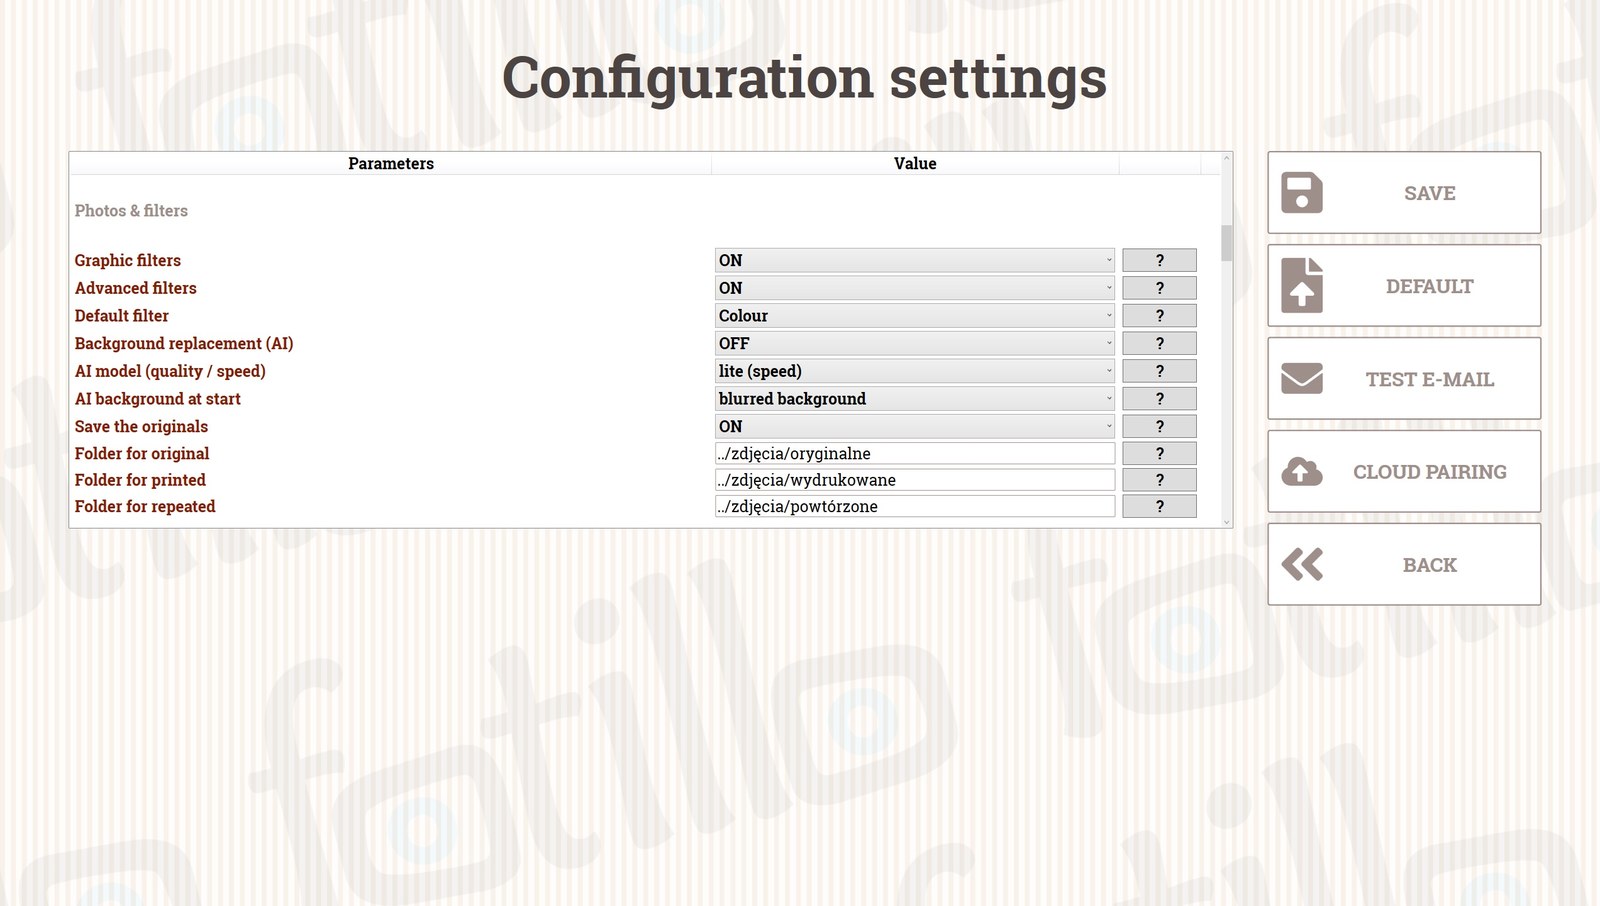
This new group brings together in one place everything that happens to the photo after it has been taken: filters, AI backgrounds and saving files to disk (previously these parameters were scattered across the Printer and Photos sections).
| Parameter | Description |
|---|---|
| Image filters | Enables the panel of 6 standard filters below the photo (see chapter 4). Disabled = the panel is hidden and we print straight away with the default filter. |
| Advanced filters | Enables the column of 10 artistic filters with a strength slider (an additionally paid feature - see chapter 4). |
| Default filter new | The filter selected when the print screen opens. The list is now dynamic - it shows by name exactly those filters that are currently enabled (standard and, where applicable, advanced), instead of the former 0-6 number. |
| Background replacement (AI) new | Enables background selection tiles on the print screen: original, your own backgrounds from the Background directory, background blur and a black-and-white background (see chapter 4). A paid feature, shared with the advanced filters; it requires downloading an AI model. |
| AI model (quality / speed) new | automatic / hr (quality) / lite (speed). The automatic mode uses the hr model if it is present in the Model directory, and lite otherwise. On less powerful hardware choose lite. |
| AI background at start-up new | Which background tile is selected automatically at the start: disabled (original), the first file from Background, background blur or black-and-white background. Handy when the whole event is to have a single style without guests having to click. |
| Saving original photos / Folder for originals | Saves every photo taken at its original resolution in the specified directory (regardless of whether it was used in a collage). |
| Photo storage | The folder on disk where finished (printed) photos are saved. |
| Storage for retaken photos | The folder for shots rejected with the "Retake" button. |
| Animations instead of live preview new | Photo mirror mode: instead of the camera preview the program plays animations with sound (Anim* files in the Images folder). The countdown plays to the end and the photo is taken at the start of the AnimNPhoto animation. With no files present the classic preview with countdown is used. File naming is described in the user manual. |
| Animation volume (0-100) new | Animation sound volume. 0 = silent (when the venue has its own sound system). |
| Photo animation time (s) new | How many seconds to show the photo animation image (AnimNPhoto files). For video animations the file length applies. |
AI backgrounds require the model file
The AI model (BiRefNet) is not part of the package - download it from builder.fotillo.com/models/ and place it in the Model directory next to Fotillo.exe. If you enable "Background replacement (AI)" without the model file, the program will not allow the settings to be saved and will show a message telling you what to do. For typical use we recommend the lighter birefnet-lite.onnx model - it works on any hardware.
Photos
| Parameter | Description |
|---|---|
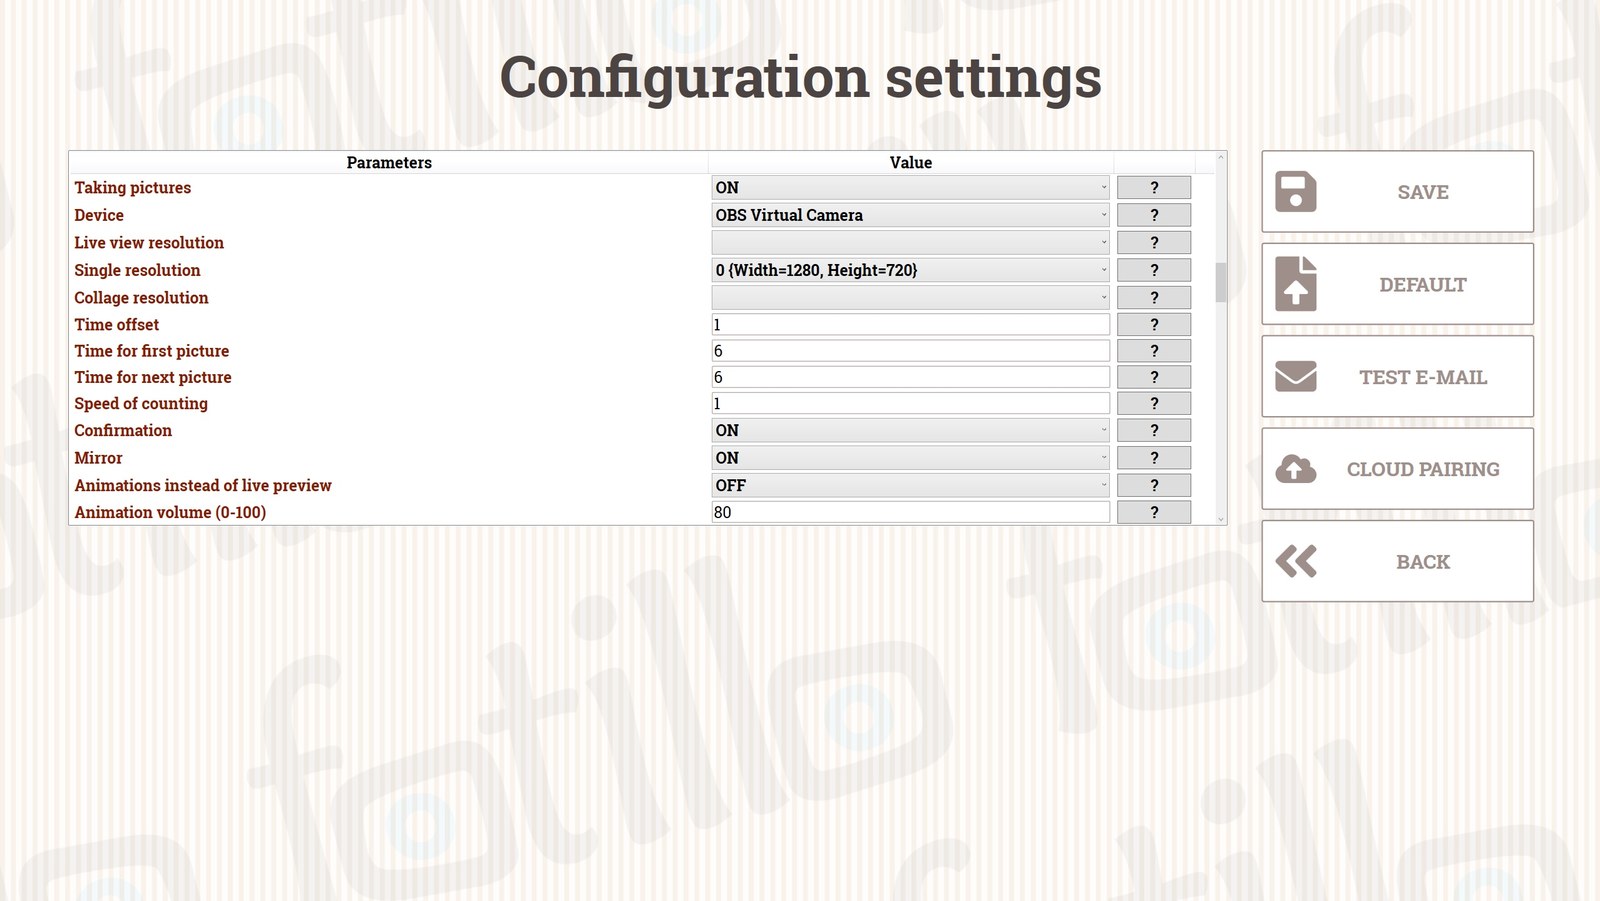
| Taking photos | Enables taking photos with a camera or a USB webcam. Disabled in versions that do not take photos (e.g. a print point, printing from a phone). |
| Capture device | Built-in camera, USB camera or a dedicated Canon EOS camera (selected from the list of available devices). |
| Camera / single photo / collage resolution | The resolution of the preview, of a single photo and of the photos in a collage (for a USB camera). The default values are optimised for smooth operation on most devices. |
| Countdown delay | Additional countdown time while the photo is being taken. |
| Time for the first photo | Time (s) for a single photo or for the first photo in a collage. |
| Time for subsequent photos | Time (s) for the second and every following photo in a collage. It is worth increasing this when guests need more time between shots. |
| Countdown speed | How many seconds a single step of the counter takes. |
| Confirmation of each photo | The customer accepts or retakes each shot - very useful with multi-photo templates (see chapter 4). |
| Mirror | Enables the "mirror" preview so that the user can check their appearance before the photo. |
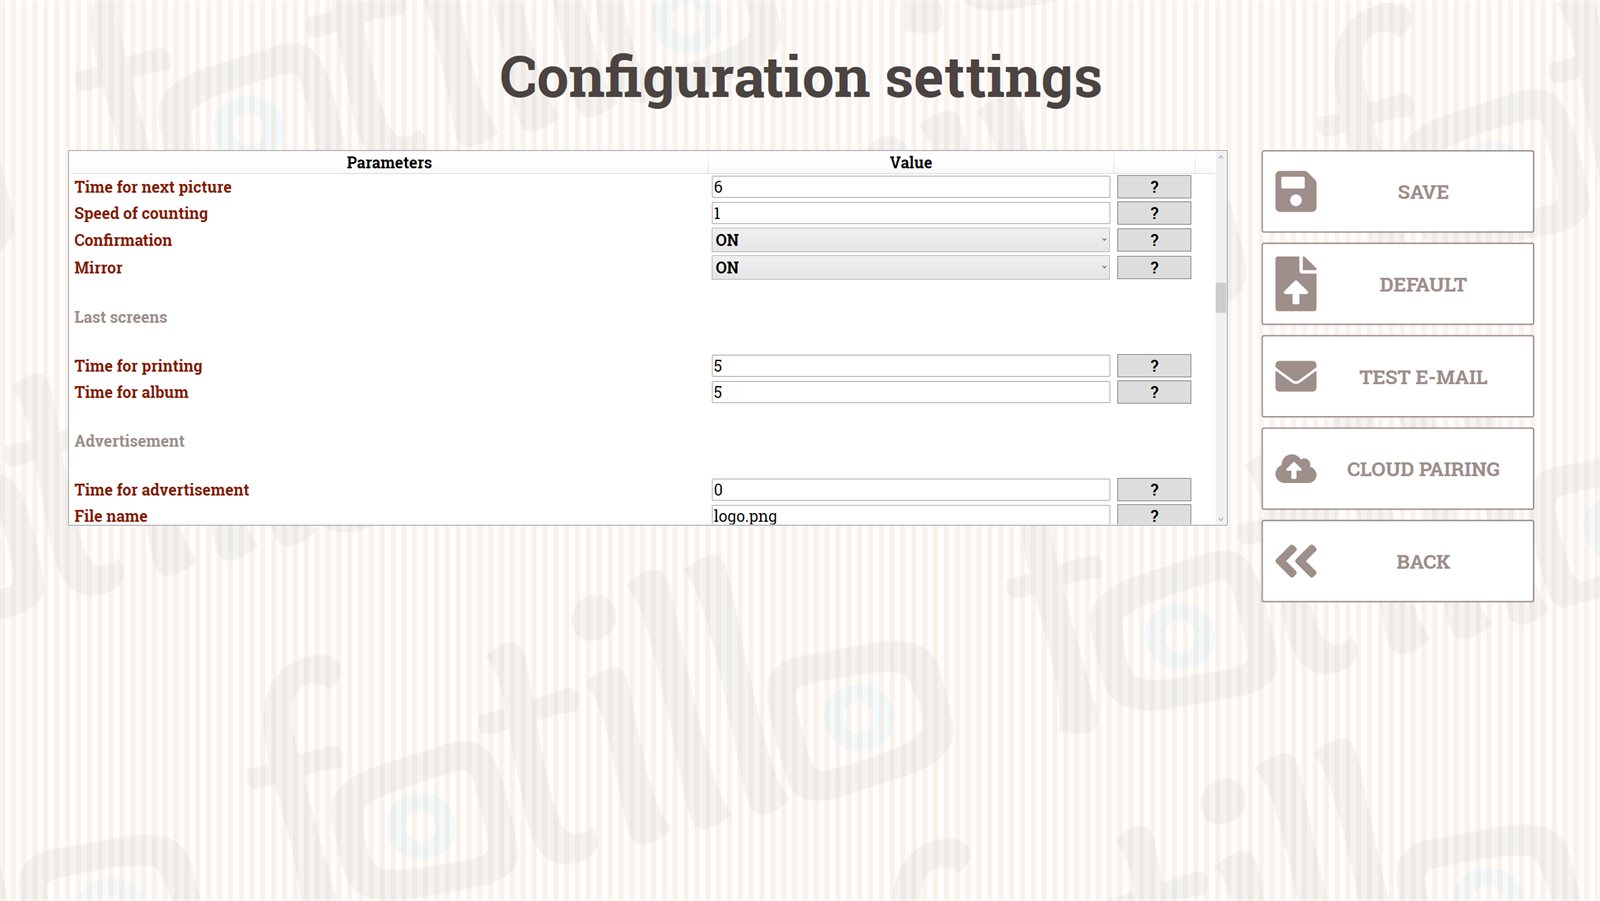
Final screens
| Parameter | Description |
|---|---|
| Time for the second-to-last screen | Time (s) for which the screen after printing is displayed, with information about collecting the photo. |
| Time for the last screen | Time (s) for the last screen (e.g. an invitation to sign the guest book). |
Advertising
| Parameter | Description |
|---|---|
| Advert display time | Time (s) for which the advert is displayed. |
| File name | A file from the Images directory. Supported formats: .avi .mp4 .wmv .jpg .png .bmp. After adding a file, restart the program. |
SMTP
The mail server used to send photos by e‑mail. By default messages go out from our mailbox; enter your own details so that messages are sent under your own brand.
| Parameter | Description |
|---|---|
| SMTP server / SMTP port | The address and port of the mail server. |
| Account / Password | The login details for the mail account. |
| Display name | The sender name visible to the recipient of the message. |
| Reply-to address | The address to which a reply to the message will be sent. |
Reporting
| Parameter | Description |
|---|---|
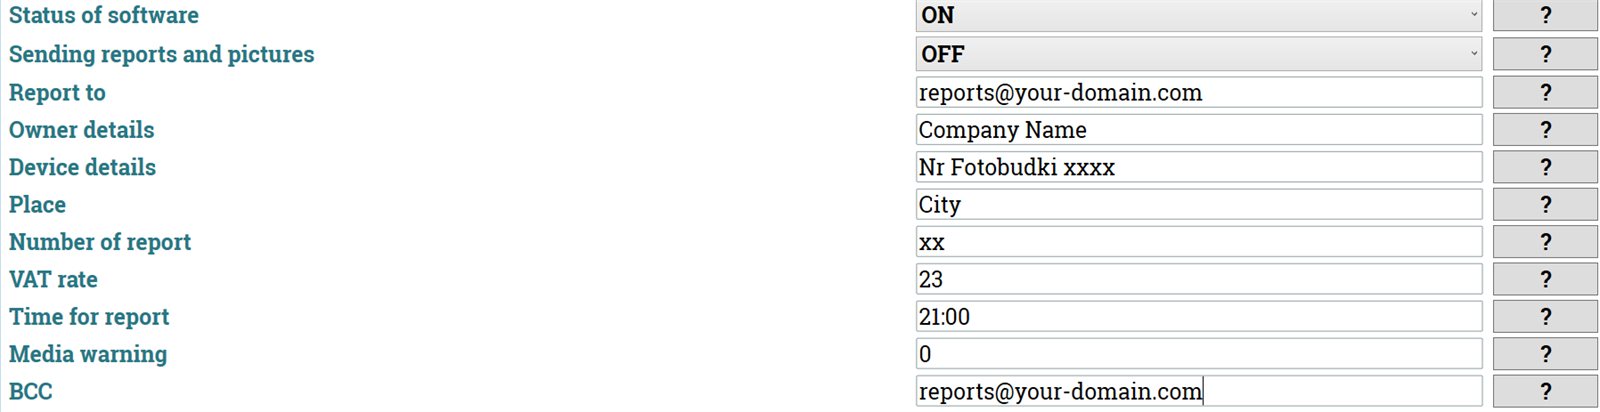
| Program status reporting | Generates a report into the %appdata%\Fotillo\Reports directory. |
| Sending reports and photos | Enables sending reports and photos by e‑mail. |
| Report recipient | The e‑mail address to which the reports are sent. |
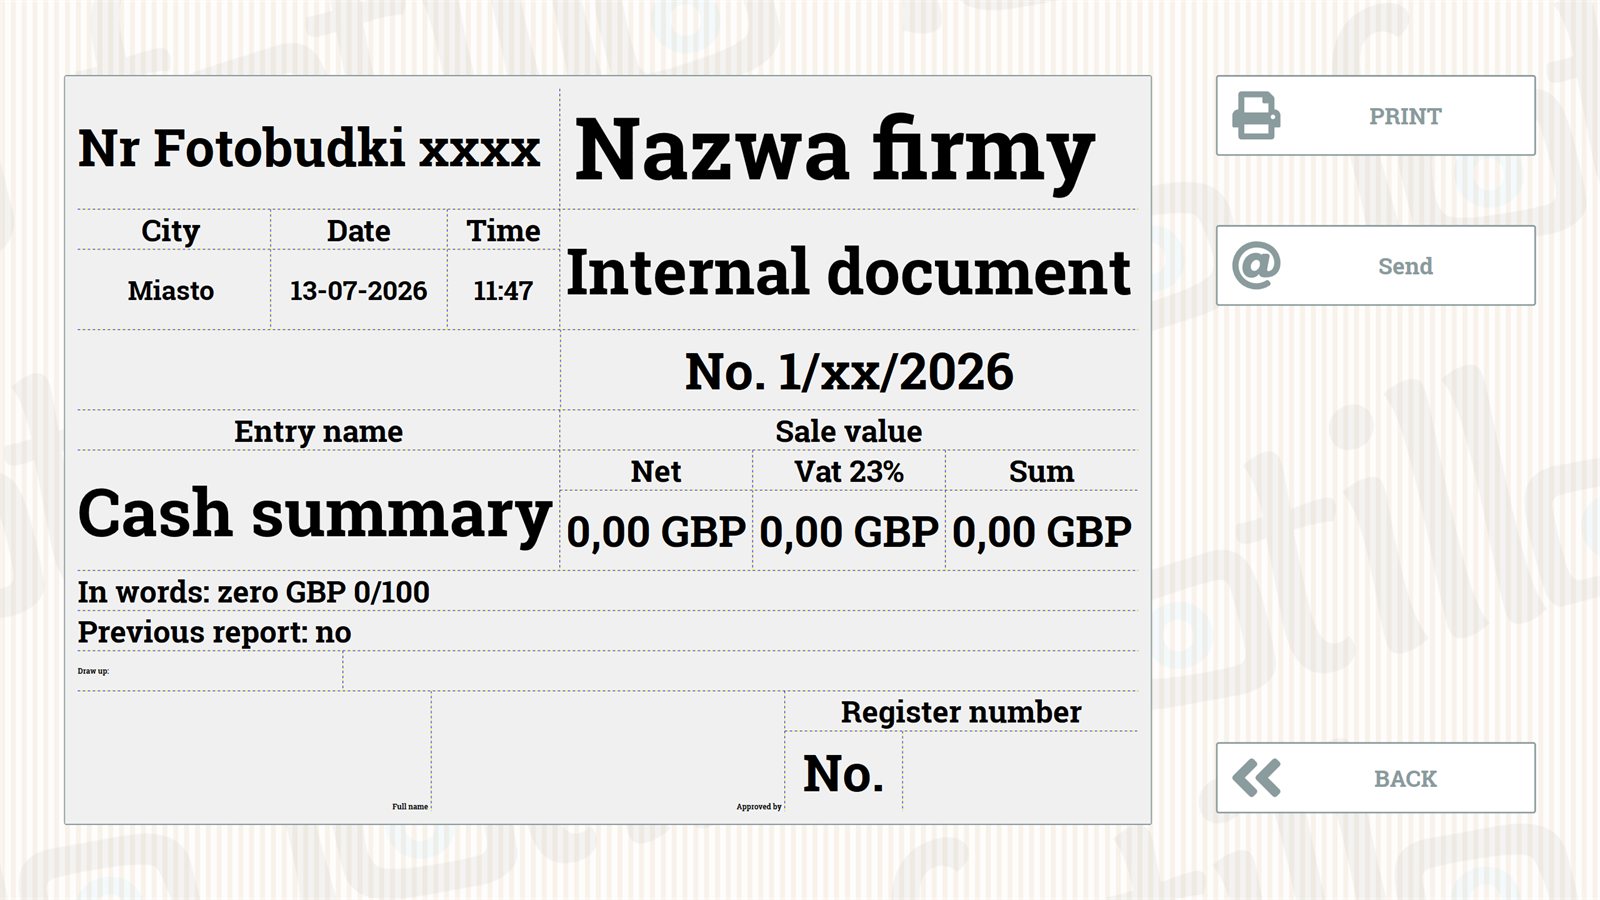
| Report title | Title printed in the report header (e.g. Cash summary). Empty = text from the program language. |
| Owner details | The company details printed on the report. |
| Device details | The device description/identifier printed on the report. |
| Device location | The location of the device (on the report). |
| Report number | The sequential number printed on the report. |
| VAT rate | The VAT rate - match it to the rate applicable to your business. |
| Reporting time | The time at which the device sends the daily report. |
| Media warning | The number of prints left on the roll at which the program sends a warning (DNP RX1 and Citizen CY only). |
| Message copy | The address that receives copies (BCC) of the messages containing photos. |
The daily report includes, among other things, the total payments accepted, the number of prints, the state of the roll and information about problems with the devices (camera, coin acceptor, banknote reader, terminal, printer).
Photo upload new
| Parameter | Description |
|---|---|
| Ask about uploading photos | Enables the screen asking whether to upload a photo - used for example with printing from a phone (see chapter 6). |
| Photos from the photographer | Allows printing of photos supplied by the photographer (from a folder). |
| Photo directory | The path to the folder that synchronises the photographer's photos. |
HOT FOLDER new
| Parameter | Description |
|---|---|
| HOT FOLDER mode | Chooses how HOT FOLDER works. OFF - the mode does not work; this is the default, and on a device already in use it works as a pause: printing stops but the photographer's link stays. PHOTOGRAPHER - a screen with preview-only template tiles, receiving photos from the photographer and printing without anyone touching the screen; requires the device to be paired with Fotillo Cloud - HOT FOLDER then switches on by itself, with no separate code, and the QR code of the link for the photographer is in the CLOUD PAIRING window. PHOTOGRAPHER + GUESTS - the paid party mode: after a package is paid, the device shows the QR code of a one-time link through which the guests and the photographer send photos (described below), and without a package it prints photos from the photographer's link; requires payments, package mode and pairing with Fotillo Cloud. The package for the HOT FOLDER device sets PHOTOGRAPHER. |
| Party link validity (hours) | After this many hours from the last payment the link stops accepting photos, even if the package is not used up. Extending the package starts the time again and keeps the same QR code. Range 1-168, 24 by default. |
Sharing and Payments
These are the two most extensive F4 sections - we describe them separately, with diagrams: Photo sharing → chapter 6 and Payments → chapter 5 (there you will find the full list of parameters, including coin/banknote channels and terminal configuration).

2d. HOT FOLDER on the device new
You switch the mode on in the F4 menu, in the HOT FOLDER section (HOT FOLDER mode = PHOTOGRAPHER). How the photographer connects to the device and sends photos is described in chapter 7.
The device screen
The device shows tiles with the templates it has, but they cannot be pressed - they are only a preview of what the photographer can choose from. Below the tiles there is a status bar showing:
- what the program is doing - waiting for photos / building the print / printing,
- a progress bar for the current batch of photos,
- the Cloud account the device belongs to,
- the paper left on the roll - if the printer reports it,
- purchased prints - how many are left from the activation code,
- the printer status.
When the device has no source of photos - HOT FOLDER off and photos from a folder off - the template selection screen is not shown at all. In its place there is a Temporarily out of service message: the guest has nothing to tap, and the operator sees that the settings are in the F4 menu.
Prints and the print counter
- If the operator has set Fixed number of prints in F4 to more than zero, the photographer cannot change it - every batch is printed in that quantity.
- If Fixed number of prints =
0, the photographer chooses on the phone between 1 and the value of Maximum number of prints. - With a template with strips the photographer sees even values (2, 4, 6…), because one print is two strips.
Every print uses up the activation code
Every print and every extra copy reduces the number of prints left on the activation code - exactly as with photos taken by the camera. The counter is shown on the device screen, in the Cloud panel and on the HOT FOLDER link page on the photographer's phone.
When the printer is not ready
The batch is not lost: it waits and prints itself as soon as the printer is back at work. The printer status is visible on the device screen, in the Cloud panel and on the HOT FOLDER link page on the photographer's phone.
Where the files end up
Exactly as with photos from the camera:
- the originals of the photographer's photos go to the folder for originals (F4 → Saving original photos / Folder for originals),
- the printed template goes to the folder with printed photos (F4 → Photo storage).
The HotFolder working folder is cleared after printing, and Fotillo Cloud does not store the photographer's photos - it is only a buffer the device downloads them from.
What this mode does not have
- The guest cannot send photos with a QR code - in this mode the upload channel belongs to the photographer.
- Payments are switched off - in the photographer mode. The paid mode for party guests is described in HOT FOLDER for parties below.
The switch works as a pause
Setting HOT FOLDER mode to OFF in F4 stops printing but the photographer's link stays the same. Set it back to PHOTOGRAPHER and everything works again.
HOT FOLDER for parties (link from the package) new
A second, paid way of working for the HOT FOLDER device - for a party. The bride and groom (or another organiser) buy a print package at the device, and the guests send photos from their own phones. The device prints them automatically from the paid package. The mode is optional - you choose it deliberately in the F4 menu, in the HOT FOLDER section: HOT FOLDER mode = PHOTOGRAPHER + GUESTS.
What the operator prepares
- A package from the configurator - the HOT FOLDER device with the Card / BLIK payment and Promotional package features (always together on this device); optionally Print from phone (QR) and Advanced filters / AI backgrounds.
- A card terminal - payment here is by card only; the device does not accept cash.
- Pairing with Fotillo Cloud - the Fotillo Cloud window from the F4 menu, left-hand column (operator account).
- The F4 menu - Payments and Package mode on, and in the HOT FOLDER section HOT FOLDER mode set to PHOTOGRAPHER + GUESTS, plus Party link validity (hours).
The program will not save the F4 settings if PHOTOGRAPHER + GUESTS is selected without payments, without package mode or on a device not paired with the Cloud. While the guests' link is active, the photographer sends photos through the same QR code as the guests. Without an active package the device prints photos from the photographer's HOT FOLDER link (QR code in the CLOUD PAIRING window).
How it works - step by step
- The couple pays for a package by card and chooses the occasion of the party as usual (party themes, chapter 8).
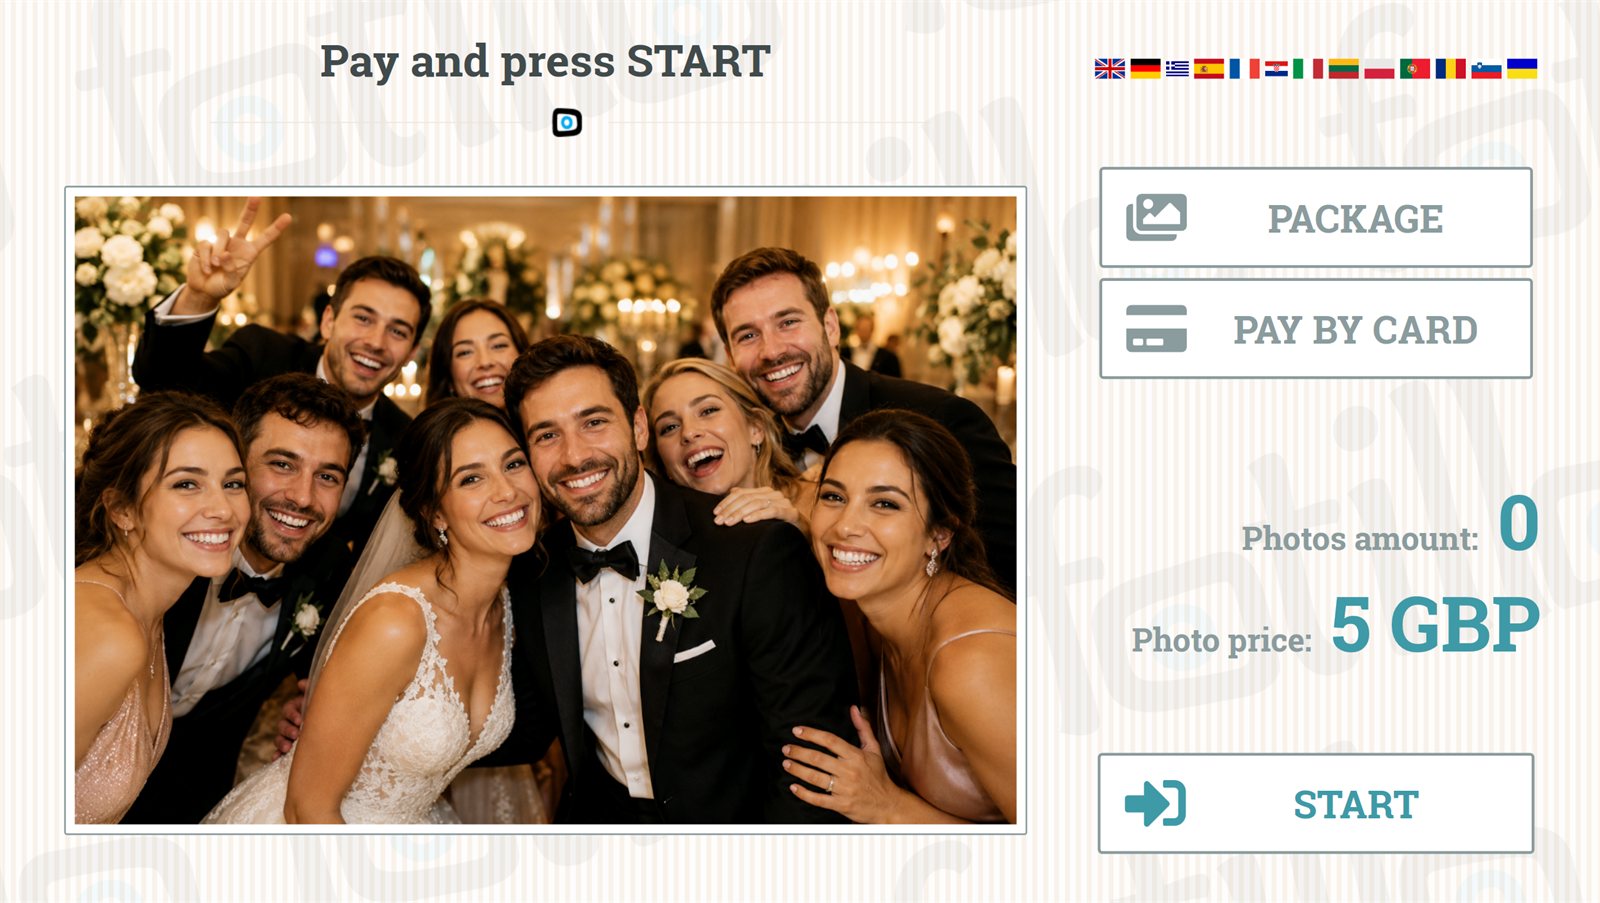
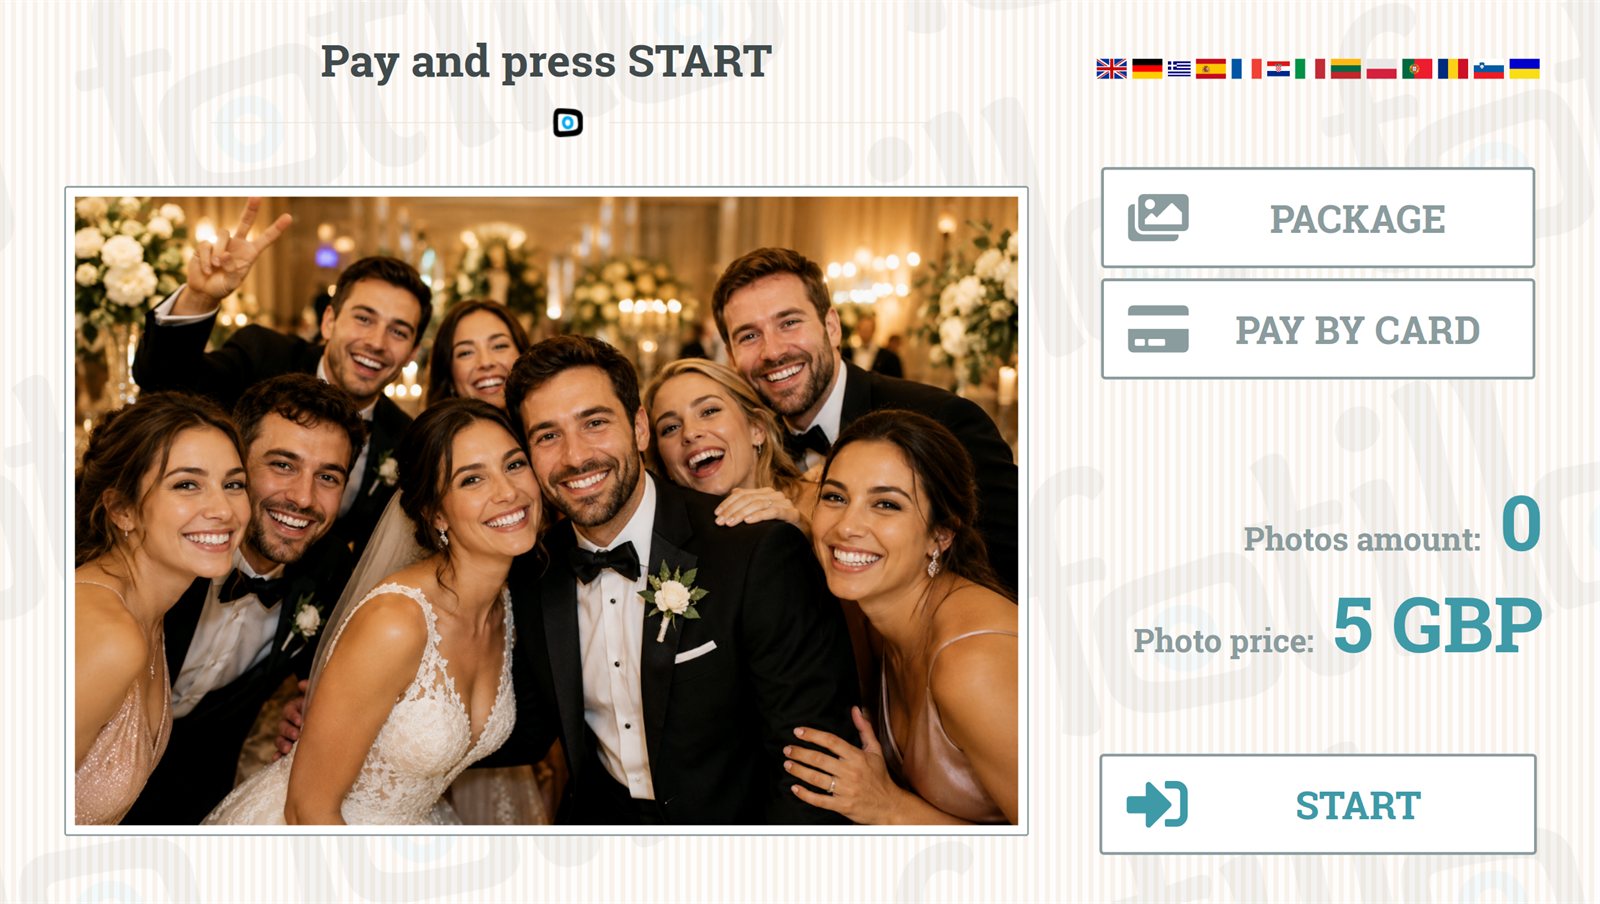
- The device gets a one-time link from Fotillo Cloud for that payment and shows its QR code on the first screen (the payment screen), in place of the start photo. Above the code it says "Print photos from your phone", and below it "Scan the code and send your photos to print". With a time package it also shows the time until which sending works.
- A guest scans the code with a phone, accepts the Cloud terms (consent checkbox), picks a template of the chosen occasion and uploads photos.
- The device downloads the photos, builds the template and prints - from the package, without anyone touching the screen.
Without an active package the headline reads "Buy a package and print photos from your phone". If the line under the photo says "The booth is not connected to Fotillo Cloud - pair it in F4", pair the device in the F4 menu (CLOUD PAIRING). The message "The device is over the Cloud account limit - check the operator panel" means that there are more devices on the account than its limit allows. The operator is the controller of the guests' data (see chapter 11).
Only packages are sold in this mode
There is no single-photo price and no card price list for single prints. The classic START path (templates, then printing from the phone) is available only if your downloaded package includes the Print from phone (QR) feature and a print package is active. Without that feature START is not shown and the start photo cannot be tapped. Prints through the link and through START come from the same package.
Quantity package and time package
| Package | How the link works |
|---|---|
| quantity | The guest chooses the number of prints, but not more than Maximum number of prints in F4 and not more than is left in the package. |
| time | The link works until the package time ends, and the number of prints is fixed at 1 (as on the print screen in time mode). In this mode the package time starts at payment. |
When the link stops working
At the first of these events:
- the package is used up,
- a new series is chosen when the next package is bought (described in chapter 5): EXTEND keeps the same link and QR code and starts the link validity again, NEW SERIES issues a new link and a new code,
- the Party link validity (hours) from F4 has passed since the last payment - 24 hours by default, 1-168 to choose from,
- the staff close the accounts with the report (Ctrl+R).
The device gets a new link only after a new payment. Anyone who opens an expired link sees only a message that the link is inactive.
Last week's link cannot print anymore
Guests of the previous party may still have the QR code on their phones. It does not matter: the link expires at the latest after the validity time from F4 (by default 24 hours from the last payment), and an expired link prints nothing - not from the next couple's package either, because they get their own link after their payment.
After the package, and the album
When the package ends, the QR code disappears and the start photo returns. You can replace the file Images\PhotoStart.png with your own graphic encouraging people to buy a package. If the couple enters an album code when buying the package (Album Fotillo, chapter 6), the album receives all the original photos and the print-ready template - as in a normal session.
2e. F5 print profile menu new
A print profile is your own saved image setting that the device prints with - matched to the printer, the paper and the light in the venue. You open the screen with F5 on the start screen; it is available only with the Advanced filters / AI backgrounds feature.
The profile is separate for each printer and remembered by its serial number, so re-plugging the USB cable loses nothing. With two printers you switch between them with the list in the top right corner.
What you set
- A base filter - one of the program's filters (or none).
- Five sliders: brightness, contrast, saturation, colour temperature and vignette.
You see the result immediately - the live preview is recalculated on a photo after every change. The program shows the last photo from the folder for originals; you can also load your own reference photo from a file.
Saving, export, import
- SAVE - saves the profile on the device.
- EXPORT - writes the profile to a file you can carry to another device.
- IMPORT - loads a profile from a file; handy when several devices have to print the same way.
- DEFAULT SETTINGS - restores the factory values.
How to put the profile to work
You select the saved profile in F4 → Photos and filters → Default filter as the entry "Custom print profile (F5)" - the last one on the list of filters. From then on every print is made with that profile, including the automatic printing in HOT FOLDER mode.
A tool for the operator, not for the guest
The profile does not appear as a tile on the filter selection screen. The guest neither sees it nor can switch it off - it works only as the default filter.
Printer settings new
Below the image sliders there is a second part titled Printer. It does not affect how the photo looks, only how the printer places the image on the paper - and that is a trait of the individual unit, because two identical printers feed paper slightly differently. That is why these settings live in the printer profile and not in the F4 menu.
| Setting | What it does |
|---|---|
| Print resolution | auto leaves the decision to the printer driver and that is what we recommend. The other values (300x300, 300x600, 600x600) force a specific resolution; not every printer knows each of them. |
| Horizontal / vertical margin | Shrinks the image at the edges of the sheet. The value is shown in millimetres next to the name. |
| Horizontal / vertical offset | Moves the whole image on the sheet. Use it when the print comes out slightly too high, too low or to the side. |
| TEST PRINT | Prints a grid with a frame right at the edge of the sheet on the selected printer. It shows which way to move the image. It uses one sheet. |
Alignment cannot be set by eye
Half a millimetre is invisible on screen - you only see it on the print. So the order is: test print, correct with the slider, save the profile, another test print. The test image is part of the program, not a printer function, so it comes out on every printer Fotillo supports.
3. Where the photo on the print comes from ↑ top
The photo that ends up on the print or is shared can come from three sources - depending on the features in your package:
- Camera - the classic photo booth: the photo is taken on the spot with a USB camera, a built-in camera or a Canon EOS DSLR.
- HOT FOLDER - the program prints/shares photos supplied by the photographer (from a folder).
- Print from phone (QR) new - the guest scans a QR code and sends a photo from their own phone to be printed by the device. Ideal for personalised postcards without a camera.
Two different "QR" features - don't confuse them
These are two opposite directions. We describe them in detail in chapter 6. In short: Print from phone = phone → device (for printing); Sharing = device → phone (download/e‑mail).
Photo mirror - animations instead of the live preview new
In a photo mirror the guest does not look at a camera preview - they see themselves in the mirror. A preview on the screen is redundant there, and even gets in the way. That is why Fotillo can play animations with sound instead: an invitation to pose, a countdown, and finally a short animation at the moment of the photo that masks the shutter and the time it takes for the frame to arrive from the camera.
The principle is simple: the file name decides the role, the presence of the file switches it on, and the number of files sets the duration. There is nothing to click - just put the files in the Images folder next to the program.
File names
| File | Role |
|---|---|
Anim1.mp4 | Animation before the first photo - invitation to pose and countdown. Plays to the end. |
Anim1Photo.mp4 | Animation at the moment of the first photo. The shutter fires exactly at its start. Optional file. |
Anim2.mp4, Anim2Photo.mp4 | The same for the second shot, Anim3… for the third and so on. The number matches the consecutive shot in the template. |
Anim.mp4 + AnimPhoto.mp4 | One pair for all shots - handy when you do not want separate animations per photo. |
The program looks for files in this order: AnimN → Anim → Anim1. If the template has four shots and you only uploaded Anim1 and Anim2, shots three and four fall back - they will not be left without an animation. When there is no Anim* file at all, the program returns to the classic preview with a countdown.
A missing file never stops the session
If there is no AnimNPhoto animation, the photo is taken immediately after the countdown. The session carries on and the guest notices nothing.
Countdown from images (instead of video)
An animation can be assembled from single images. The number after the dash is the number of seconds before the photo at which the frame appears on screen:
Anim1-5.png- appears 5 seconds before the photo;Anim1-3.png,Anim1-2.png,Anim1-1.png- the following seconds;Anim1-0.png- the last frame, the photo is taken right after it.
The numbers need not be consecutive: a set of 10, 5, 3, 2, 1, 0 works too - frame “10” stays for 5 seconds, “5” stays for 2 seconds, then one second each. Want a longer countdown? Add Anim1-10.png and change nothing else.
Sound
When the animation is a video with sound, nothing else is needed. For an animation made of images, add separate audio files: Anim1.wav plays throughout the stage before the photo, and Anim1-3.wav is a short signal at a specific frame (for example a beep on 3‑2‑1). You set the volume in F4 - the value 0 mutes the animations when the venue has its own sound system.
Portrait and landscape screens
A photo mirror usually stands vertically, but the same animations are useful on a landscape screen. Add the suffix -v for portrait or -h for landscape: Anim1-v.mp4, Anim1-h.mp4 (the same works for frames: Anim1-5-v.png). A file without a suffix is used when there is no version for the detected orientation.
The recommended resolution is Full HD - 1080×1920 in portrait, 1920×1080 in landscape. It is not required: the program scales the animation to fill the screen, cropping the excess.
The “Animations / Adverts” function
The animation mode belongs to the Animations / Adverts function - the same one responsible for the interstitial advert screen during printing. It requires a printer. In the configurator choose the Photo mirror device and the function will already be included.
4. Printing, filters and finish ↑ top
Image filters
After the photo has been taken, the customer can choose from 6 standard filters: original (colour), greyscale, sepia, inversion, edge detection (Sobel) and edge inversion. Selecting a filter immediately shows the effect in the preview.
Control from F4: the "Photos and filters" section new
The entire selection screen is built by three independent switches in the F4 → Photos and filters menu: Image filters (the panel of 6 standard filters), Advanced filters (the column of 10 artistic filters) and Background replacement (AI) (the background tiles - described below). Each can be switched on or off separately.
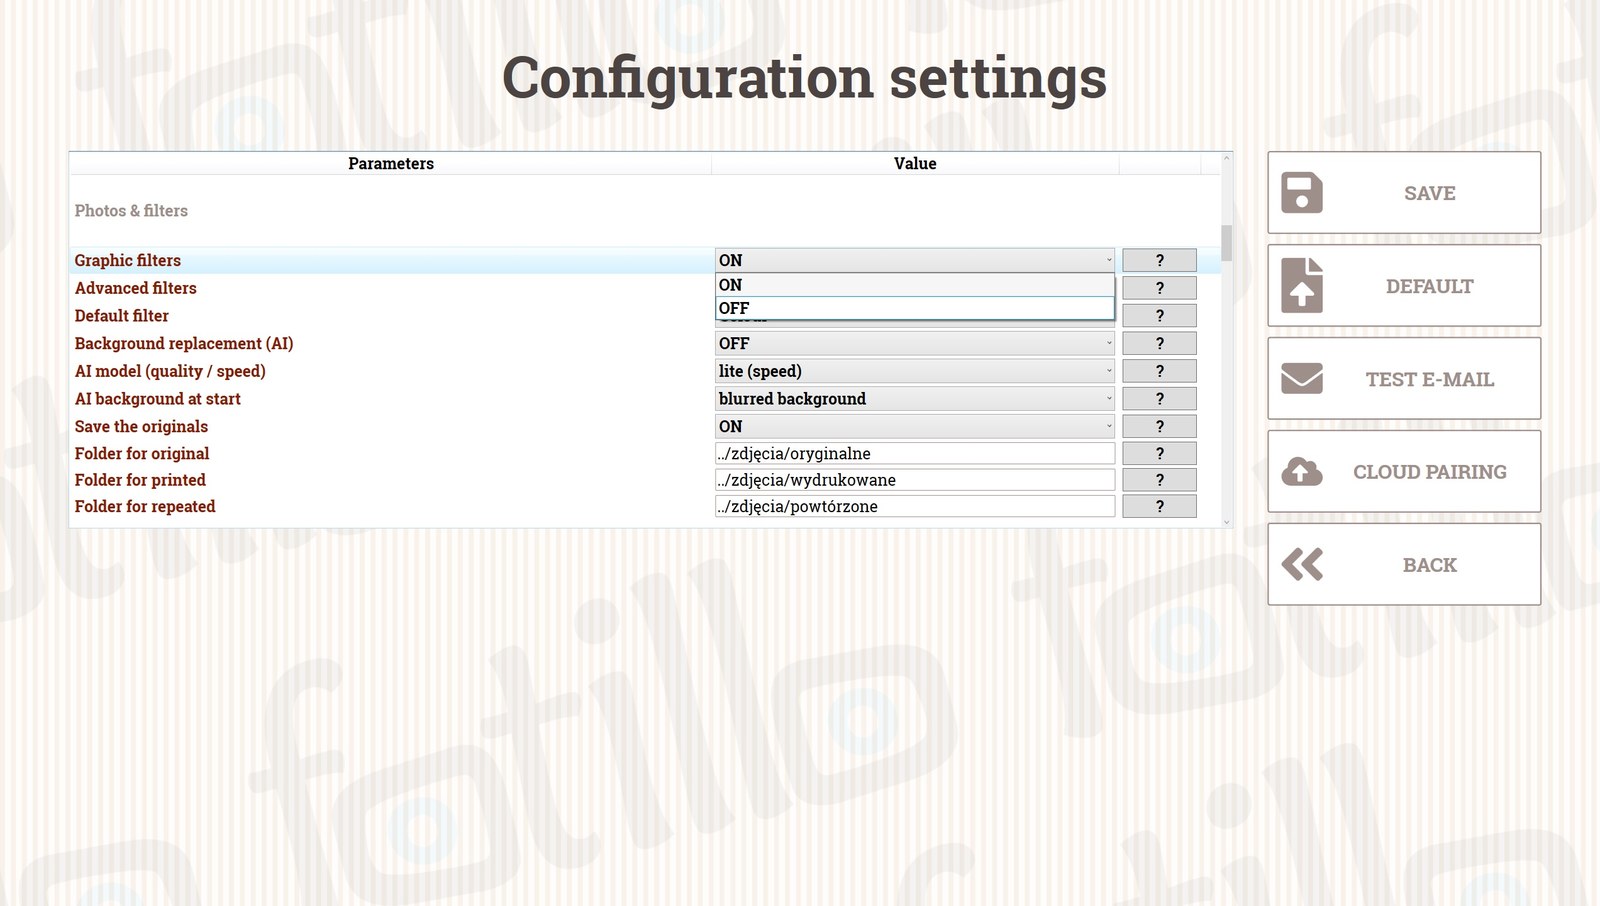
Switch off Image filters if you want to speed up service and print straight away in one set style - the program will then use the filter from the Default filter parameter. In versions without a photo on the print, the filter panel does not appear anyway.
New: advanced filters new
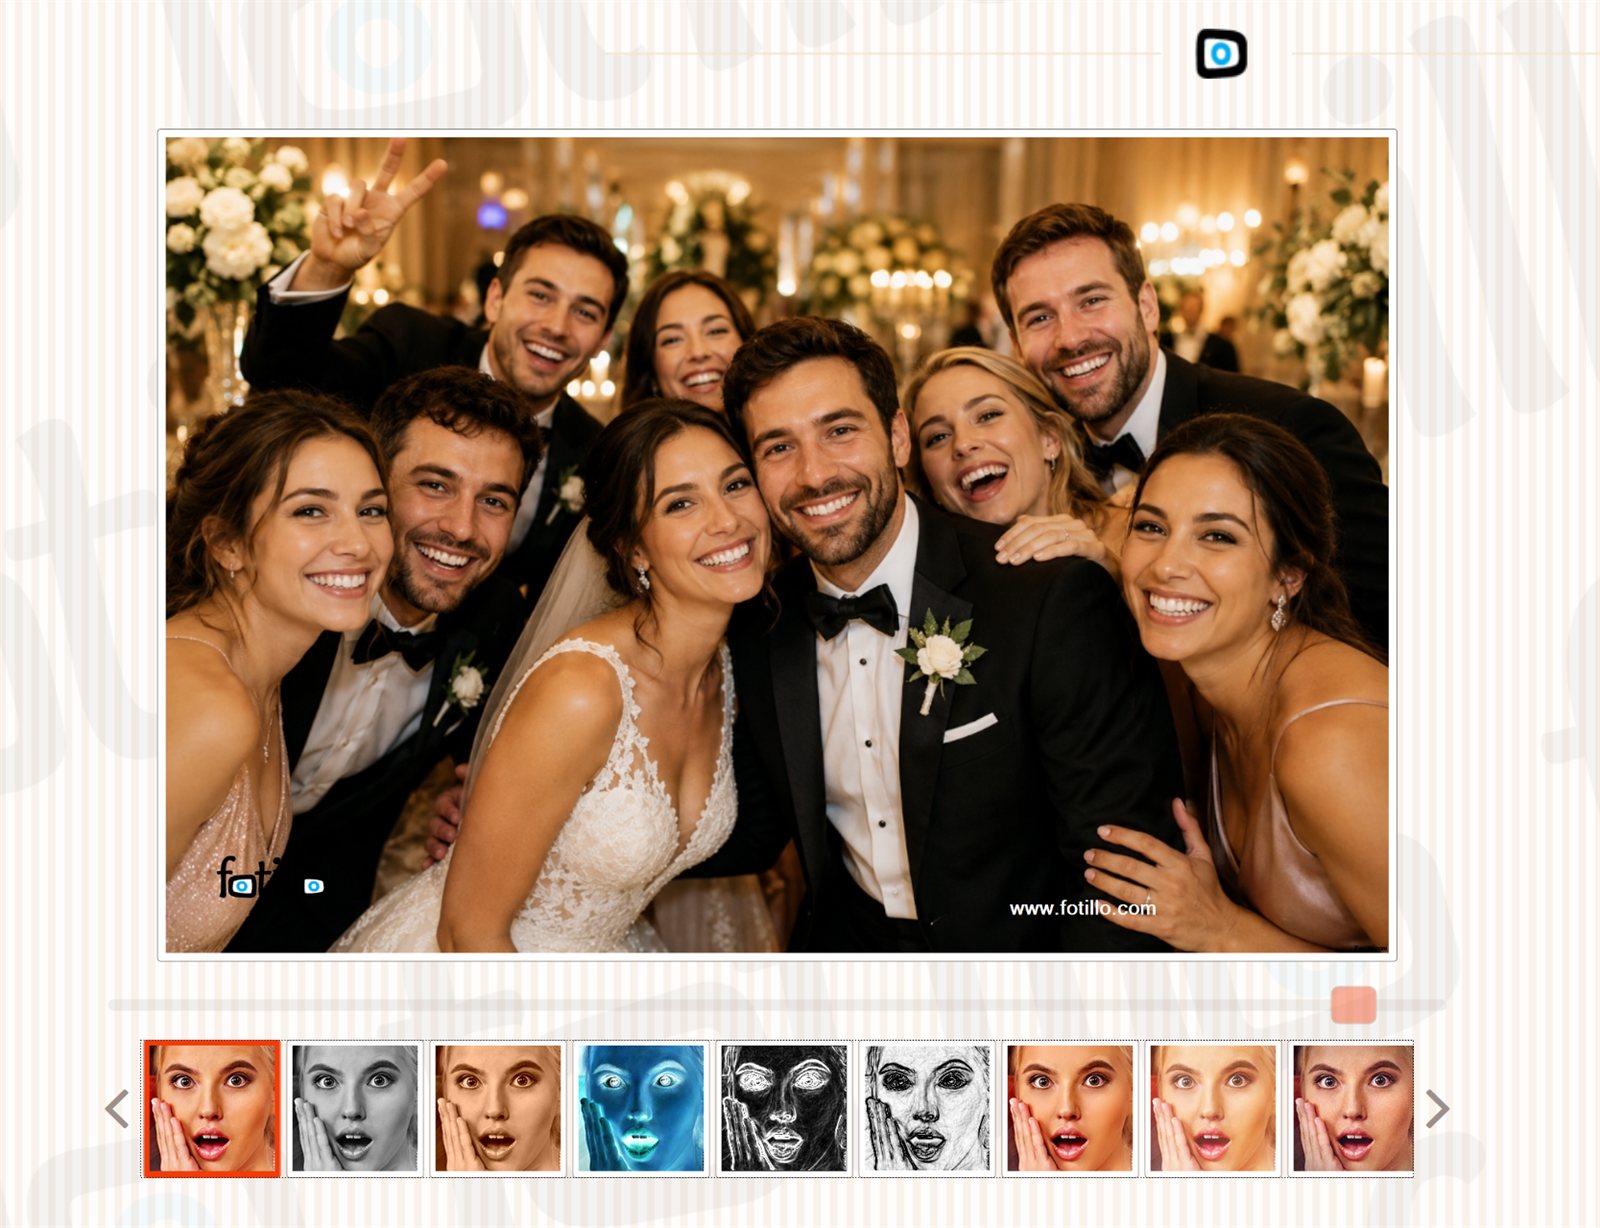
The Advanced filters switch adds a vertical column of 10 artistic filters on the left (including Beauty, Vintage, Noir, Pencil sketch, Oil painting, Neon, Newspaper halftone, Tilt‑shift) with a strength slider - alongside the standard filters below the photo. This is an additionally paid feature: you enable it by ticking it in the configurator (it is added to the activation code), and it requires a photo source (camera, photographer or printing from a phone).
AI backgrounds - replacing the photo background new
Fotillo can remove the photo background and replace it on the fly - without a green screen. Artificial intelligence (the BiRefNet model) detects the people in the photo and separates them from their surroundings, and everything is computed locally on the photo booth's computer - no photo is sent to the internet. Once the Background replacement (AI) parameter is enabled, tiles appear on the selection screen:
- Original - the photo unchanged;
- Your own backgrounds - one tile for each image file placed in the
Backgrounddirectory in the program folder (e.g. a beach, a city skyline, wedding decorations); - Background blur - the people stay sharp while the surroundings are gently blurred (a portrait effect);
- Black-and-white background - the people in colour against black-and-white surroundings.
The "Blur" and "Black-and-white" tiles work even when the Background directory is empty. The AI background at start-up parameter (F4 → Photos and filters) lets you preselect a particular tile - for example a whole wedding with one fixed background.
The AI model - a one-off download
Because of its size, the model is not part of the program package. Download it from builder.fotillo.com/models/ and place it in the Model directory next to Fotillo.exe. Two files are available: birefnet‑lite (approx. 175 MB - fast, works on any computer, recommended) and birefnet‑hr (approx. 890 MB - the highest mask quality, a graphics card with about 4 GB of memory is recommended). You make the choice with the AI model (quality / speed) parameter. Once downloaded, the feature works without an internet connection.
One paid feature: "Advanced filters / AI backgrounds"
Advanced filters and AI backgrounds are sold together as a single item in the configurator - one tick unlocks both capabilities within the same activation code.
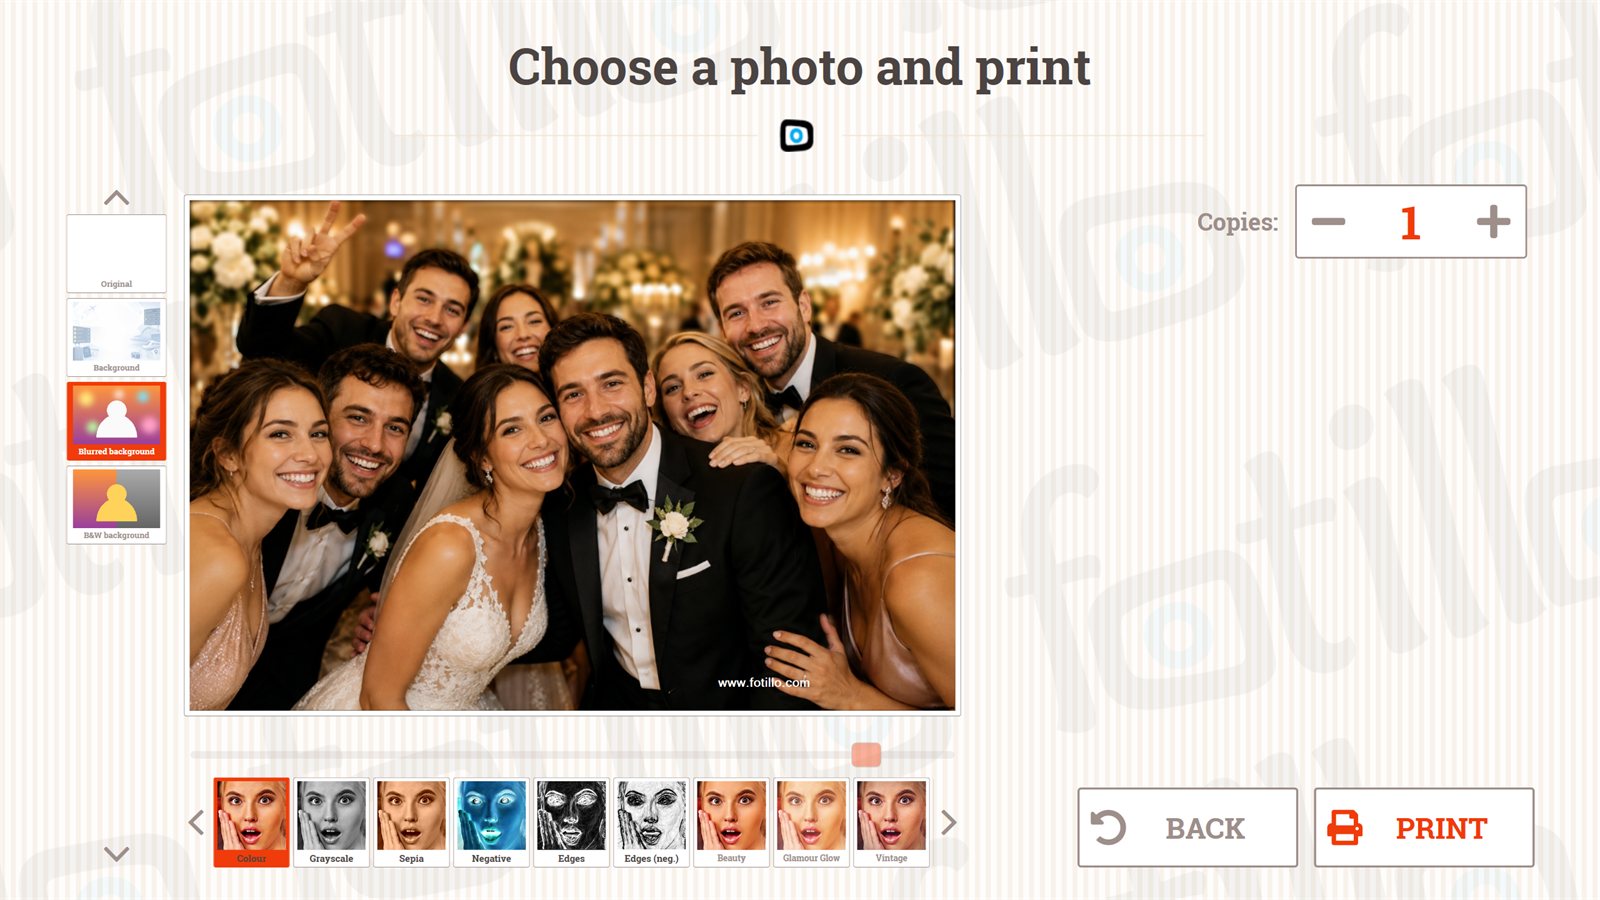
Background directory, Background blur and Black-and-white background.Paper finish
The program shows only the finishes the connected printer has - there is no setting for this in the F4 menu.
| Printer | Available finishes |
|---|---|
| Citizen CX-02 | gloss, matte, fine matte, lustre |
| Citizen CY / CY-02 / CZ-01 | gloss, matte |
| DNP DS-RX1 / RX1 HS | gloss, matte |
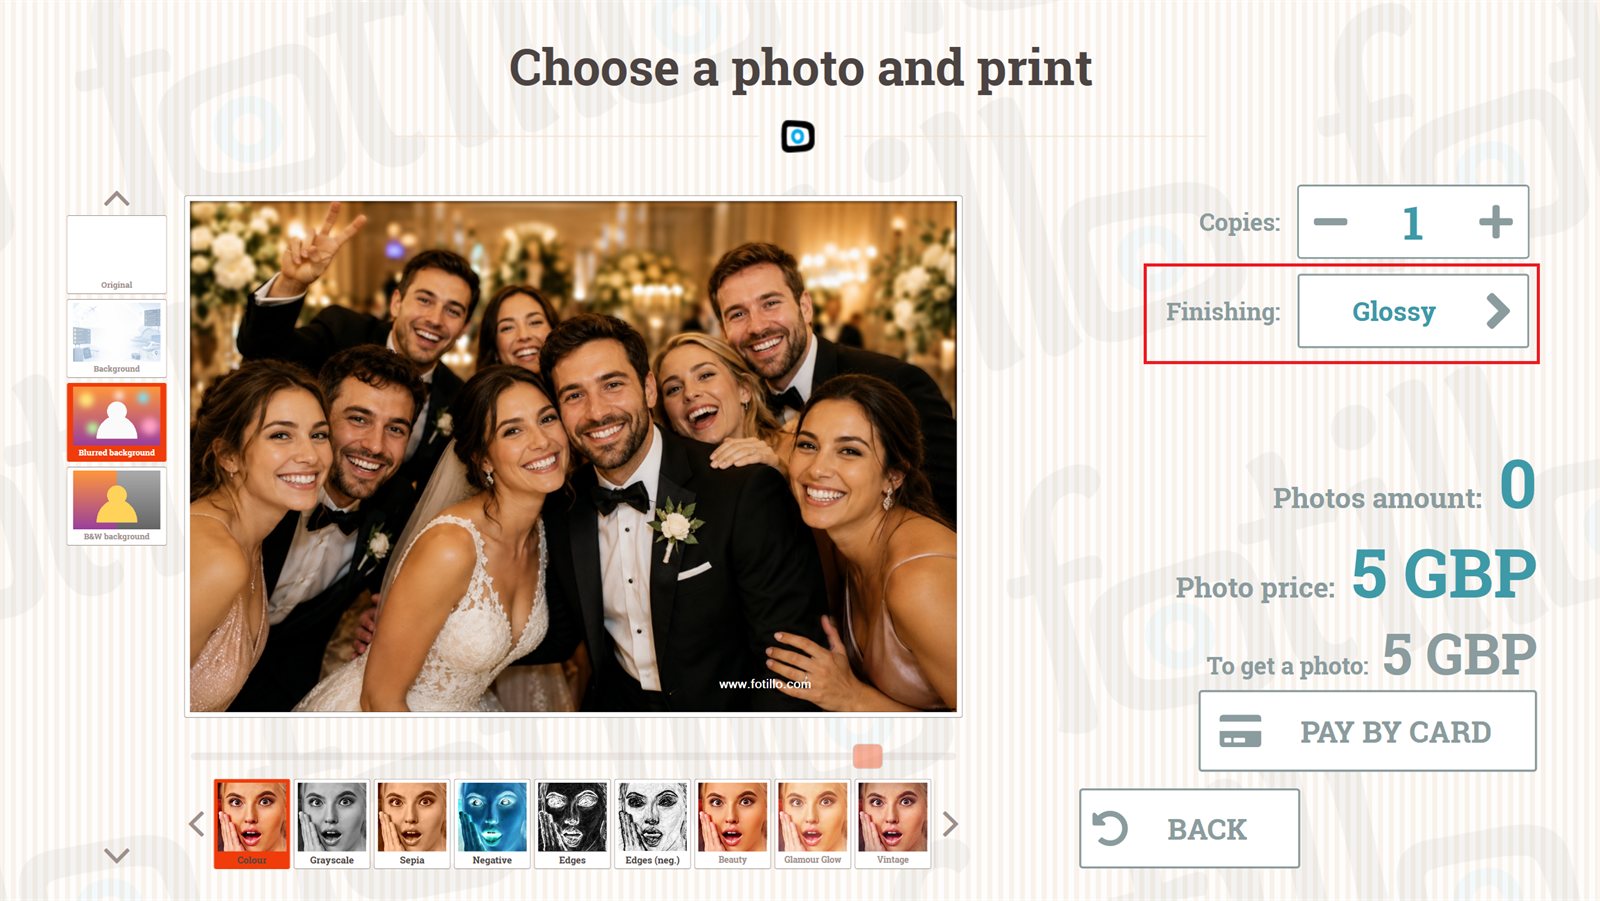
Citizen printers: paper, formats and proportions new
The program talks to Citizen printers directly: it knows which roll is loaded, how many prints are left and what can be made from that paper. The print format is not set anywhere in the program - it comes from the template itself. Fotillo compares the proportions of the template image with a table of formats and picks the largest sheet that still leaves at least 290 dots per inch.
What this means in practice
A 1800x1200 px template has a 3:2 ratio, that is 10x15 cm. The same design prepared as 2400x1800 px has a 4:3 ratio and comes out as 15x20 cm. So the format changes in the template editor, not in the printer settings.
What comes out of one sheet. The offcut is the part of the sheet the printer cuts off and discards - the paper used is the same as for a full sheet.
| Printer | Roll (media) | What you can print |
|---|---|---|
| Citizen CX-02 | 6x8 (15x20 cm) | 15x20 · 15x15 with offcut · 15x11.5 with offcut · two 15x10 photos on one sheet · four 15x5 strips |
| Citizen CZ-01 | 4x6 (10x15 cm) | 10x15 · 10x11.5 with offcut · 10x10 with offcut · two 10x7.5 photos on one sheet · three 10x5 photos |
| Citizen CY / CY-02 | 6x4 (10x15 cm) | 10x15 · two 15x5 strips |
| Citizen CY-02 | 6x8 (15x20 cm) | 15x20 · two 15x10 photos on one sheet (in pairs only) |
Why a CY with a 15x20 roll does not print single 10x15 photos
CY and CY-02 printers can place two 15x10 photos on a 15x20 sheet. but only in pairs. An odd print would use a whole sheet. that is as much paper and ribbon as a 15x20 photo. That is why the program does not send 10x15 templates to a CY with a 15x20 roll at all - such designs disappear from the selection screen. The CX-02 handles it differently: it rewinds the ribbon and prints from its second half. so a single 15x10 does not waste a sheet.
Formats the program recognises. Pixel sizes are given for 300 dots per inch - what the photo printers themselves print and what new templates from the editor use. A template can be portrait or landscape; what counts is the ratio, not which side is longer.
| Format | Ratio | Template size (300 dpi) | Paper in the driver |
|---|---|---|---|
| 7.5x10 cm | 4:3 | 1200 x 900 | (4x3) |
| 10x10 cm | 1:1 | 1200 x 1200 | (4x4) |
| 7.5x11.5 cm | 3:2 | 1350 x 900 | (4.5x3) |
| 10x11.5 cm | 9:8 | 1350 x 1200 | (4.5x4) |
| 11.5x11.5 cm | 1:1 | 1350 x 1350 | (4.5x4.5) |
| 9x13 cm | 10:7 | 1500 x 1050 | (5x3.5) |
| 13x13 cm | 1:1 | 1500 x 1500 | (5x5) |
| 10x15 cm | 3:2 | 1800 x 1200 | (6x4) / (4x6) |
| 11.5x15 cm | 4:3 | 1800 x 1350 | (6x4.5) |
| 15x15 cm | 1:1 | 1800 x 1800 | (6x6) |
| 13x18 cm | 7:5 | 2100 x 1500 | (7x5) |
| 11.5x20 cm | 16:9 | 2400 x 1350 | (8x4.5) |
| 15x20 cm | 4:3 | 2400 x 1800 | (8x6) |
| 15x23 cm | 3:2 | 2700 x 1800 | (9x6) |
Older 320 dpi templates keep working
Fotillo templates used to be 320 dots per inch: 10x15 cm was 1920x1280 px and 15x20 cm 2560x1920 px. The program works the format out from the ratio and the density, so it recognises both sets of sizes - nothing has to be redone. New templates are still better made at 300 dpi: that is what the printers themselves print, so the image reaches the paper one to one, without being scaled down in the driver.
15x5 strips
Strips come from one sheet which the printer cuts every two inches across the paper feed. A 10x15 roll gives two strips, a 15x20 roll four. In the template this is the PrintCuts field; older templates with TwoInchCut work as before.
Wrong paper in the printer: what the customer sees
A template that no connected printer can print does not appear on the selection screen - the customer does not get a tile that would lead nowhere. When the paper matches no installed design, the device shows "Temporarily closed" with a note about the paper and a pointer to the F2 menu. That usually means the printer holds a different roll than the one the templates were made for.
When something does not work: messages and what to do new
Every situation where printing is impossible has its own message, and below you will find what it means and where to start. The full explanation with template names and error codes always goes to Trace.txt in the %AppData%\Fotillo folder.
| What you see | Where | What it means and what to do |
|---|---|---|
| Temporarily closed The selected printer does not respond | main screen | There is no working printer on the port saved in the configuration, and the program could not pick another one because either none is connected or several respond at once. Check the USB cable and whether the printer is on, then point to the printer in the F4 menu. If exactly one Citizen printer is connected, the program takes it by itself and this message never appears. |
| Temporarily closed The paper in the printer does not match any installed template | main screen | The printer responds, but none of the installed designs will come out on the loaded roll. Usually a different roll was loaded. Open the F2 menu - it says which paper format is missing. |
| Temporarily closed The device has no source of photos | main screen | This is not a fault but a configuration: a device without a camera, with HOT FOLDER off and without a photographer folder has nothing to make a photo from. Settings are in the F4 menu. |
| Templates hidden - no paper in this format: … | F2 | Some designs disappeared from the selection screen because no printer holds paper in the listed format. The customer will not see them, the rest works normally. Load the right roll and open the F2 menu again - the list recalculates itself. |
| Templates with a size outside the print formats: … | F2 | Here the template itself is at fault, not the roll: its proportions match no print format. Fix the size in the template editor according to the format table above, or remove the design from the Collages folder. |
| Printer does not respond | F2 | The printer queue is in Windows but the hardware is silent. A queue stays in the system even after the printer is unplugged, so seeing it proves nothing. Check the power and the cable, then the selection in the F4 menu. |
| This photo cannot be printed right now. Please ask the staff. | print screen (customer sees it) | The format of this photo does not come out on the paper in the printer. It happens when the roll was changed during a running session. The customer can go back and pick another design; the operator should check the paper in the F2 menu. |
| Please wait… (blinking text) | print screen (customer sees it) | The printer is busy or briefly not ready: printing the previous photo, cooling the head, cover open. The program waits and resumes printing by itself. If the text does not disappear, check the cover, the paper and the ribbon. |
| Cover Open, Paper End, Ribbon End, Paper Jam | F2 | A state reported by the printer itself: cover open, out of paper, out of ribbon, a jam. Remove the cause and the program resumes without a restart. A customer who pressed Print meanwhile sees a message asking them to call staff. |
| Standby | F2 | The printer fell asleep after a longer idle time. This is not a fault. The first query wakes it, so press REFRESH. |
| The image comes out crooked or cut at the edge | the print | This is not a message but a symptom: the printer places the image slightly off centre. Open F5, select that printer, press TEST PRINT and correct it with the offset sliders until the frame sits evenly at the edge. Finally press SAVE PROFILE. |
The three most common situations
I move the booth and connect a different printer. Set nothing. If one Citizen printer is connected, the program takes it by itself and saves it. If you connect two, point in the F4 menu to the one that should be the main printer.
I moved the USB cable to another socket. The program recognises the printer by its serial number, not by the socket, so it finds it by itself. The settings and the print profile stay.
I changed the roll to another format. Open the F2 menu. If some designs no longer fit the paper, you will see a red line there with the missing format.
Confirming and retaking photos
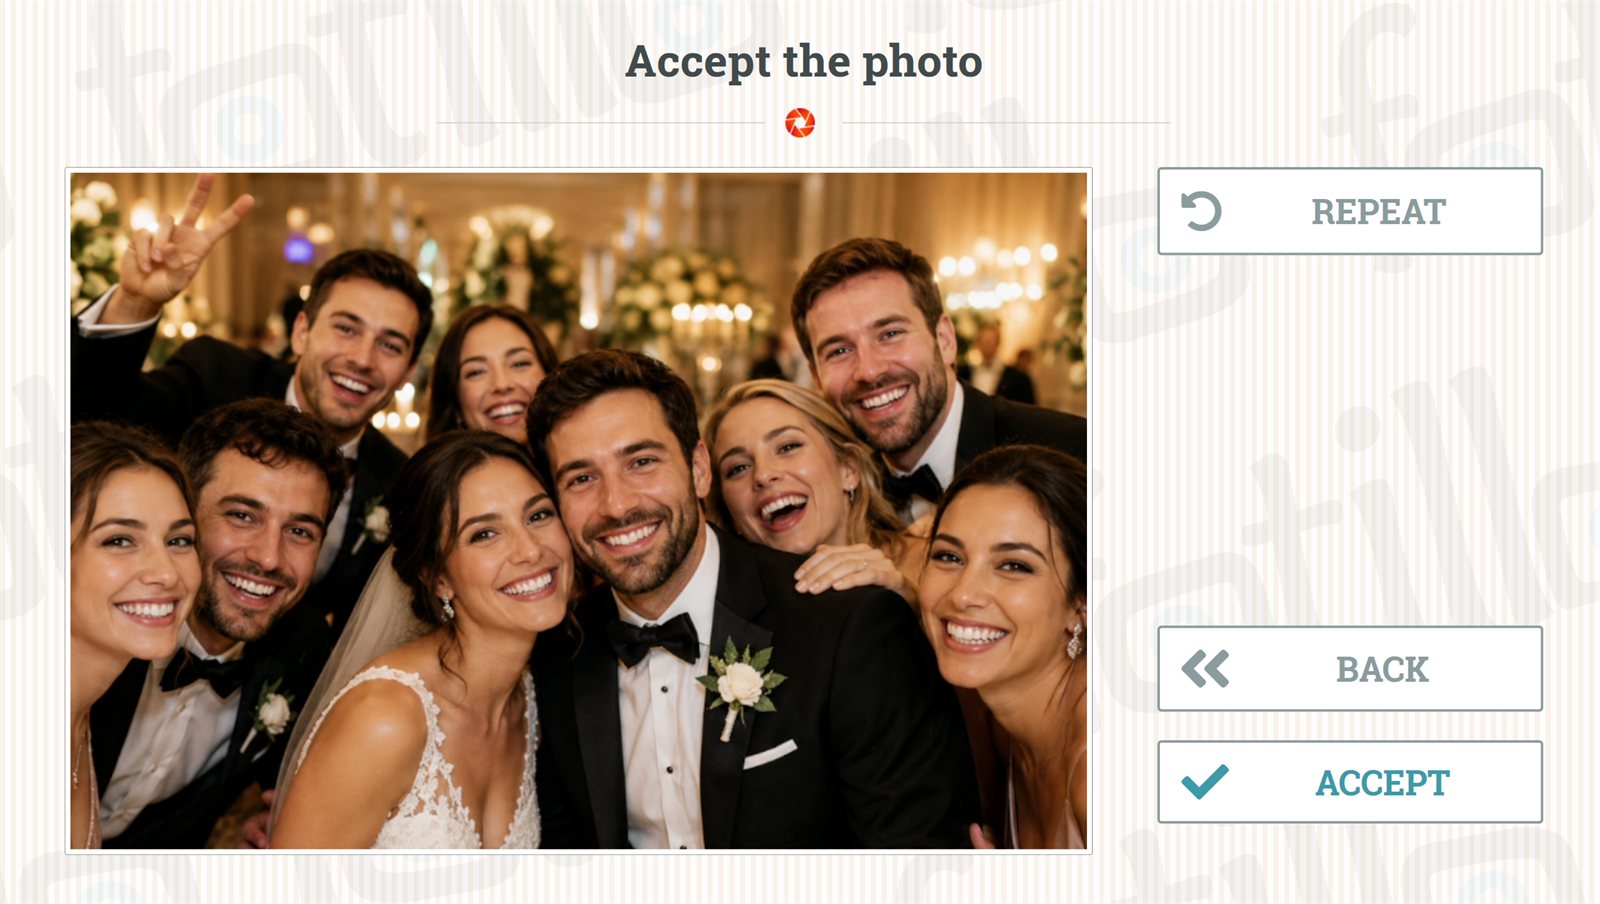
In templates with several photos it is hard for every shot to come out perfectly. That is why, after each shot, the customer can click "Retake" and repeat only the last photo (for example one with closed eyes) - without repeating the whole series. The feature is enabled by the Confirmation of each photo parameter (F4 → Photos).
5. Payments ↑ top
Your photo booth can pay for itself - accepting coins, banknotes and card payments. Below: the supported devices and their configuration.
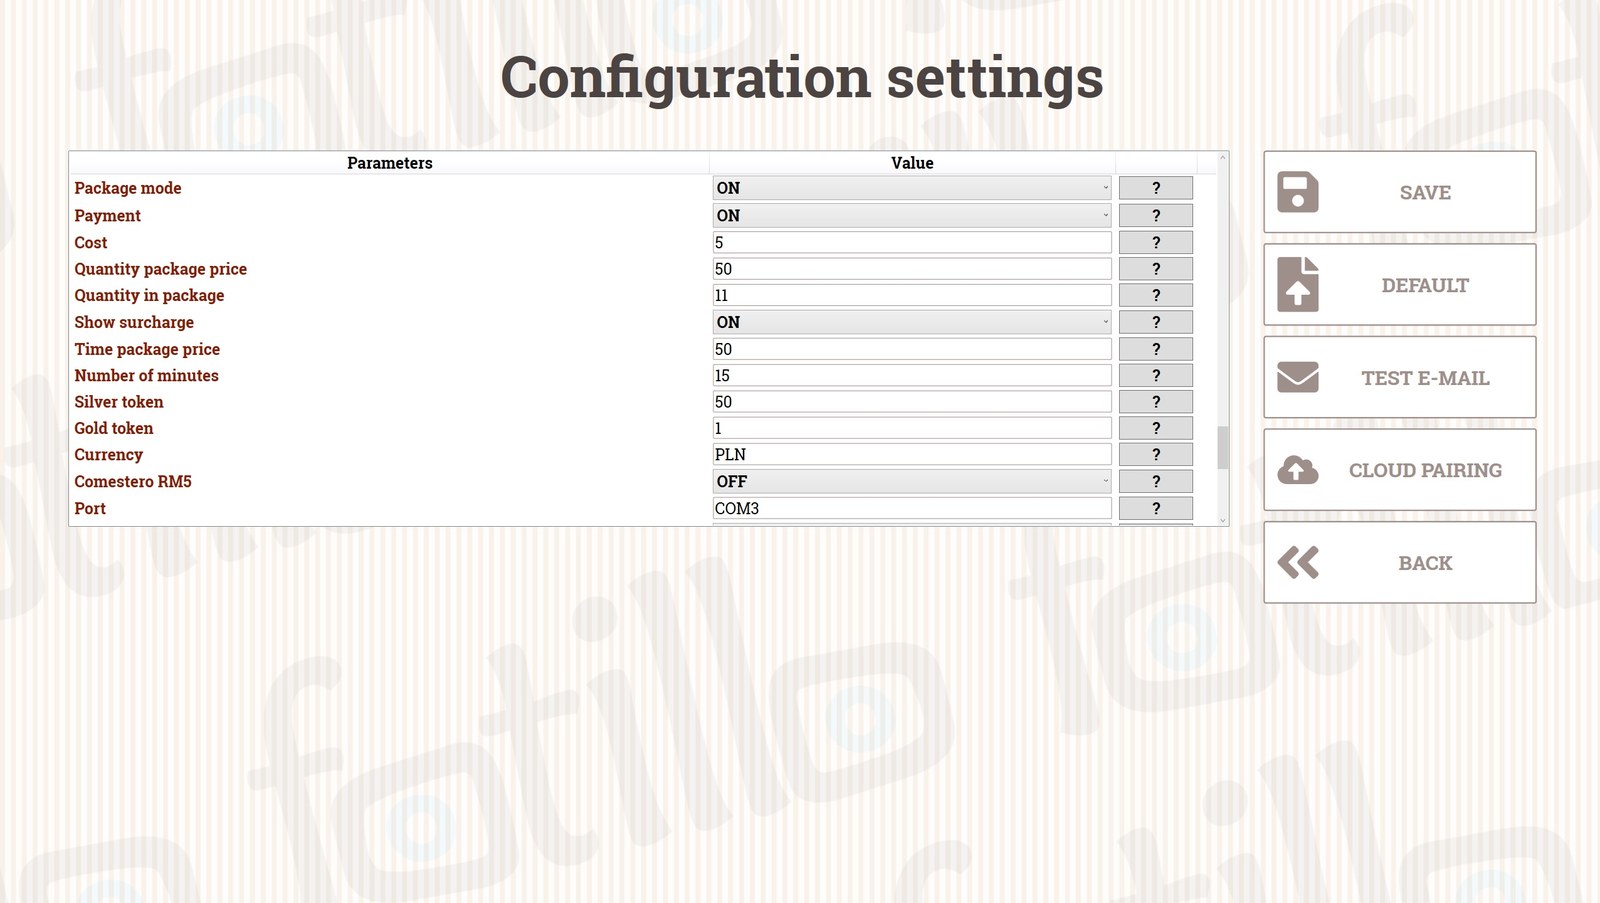
Payment settings (F4)
Disabled by default
new In a freshly downloaded package Payments are disabled by default - as are e‑mail delivery, QR sharing, printing from a phone and e‑mail reports. You deliberately enable the features that involve money and sending photos in F4, once the devices and accounts have been configured.
| Parameter | Description |
|---|---|
| Payments | Enables the payment collection screen in the program. Disabling Payments also disables monitoring of communication with the coin acceptor, the banknote reader and the terminal (see chapter 10). |
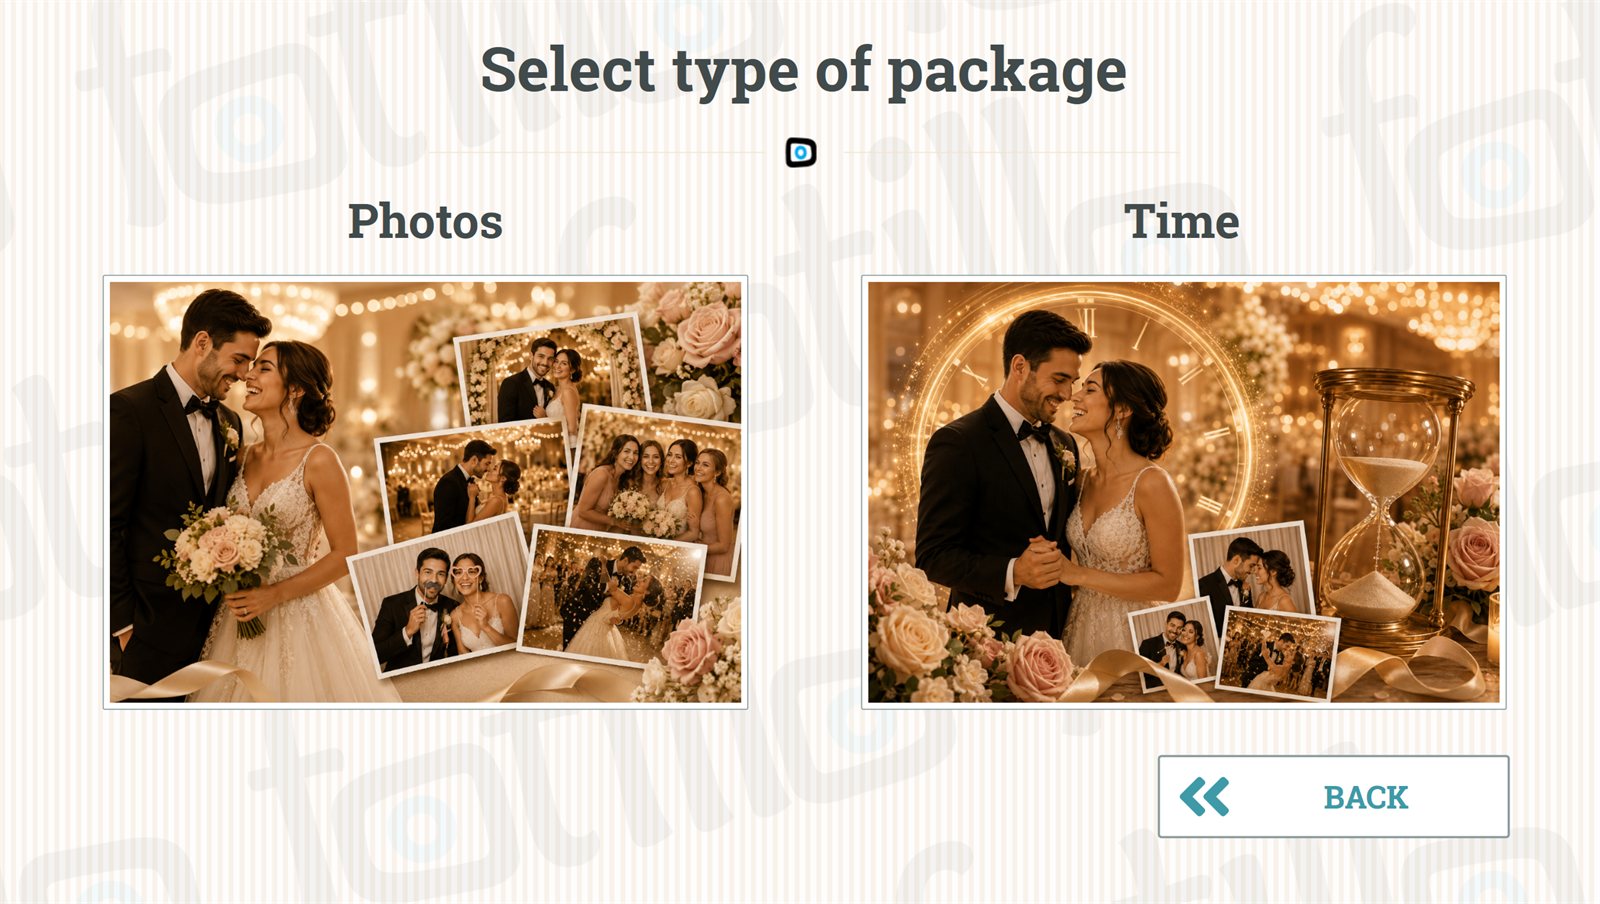
| Package mode new | The option to buy the service in quantity-based and time-based packages (a form of promotion). Available in the Vending, PostCard Kiosk and HOT FOLDER (party mode) versions. The parameter has been moved from the Program section - it is now together with the other payment settings. |
| New series question new | When a customer buys a package while something is still left on the counter, the program first asks: extend or new series (described below). Works only together with package mode. Turn it off where the package is a subscription - in the donation kiosk it is off from the start. |
| Price | The price of a single print in the selected currency. |
| Price / Quantity of the quantity package | The price and the number of photos in the package (e.g. 11 photos for 50 zł). |
| Show additional payment | The program will show how much extra needs to be paid for the selected photos/packages. |
| Price / Number of minutes of the time package | The program runs for X minutes for a set amount. |
| Silver token (promotional) | For the venue manager - a demonstration without payment. |
| Gold token (service) | For the service technician - a test photo. |
| Currency | The currency symbol (shown next to prices and printed on the report). |
Package bought on top of a remainder: extend or new series new
A print package rarely runs down to zero - two or three photos are often left. If someone buys another package at that point, the program cannot tell whether it is the same customer or the next one. So right after payment it asks directly:
| Answer | What happens |
|---|---|
| EXTEND | Everything stays as it was: the texts on the print, the e-mail and the party album. The program asks nothing more and only adds the prints or the time. |
| NEW SERIES | The texts, e-mail and theme of the previous series are cleared and the party album is detached. The program asks again: for the occasion, the album code, the texts and the e-mail. |
Prints already paid for are not lost
In both cases the print counter and the time stay untouched - a new series changes only the data, not what has been paid for. It is also a way for customers to fix their own mistake: whoever typed the names wrong buys a package, chooses a new series and types them again.
Why the album is detached
The next package may be bought by complete strangers, and their photos must not end up in their predecessors' album. That is why a new series always starts by asking for the album code. The album and its photos stay in the owner's account - the booth just stops sending there.
The question appears only when something is left on the counter. With an empty counter there is nothing to extend and the program goes straight to the usual questions. A time package works the same way: the time is added, and the question comes up when the previous one has not run out yet. You can turn it off in F4 with the New series question parameter.
In HOT FOLDER for parties mode, extending keeps the same link and QR code for the guests and starts its validity again, while a new series issues a new link - the old one stops working.
Payment devices (F4)
| Parameter | Description |
|---|---|
| Comestero RM5 | Enables the coin acceptor and its monitoring. |
| Port (coins) | The serial port number of the coin acceptor (COMx). |
| Channels in normal / package mode | Which acceptor channels are active (which coins it accepts) in normal and package mode. |
| Channel values (coins) | The values of the individual channels. Pattern channel:value:description. |
| NV10+ banknote reader | Enables the banknote reader (Innovative Technology) and its monitoring. |
| Port (banknotes) | The serial port number of the reader (COMx). |
| Channels in normal / package mode | Which banknote denominations are accepted in each mode. |
| Channel values (banknotes) | The channel values. Pattern channel:value:description. |
| Terminal | Enables card payment (Valina terminal). |
| Terminal ID | Must be the same as the one set in the device. |
| Terminal currency | The currency in which the terminal accepts payments. |
| Value template / in Promotion mode | The definition of amounts and payment buttons. Pattern actual value:credited value:button description; |
| Daily balance | How often (in hours) the terminal performs its daily balance. |
Important - token configuration
On the coin acceptor, channels 8 and 9 are reserved for tokens (8 - promotional, 9 - service). Do not program coins on them.
Structure of channels and modes
The channel values of the coin acceptor and the banknote reader are written as:
{channel no.}:{value}:{name} - successive entries separated by a semicolon.
The card terminal supports two modes: {payment}:{credited}:
3:3:- the customer pays 3 EUR, the program credits 3 EUR.11:12:- the customer pays 11 EUR, the program credits 12 EUR (a promotion for higher amounts).
Do you need different channels or modes? Write to contact@fotillo.com. Almost any currency is supported.



6. Photo sharing - two QR directions ↑ top
Fotillo supports QR codes in two opposite directions. These are two separate features - the diagram below shows the difference.
new All photo sending and sharing features (e‑mail, QR, printing from a phone, e‑mail reports) are disabled by default in a fresh package - you deliberately enable them in F4 once the accounts have been configured.
Photo sharing (device → phone)
Settings in F4 → Sharing:
| Parameter | Description |
|---|---|
| Ask about sharing | The program asks the customer whether they want their photo made available for download (link / QR / e‑mail). |
| Send photo by e‑mail | The customer can enter an address and receive the photo by e‑mail. |
| Send photo to the cloud | The photo is available via a link / QR code (can be disabled). |
| Photo with QR code | An additional print with a QR code printed on it leading to the digital version. |
| Description | The text displayed below the shared photo. |
| Title | The heading of the page on which the customer downloads/views the photo. |
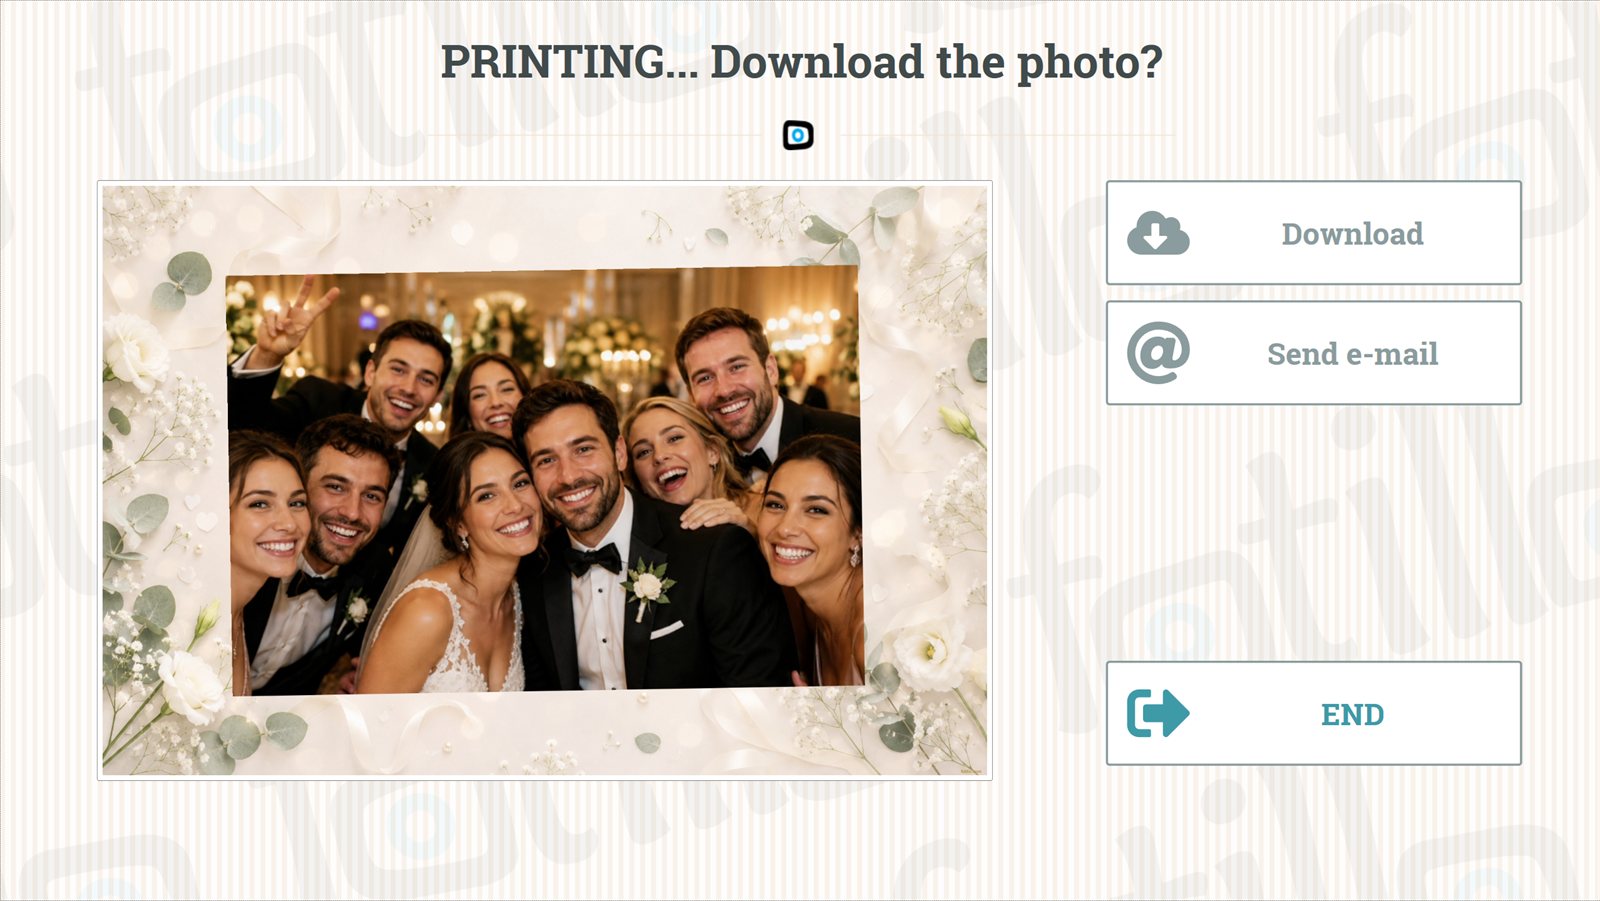
With these options enabled, after the photo the customer will see the "Download photo" and "Send e‑mail" buttons.
Print from phone (phone → device) new
The reverse feature: the guest scans the QR code shown by the device, selects a photo on their phone and sends it for printing in the photo booth or postcard kiosk. It works excellently in postcard machines, where the customer personalises a ready-made design with their own photo - with no need for a camera in the device.

Album Fotillo - a shared album from the party new
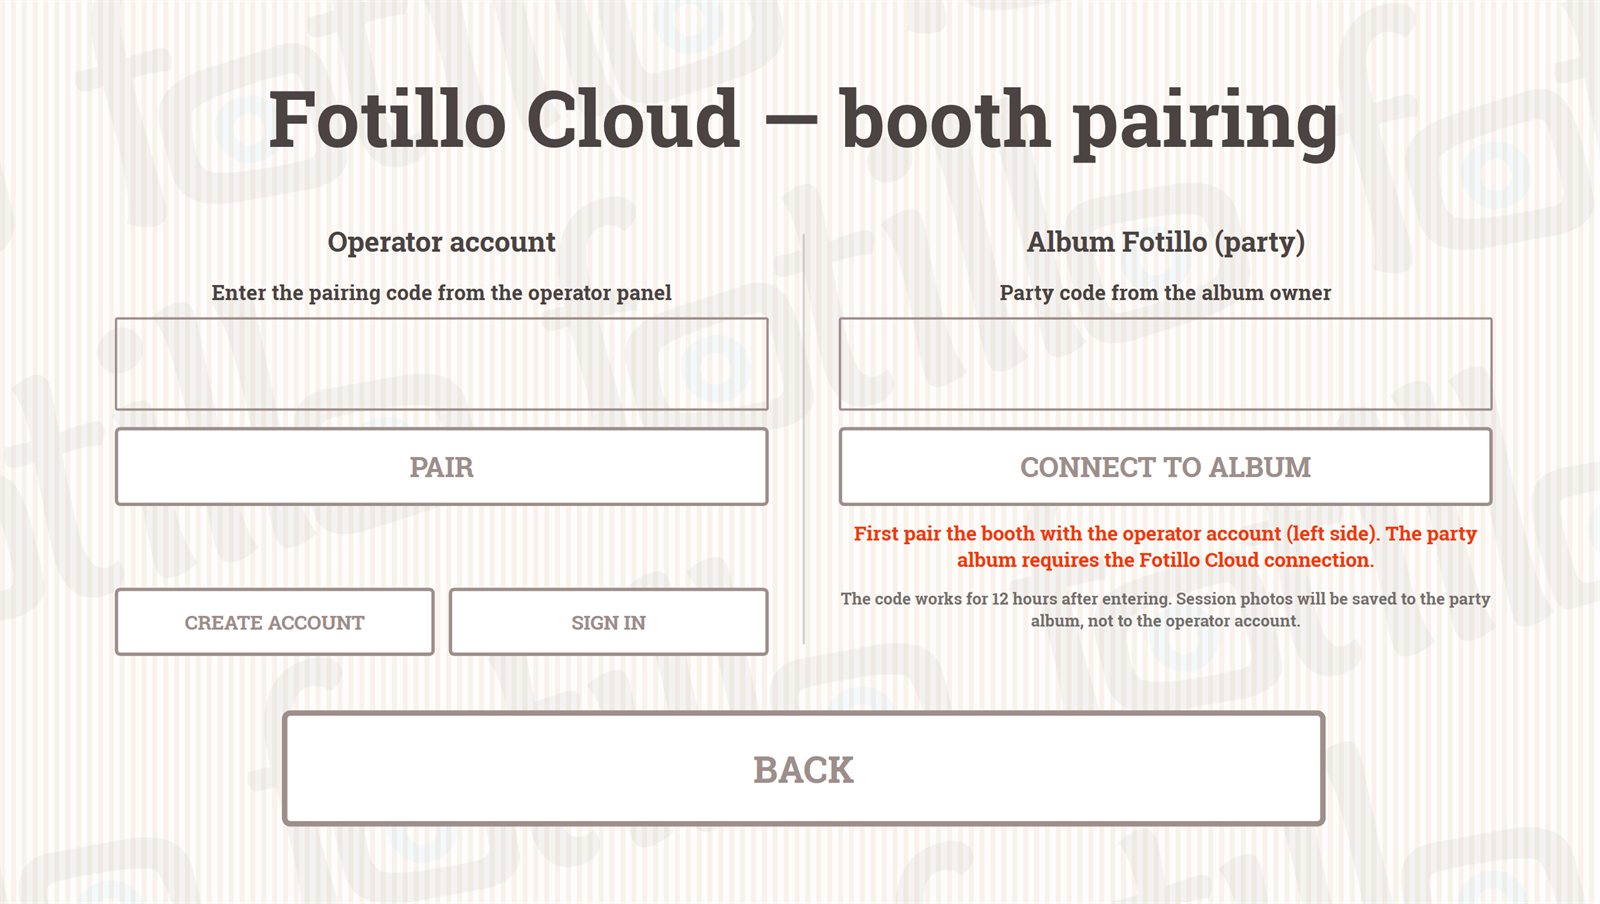
Album Fotillo is a cloud service for party organisers (for example the bride and groom): they set up an "Album" account at album.fotillo.com and receive a party code in the format AL‑XXXX‑XXXX. You, as the photo booth operator, enter this code in the Fotillo Cloud window (opened with a button in the F4 menu) - and from that moment, after every session, the following are sent to the album automatically in the background: the printed photo and all the shots from the camera (1-5 photos, at their original resolution).
The Fotillo Cloud window is split in two: the left column is the existing pairing of the photo booth with an operator account (an 8‑character code from the panel), and the right one is the Album party code. If you enter a code in the wrong field, the program will recognise the mistake and point you to the correct column.
The operator account comes first
new The right column (party code) only becomes active once the photo booth has been paired with an operator account (the left-hand side). Pairing also serves as a test of internet access - without a connection to the Cloud, albums cannot work, so the program will not allow a party code to be entered on an unpaired device.
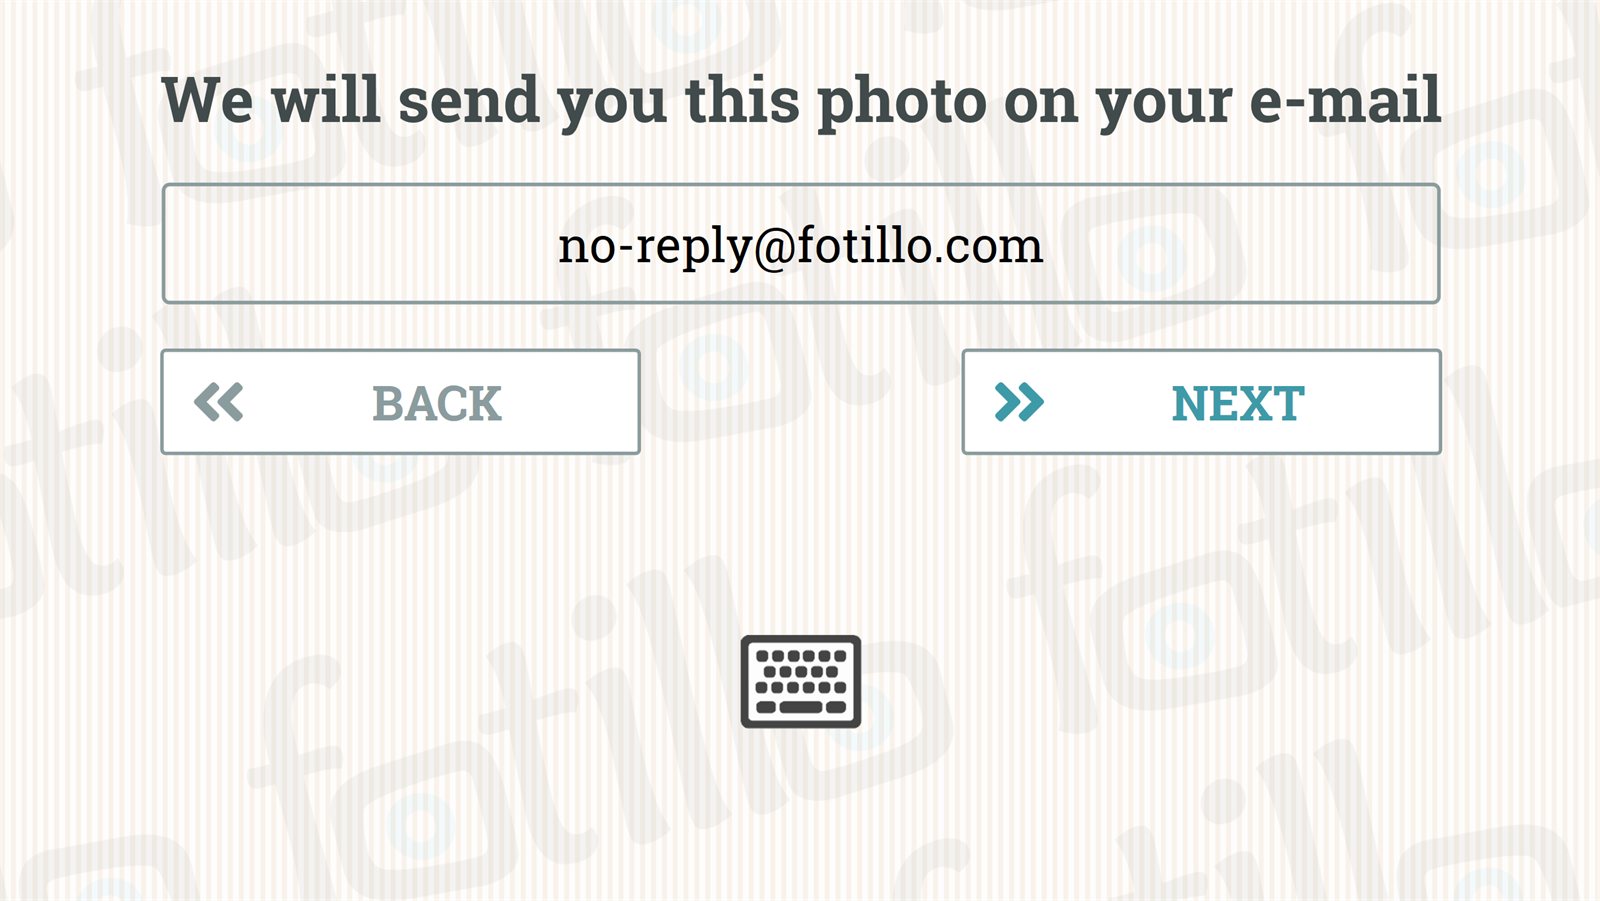
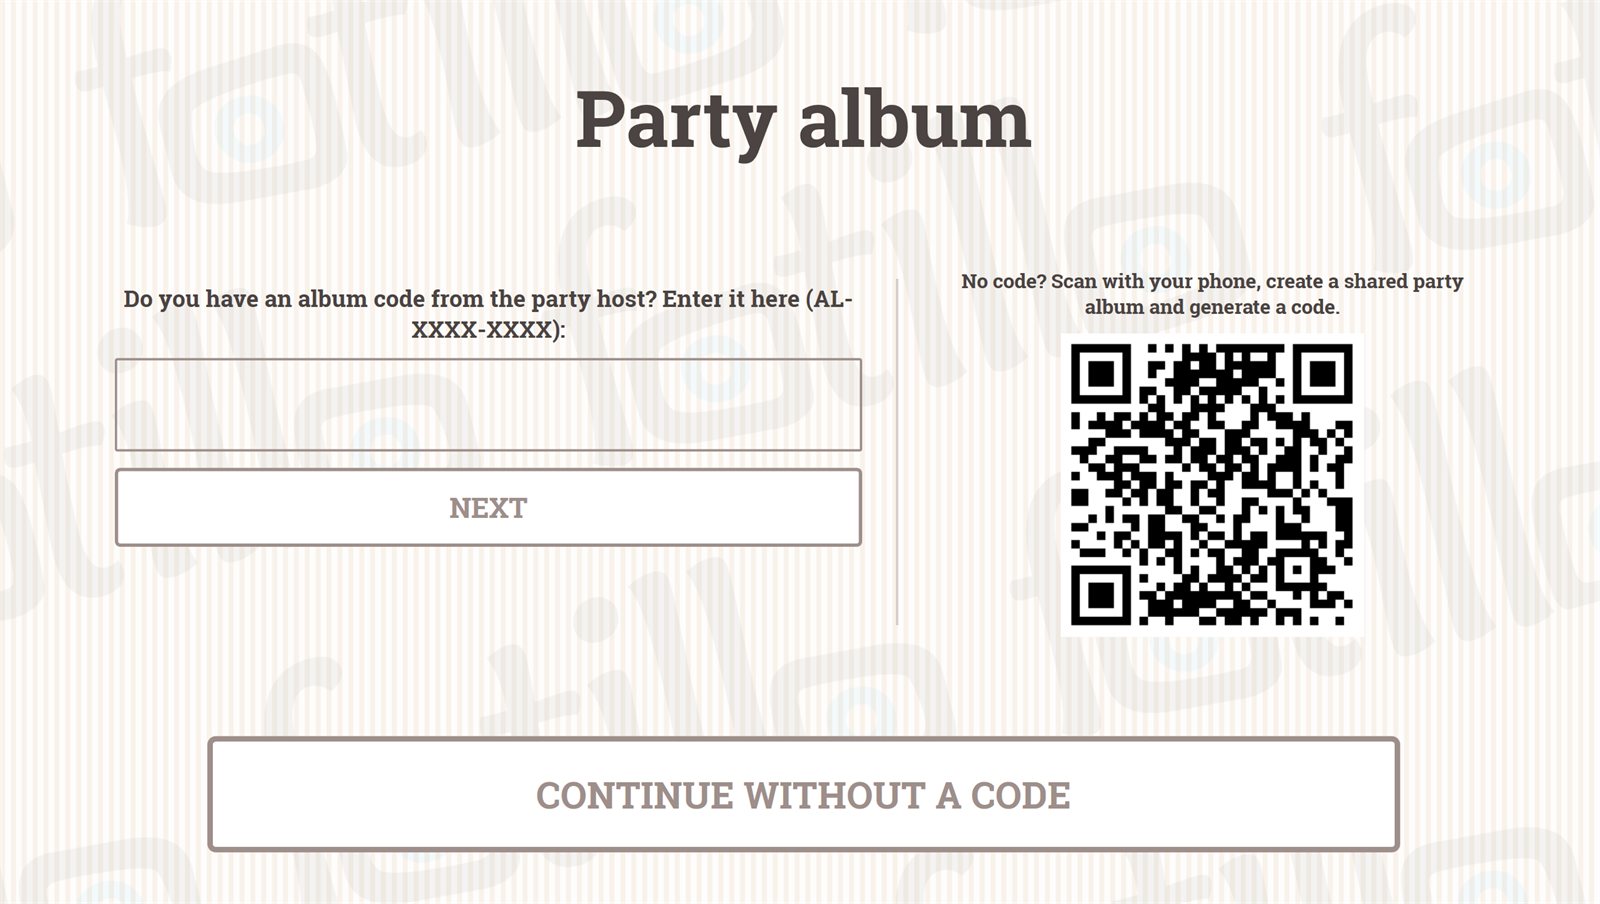
new The customer can also enter the party code themselves. On a photo booth paired with an operator account, after buying a promotional package the customer sees the "Party album" screen with a field for the AL‑XXXX‑XXXX code and a QR code for setting up an album from their phone. Once the code has been entered, the photos from the session go to the album automatically and the question about an e‑mail address is skipped (the guests will receive everything in the album anyway). The CONTINUE WITHOUT CODE button follows the old path (asking for an e‑mail address). On a photo booth not paired with the Cloud, the screen does not appear - the customer is asked for an e‑mail address straight away.
- Time window - uploading to the album works for 12 hours from entering the code (the album owner can extend this from their own panel). So enter the code just before the party.
- The party code is valid for 7 days from being generated and can connect a maximum of 3 photo booths (each has its own subdirectory in the album). More photo booths can join the code within a day of the first one.
- Independent of QR sharing - the album receives separate copies of the photos. Ordinary sharing (a link/QR for the guest) works as before, and deleting a shared photo removes nothing from the album.
- The DISCONNECT ALBUM button ends uploading from this photo booth; the album and the collected photos remain with the account holder.
7. Fotillo Cloud - the operator panel ↑ top
The Cloud is the other half of Fotillo. The photo booth takes photos and prints them, and the Cloud handles everything that happens after the print: the page where a guest downloads their photo, the shared party album and printing from a phone. You set up your account once, at cloud.fotillo.com, and it serves all your devices.
The photo's journey - why the QR code works right away
The address where the guest will find their photo is created on the booth, not on the server. That is why the QR code appears instantly and is correct even when there is no internet at that moment - the file will reach the Cloud later, on its own.
Your booths - pairing
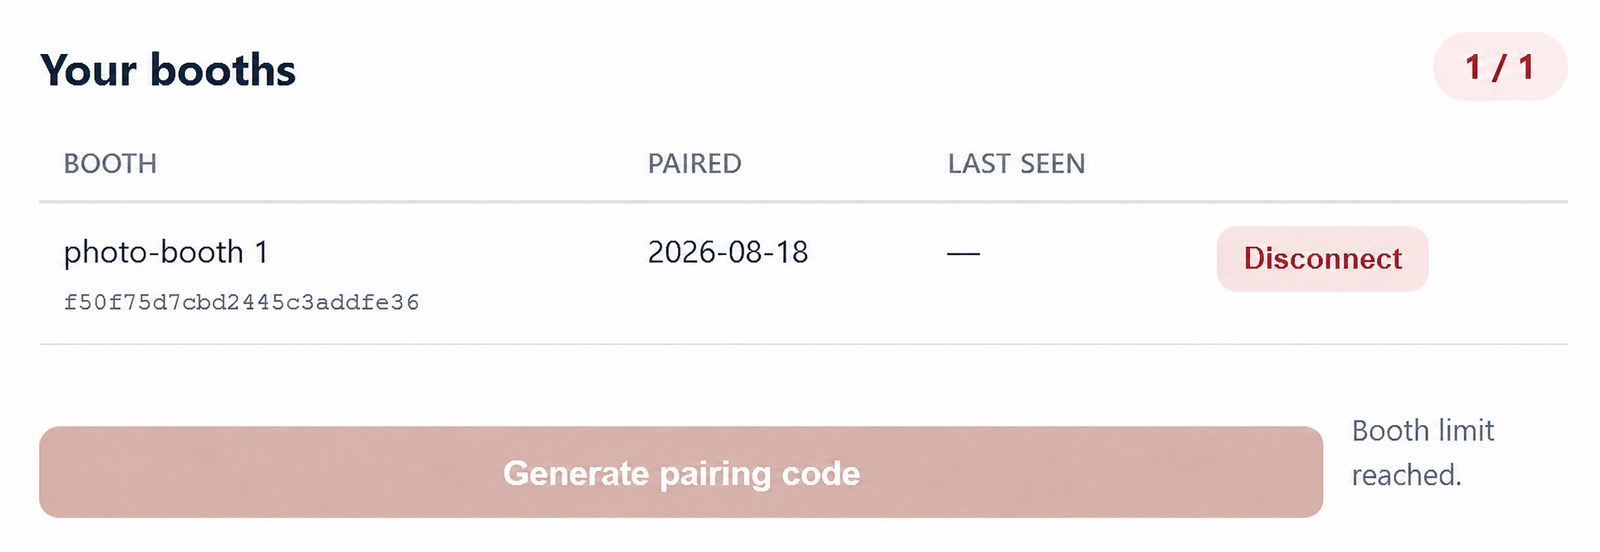
The panel opens with the Your booths list. Each row is one device: the name, the pairing date and Last seen - that is, when the booth last contacted the Cloud. This column is the simplest test of whether the device has a connection.
Above the list you will find the pairing code. You type it into the program on the booth: key F4 → the Cloud button → the left column of the window. From that moment the device belongs to your account. Pairing is also an internet test - if it goes through, the connection works.
You can disconnect a booth with the button in its row, for example when you sell the device. The number of booths connected at the same time is limited; once you reach the limit, the panel shows a message.
The look of the sharing page
What the guest sees after scanning the QR code is set in the panel under the Page appearance button. You have these options:
| Field | What it does |
|---|---|
| Title | The heading of the page where the guest views and downloads their photo. |
| Logo | Your company mark above the photo. |
| Logo link | The address the guest goes to after clicking the logo - for example your website. |
| Background | The background image of the page. |
| Price list link | Room for your offer - a guest who has just had fun at a party is the best audience there is. |
new Page customization is a paid feature. While it is inactive, the guest sees the default Fotillo look, but you can prepare the settings right now - they start working once you activate it. You activate them with a code: in the panel you will find your Operator ID, which you paste in the shop when you buy, and the activation code you receive goes back into the panel. The code works on that one account only. Buy a customization code in the shop →
Events - a different look for every party
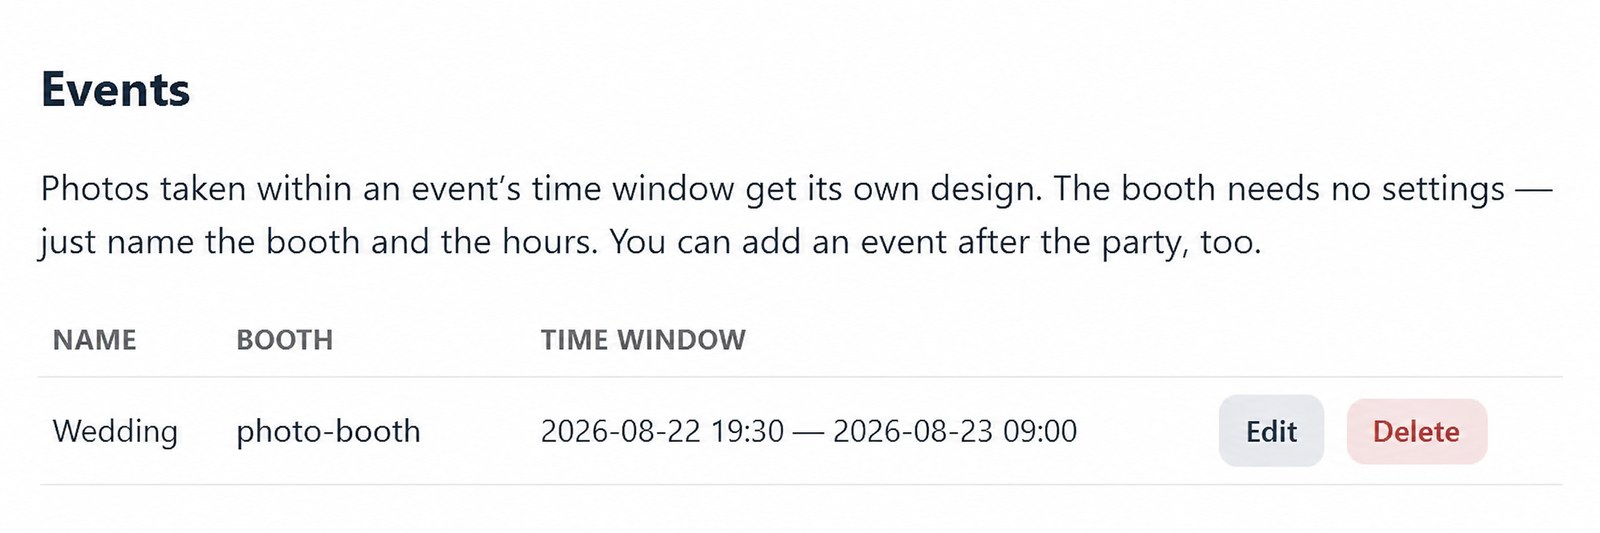
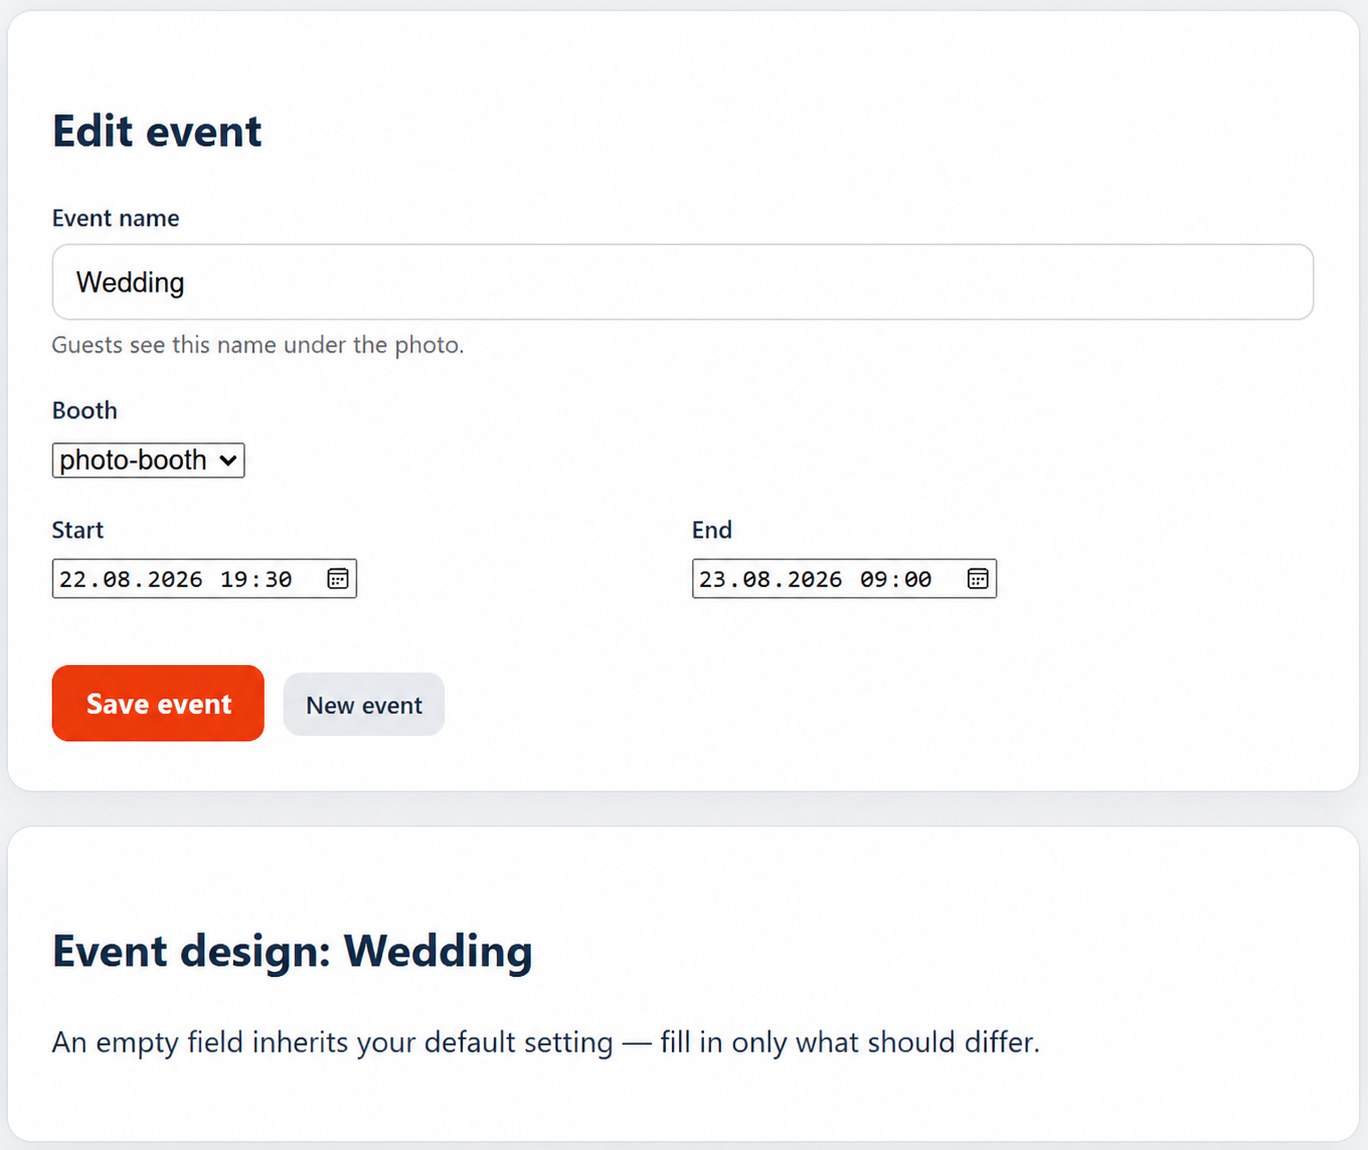
An event is a time window on a specific booth that has its own page appearance. Photos taken inside that window get the event's customization; all the rest get your standing setting.
The booth needs no settings for this at all. The photo carries the information about which booth it came from and when it was taken - the Cloud works out the rest by itself. That is why you can create an event even after the party, and the photos will still get the right look.
When you create an event you give four things: the Name (visible to guests under the photo), the Booth, the Start and the End. Then you fill in the look - an empty field inherits your default setting, so you only fill in what should be different.
Windows on the same booth must not overlap
If you try to save an overlapping period, the panel refuses and points to the clash. If you are running two parties at the same time, assign them to two different booths.
Events are part of the paid customization - without it the button shows an invitation to activate with a code.
Photos and space on your account
The Photos button opens the list of everything that has reached the Cloud from your booths. In the Account section you see the email address, the account type (company or private person) and Storage used. Active customization raises the available space to 10 GB.
new When usage gets close to the limit, you get a warning email - before you run out of room for the next party. You do not have to watch it yourself.
The party album - what your client gets
The album is created by the client (for example the newlyweds) on their own account at album.fotillo.com - an account separate from your operator account. All you do on the booth is enter their party code (see chapter 6). Still, it is worth knowing what the client gets, because you are usually the one who tells them about this feature:
| What | How much |
|---|---|
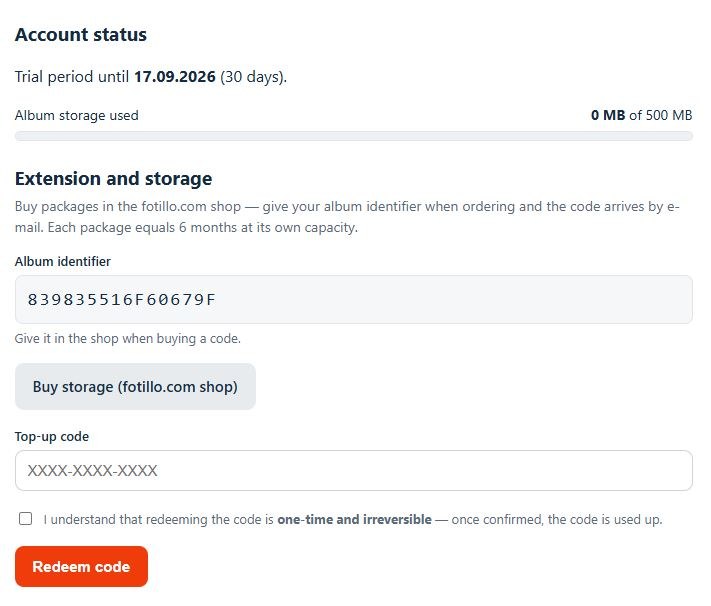
| Free account after sign-up | 1 month of validity + 1 month grace period, 500 MB |
| Storage packs you can buy | 2 GB, 5 GB or 10 GB - each for 6 months |
| Top-up | With a code from the shop, entered in the album panel - Album storage packs |
After the grace period the album stops being available, so it pays to warn the client to download the photos in time or extend the account. The detailed rules are in the Album terms on album.fotillo.com.
Photos from the photographer: HOT FOLDER mode new
In HOT FOLDER mode the photographer sends photos from their own phone and the device prints them by itself - without anyone touching the screen.
This is the mode for a photographer working at an event: they shoot with their own camera, pick on their phone the photos that should be printed and tap PRINT. Everything else happens without the guest and without an operator at the device. All you need is a computer with the Fotillo program and a printer. The mode belongs to the HOT FOLDER feature.
How it works - step by step
- The operator pairs the device with Fotillo Cloud - with the pairing code from the operator panel, in the Fotillo Cloud window from the F4 menu (left-hand side of the screen). This is the only code: a package with the HOT FOLDER feature needs no separate code, and the Cloud shows only what the package can do.
- In F4 the operator sets HOT FOLDER mode to PHOTOGRAPHER. HOT FOLDER switches on by itself, and the Cloud issues a HOT FOLDER link for the device.
- The photographer scans the QR code of the link - in the CLOUD PAIRING window (the F4 menu, right-hand side) or in the operator panel at cloud.fotillo.com, on the HOT FOLDER page. The photographer does not create an account and does not log in.
- On the phone the photographer picks a template from the list of templates loaded on the device, uploads exactly as many photos as the template has fields (the page keeps count), chooses the number of prints and taps PRINT.
- The device downloads the photos, builds the template and prints. The main screen does not change - nobody has to click anything.
The device link does not expire
The link works until the operator changes it. The equipment can therefore be prepared and tested several days before the event and simply switched on on the day. The NEW LINK button (in the CLOUD PAIRING window or in the Cloud panel) immediately invalidates the previous link - use it if the link has reached the wrong person. In the Cloud panel the link can also be switched off.
QR code for the photographer only
The main screen of the device shows neither the link nor a QR code - the link is for the photographer, not for the guests. The QR code is only in the F4 menu and in the Cloud panel.
Several HOT FOLDER devices
Each device on the account has its own link - the Cloud panel shows them separately. HOT FOLDER works on devices within the device limit of the Cloud account, just like photo sharing.
HOT FOLDER for parties
The booth issues the link to the guest page automatically after each package payment. While it is active, it has priority: the photographer sends photos through the same QR code as the guests. Guests accept the Cloud terms before sending photos, and the link expires together with the package, on a new series, after the validity time from F4 or after the report - the device then returns to the photographer's HOT FOLDER link. Details: HOT FOLDER for parties (link from the package).
8. Templates (collages) ↑ top
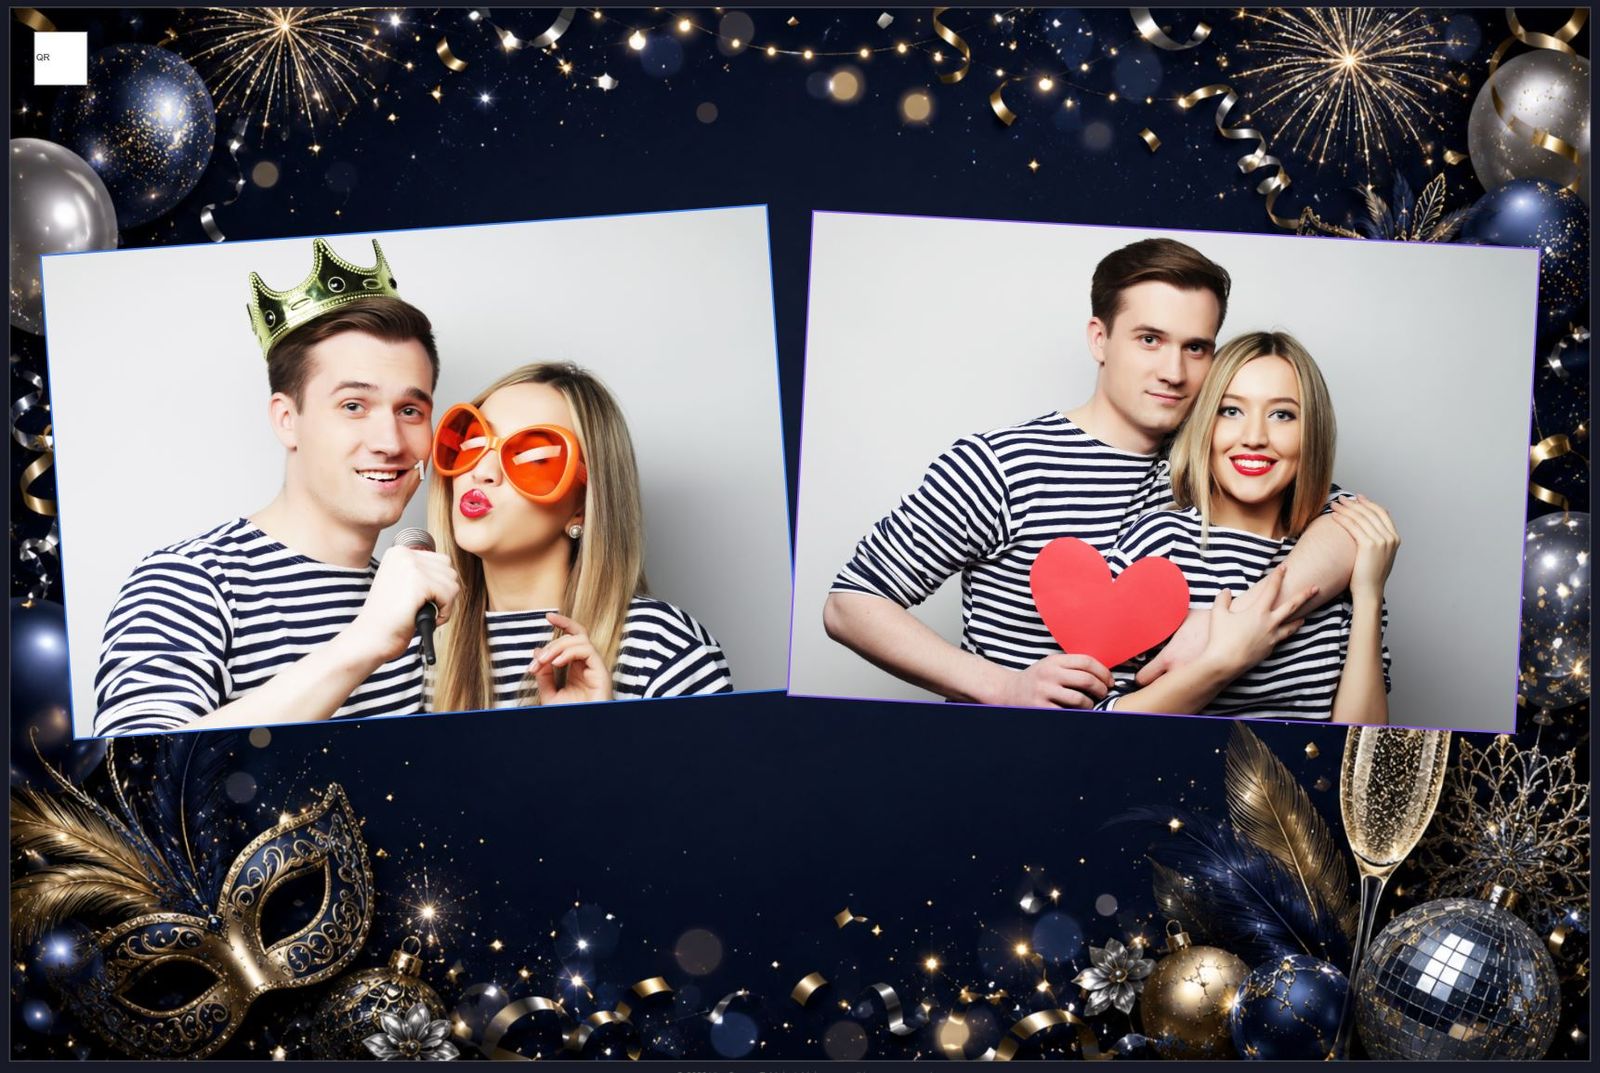
Templates (collages) determine the design, layout and appearance of the photos. Original Fotillo templates (more than 20 000) are available exclusively at fotillo.com/templates - you can filter them by the number of photos, colours, theme and tags. Some are free, most cost 6-8 EUR.
Template editor - make your own design in the browser
new You do not have to stick to the ready-made designs. editor.fotillo.com is our template editor that runs in the browser - you design the print layout in it: where the camera photos go, what the background will be, what text and decorations there are. You export the finished design as a ZIP package and copy it into the Collages folder exactly the same way as a template from the shop.
The editor does not process real photos - you draw photo slots in it, and the actual shots are put there by the Fotillo program during the party. What you see in those slots while designing is only a rough preview.
You can try it without creating an account
Designing and a trial export are available right away, with no registration - just go to editor.fotillo.com. An account is only needed when you export a template ready for printing.
How to install a new template
Extract the purchased template into the Collages directory in the program folder. The program will show it to customers as a selectable option. Deleting the template folder = removing it from the list. Simple file management.
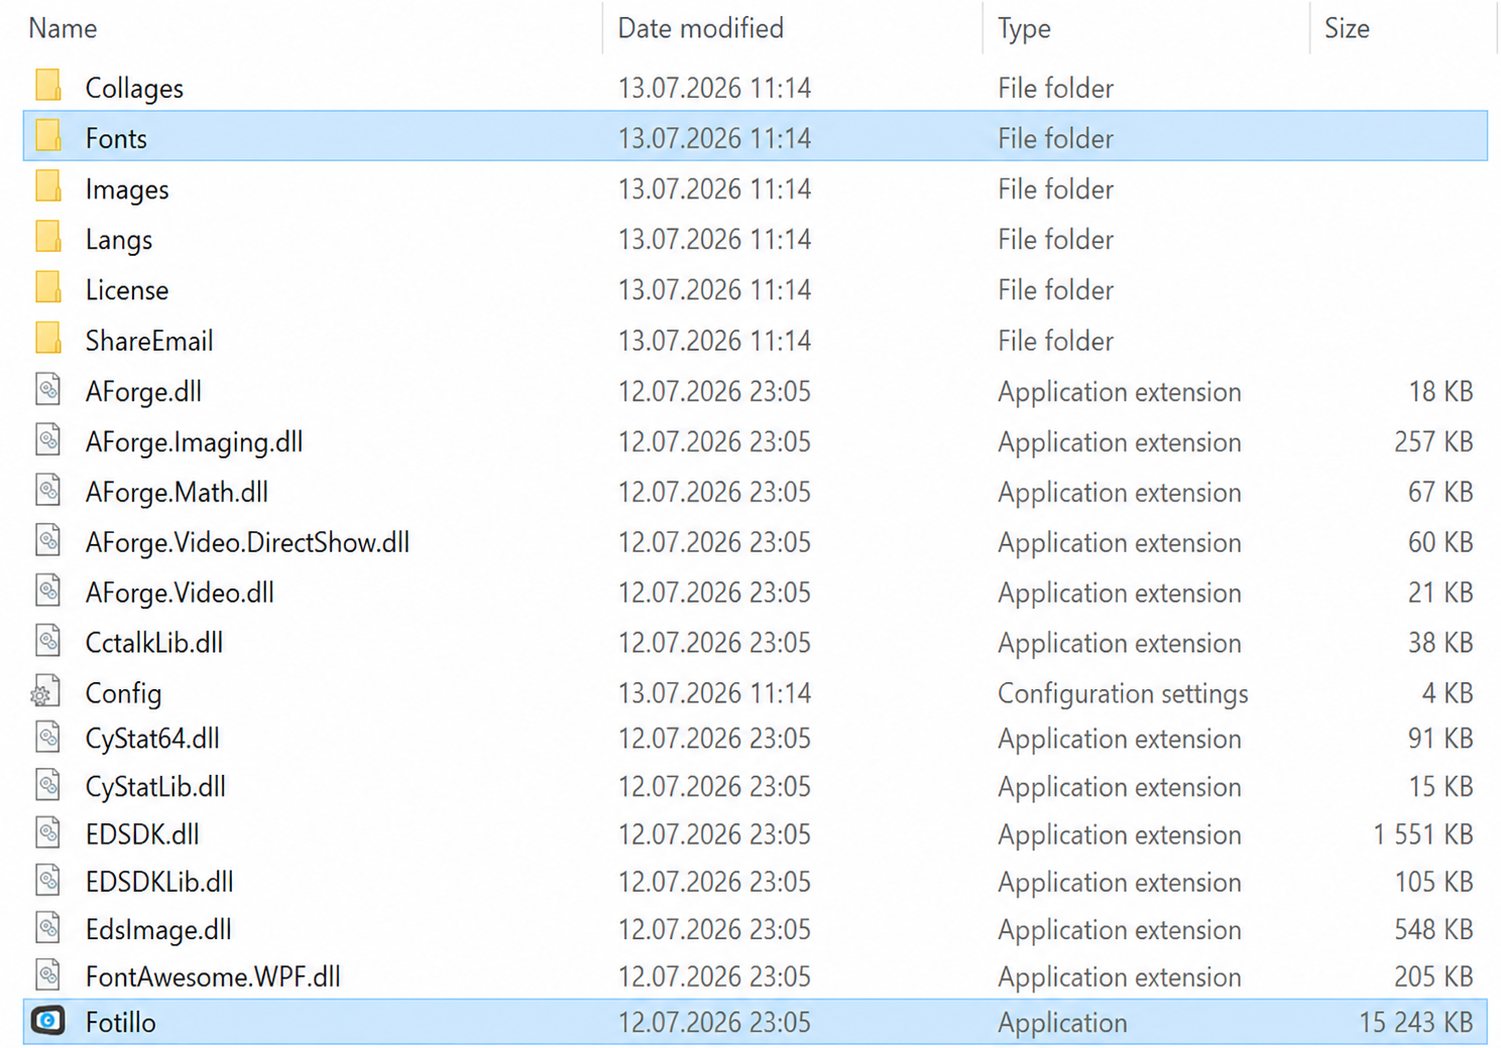
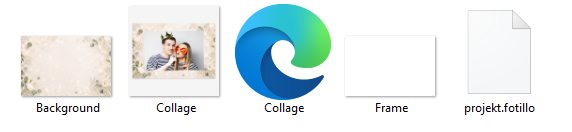
Collages directory with extracted templates.What a template consists of
You can edit each Frame* image - add your own logo or text, or change the graphics completely. Collage.xml sets, among other things, the background colours, the dimensions of the photo frames and how the remaining elements are interpreted. Do you need changes to a template? Order a bespoke edit.
Seasonal templates - a date in the folder name
new A folder inside Collages can be named after a date or a date range. Its templates are then shown only during that period and hidden from guests on all other days. Nothing needs to be switched over or restarted - the set is checked every time a guest opens the template selection screen, which in coin-operated booths happens right after pressing START.
The folder name must be the date and nothing else - no occasion name, no extra words. Always write the day and month with two digits, separated by dots.
| Folder name | When the templates are visible |
|---|---|
| 24.12 | only on 24 December - every year |
| 24.12.2026 | only on 24 December 2026 |
| 01.12-26.12 | from 1 to 26 December - every year |
| 01.12.2026-26.12.2026 | from 1 to 26 December 2026 |
| Wedding | a name without a date - the folder is visible all year round |
A period that crosses New Year is best set up as two folders holding the same set of templates: 27.12-31.12 and 01.01-03.01. Written this way it works every year and you never have to update the year - the most convenient option for permanently installed booths. Use full years (27.12.2026-03.01.2027) only when the theme should appear once.
Where this works best
In permanently installed booths - shopping centres, hotels and tourist attractions. You prepare the folders once and the booth changes its look on its own all year long: Christmas templates in December, Easter ones in spring, Halloween at the end of October, and the standard set outside the season. Nobody has to travel to the site to switch templates over.
Keep one folder without a date
If every folder in Collages has a date, then on a day outside all of the ranges the guest will see an empty template selection screen. Always keep at least one folder with an ordinary name - that is your standard set for the rest of the year.
Folders on the selection screen new
With a dozen templates the selection screen gets long and the guest keeps turning pages looking for that one design. From version 6.1 a folder can hide its templates behind a single icon: passport photos in one place, seasonal designs in another, greeting cards in a third.
It takes one file. Put an image named Folder.png into the folder and it stops being transparent: instead of spilling its templates onto the shared screen, it appears as one tile with that image. A touch goes inside, and the BACK button in the bottom right corner goes one level up.
| What you do | What the guest sees |
|---|---|
folder with a Folder.png file | one tile with that image, and the number of templates inside in its corner |
| folder without that file | no change: the templates go to the shared screen, as before |
| a folder inside a folder | another level - the depth is unlimited |
The icon matters more than the name
The tile shows only the image and the number of templates, so Folder.png should say at a glance what is inside. Prepare it like a template icon: square, readable at arm’s length. Folder names need not be unique - two 10x15 folders in different branches are two separate entries for the program.
An empty folder will not appear
If nothing is left after discarding the templates that cannot be printed on the loaded paper, the tile does not appear at all. The guest will not touch an icon with an empty screen behind it. For the same reason the number in the corner counts only templates ready to print.
Dates work on every level
A folder named with a date (previous point) disappears in due course together with everything inside, wherever it sits in the tree. So you can keep seasonal designs in a Christmas folder and put 01.12-26.12 inside it.
Party themes: one booth for many occasions new
The photo booth stands permanently in a wedding venue. Saturday is a wedding, New Year’s Eve is a party, May is a communion - and nobody is there to switch the templates. From version 6.1 the customer picks the occasion when buying a package, and the booth immediately shows the matching templates, background and colours.
You prepare the sets in the Collages\THEMES folder. Each subfolder is one occasion:
Collages\
  <ordinary templates - booth without a purchased package>
  THEMES\
    Wedding\
      Folder.png        icon on the occasion screen
      background.png    programme background for the party (optional)
      Config.ini        colours only (optional)
      <template folders>
    NewYearsEve\
...| When | What happens |
|---|---|
| booth without a purchased package | the THEMES folder is invisible; the screen looks as before and shows the ordinary templates |
| the customer buys a package | the program asks about the occasion before it asks for the album code and personalisation |
| during the party | only the templates of the chosen occasion are visible, on its background and in its colours; the same for a single photo |
| the package runs out | the booth returns to its usual look and its usual templates |
Why the occasion comes first
Because the labels the customer fills in on the next screen (names, date, hashtag) are part of the template. Until the program knows which set is in play, it does not know what to ask - otherwise it would ask for the newlyweds’ names on New Year’s Eve.
When the party ends
Together with the package: when the purchased prints run out or the time is up. The choice survives a power cut, so the booth will not wake up in its usual look in the middle of a wedding. Closing the accounts with the report (Ctrl+R) ends it as well.
If the customer buys another package before the previous one has run out, the program first asks whether to extend or start a new series. Extending keeps the party as it was; a new series starts with choosing the occasion, together with the texts and the album. A wrong choice of occasion can be corrected by the staff on the F3 screen.
Folder names in English
The folder name is also the translation key: Wedding will appear in the guest’s language if the program knows that occasion. A name it does not know (say Zosia birthday) is shown exactly as you wrote it - and that is fine if the booth works in one language. Do not use spaces in names that are meant to be translated.
The Config.ini in a theme changes colours only
The program reads exactly four keys from it: ProgramColorAccent, ProgramColorHeader, ProgramColorText and ProgramColorControls. Every other entry is skipped and written to Trace.txt. A theme cannot change prices, features or any other setting - a deliberate safeguard, because a folder of themes often travels on a memory stick.
The feature needs Packages
Party themes work only where the Promotional package feature and payments are switched on, because a party ends together with the package. In a device without packages the THEMES folder would have no way to expire, so the program ignores it.
9. Appearance: themes and interface colours new ↑ top
The look of the program can be adapted to your own brand or to the occasion on two levels:
- Graphic theme - a coherent set of backgrounds, collages and interface graphics (e.g. wedding, festive, corporate). You choose the theme when downloading the package in the configurator.
- Interface colours - four configurable program colours (accent, headings, text, control elements). You set them in the F4 menu → Program section, entering values in
#RRGGBBformat.
The accent colour
The accent colour (by default the Fotillo corporate red) governs active buttons and highlights. By changing the four colours you can match the interface to your visual identity without touching the templates.
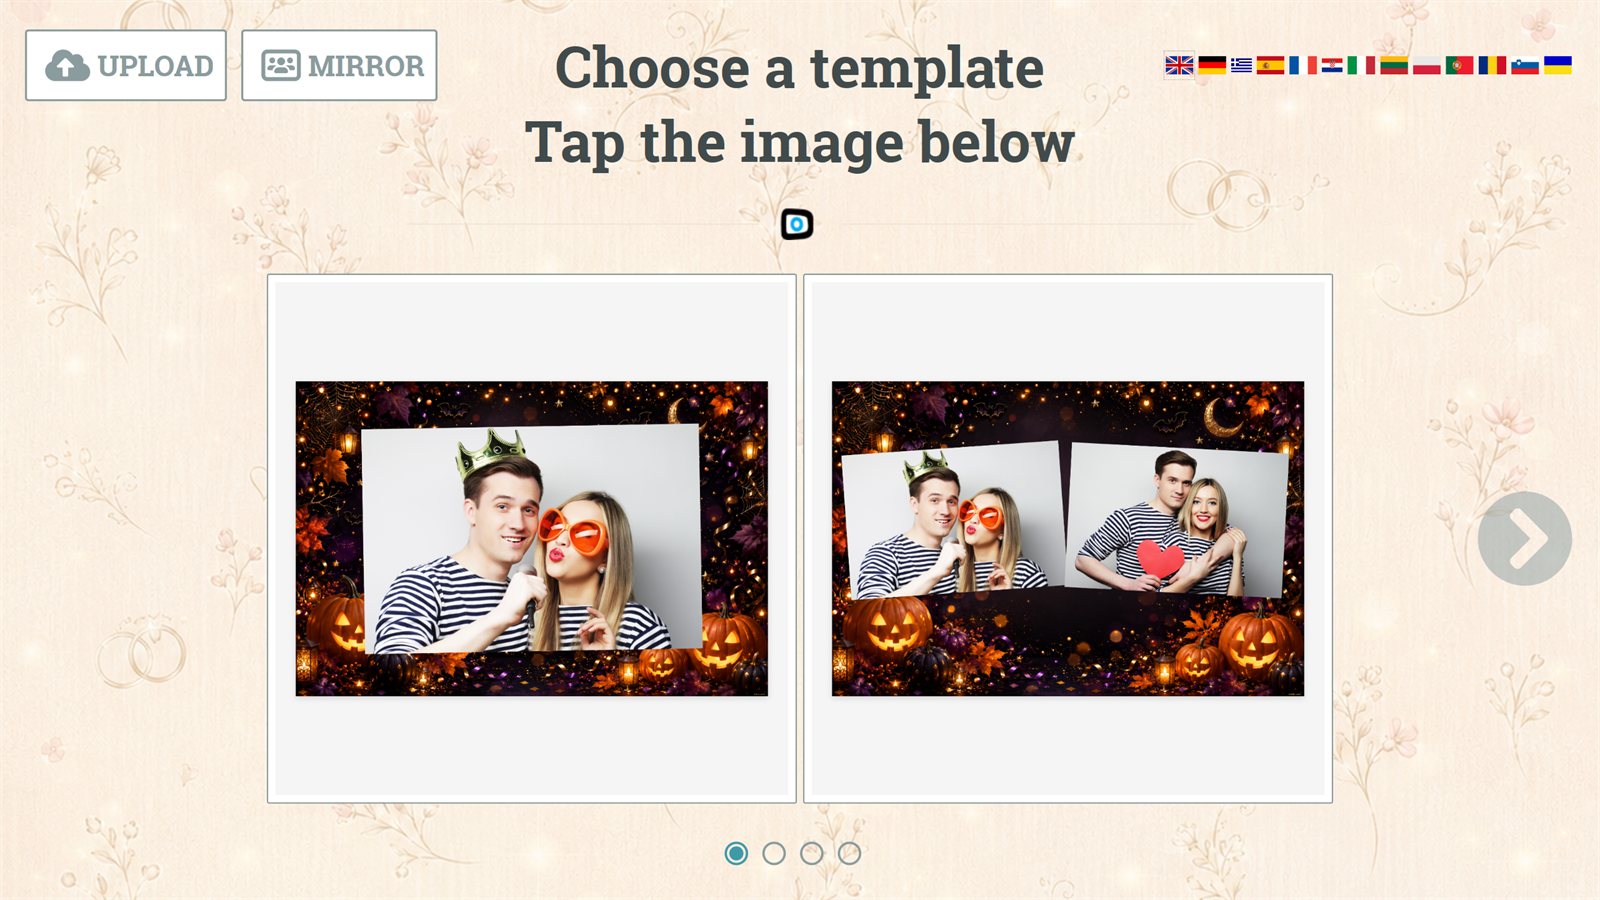
10. Reliability and wireless mode ↑ top
Automatic error recovery
The program constantly checks communication with the peripheral devices and reacts to problems by itself:
- Frozen communication (e.g. a USB port) → the program restarts the computer to restore normal operation.
- A jam or no paper (two-way printers) → the program locks and displays a request to call an attendant.
- A blocked coin acceptor / banknote reader → the program locks so that it does not take payment from further customers.
new Only devices enabled in the configuration are monitored: disabling Payments in F4 also disables monitoring of the coin acceptor, the banknote reader and the card terminal; the Canon camera is only checked when it is selected as the image source. A disabled feature will never trigger a restart.
new The restart no longer happens "out of the blue": the program first displays a warning screen with a 30-second countdown, the name of the device that has stopped responding and an ABORT RESTART button. If the time runs out the computer restarts (as before); touching the button aborts the restart and resets the error counter - if the device still does not respond, the screen will appear again after a few minutes. The screen is only shown on the screensaver (never during a customer session).
Wireless operation (Bluetooth)
Fotillo can be operated without physical access to the computer. Any audio device connected via Bluetooth can serve as a remote control: the left/right buttons move through the options (filters, templates, buttons), and the main button (e.g. Play/Pause) confirms. The basic functions are available: choosing a template, accepting or retaking a photo, choosing a filter, the number of prints and printing.
Blocking edge gestures (touch screens)
new On a touch screen a guest can swipe from the edge of the display and pull out Windows elements: the taskbar (from the bottom), the notification centre (from the right), task view (from the left) and the title bar (from the top). Fotillo runs full screen, but it cannot stop these gestures itself - Windows handles them. The package contains an EdgeGestures folder with two scripts that turn these gestures off and back on.
Turning the block on:
- Open the
EdgeGesturesfolder in the program folder (next toFotillo.exe). - Double-click
Block-edge-gestures.cmdand confirm the Windows consent dialog - the change applies to the whole computer, so it needs administrator rights. Once is enough. - The script refreshes the desktop itself. Check every edge with your finger - nothing should slide out. If something still reacts, restart the computer.
You can lift the block at any time: run Unblock-edge-gestures.cmd from the same folder. The setting returns to the Windows default.
When you need this
Whenever the booth stands unattended and has a touch screen - at parties, in shopping centres, in hotels. Without the block a curious guest leaves the program for the Windows desktop with a single swipe. The block changes nothing inside the program: Fotillo works exactly the same, and you still have normal access to the computer with a mouse and keyboard.
What the block does not do
It does not disable the keyboard: shortcuts such as Ctrl+Alt+Del or Alt+Tab keep working - which is good, because they always let you back into the computer. A guest at the booth usually has no keyboard, so in practice this is entirely enough. The setting applies to the whole computer, not only to Fotillo.
11. Legal aspects / GDPR ↑ top
By using Fotillo you accept the Terms and Conditions and the licence agreement - please read them before installation.
Some features (sending a photo by e‑mail, generating a link to a photo) process customers' images on Fotillo servers. Under the GDPR (EU Regulation 2016/679), as the data controller you should:
- have a lawful basis for processing customers' images and obtain their consent,
- provide a clear privacy notice for people using the device (who the data controller is, for what purpose and on what basis you process images, and how to contact you),
- consider the private cloud service - the data is then processed within your own infrastructure and Fotillo as the manufacturer does not process your customers' data.
Please note
This is an informational summary, not legal advice. The detailed obligations depend on the country and on how the device is used.
+ Glossary of features ↑ top
A quick reminder of what each feature does and where to find it. The set of features depends on your package (see the Introduction).
| Feature | What it does | Where |
|---|---|---|
| Camera | Takes a photo on the spot (USB / built-in / Canon EOS) | F4 → Photos |
| HOT FOLDER | Printing the photographer's photos - from a folder or from a phone through the device's HOT FOLDER link | chapter 3 |
| Print from phone (QR) | Phone → device, for printing | chapter 6 |
| Sharing (e‑mail / QR) | Device → phone (download/e‑mail) | F4 → Sharing |
| Printer | Printing photos, two-way communication | F2 · F4 → Printer |
| Image filters | 6 standard filters | F4 → Photos and filters |
| Advanced filters / AI backgrounds | 10 artistic filters with a slider + AI background replacement (one shared paid feature) | F4 → Photos and filters · chapter 4 |
| Album Fotillo | Automatic upload of the session to the party album (AL‑… code) | Fotillo Cloud window (F4) · chapter 6 |
| Cash / token payment | Coins, banknotes, silver/gold tokens | F4 → Payments |
| Card / BLIK payment | Valina terminal | F4 → Payments |
| Promotional package | Quantity/time-based promotions | F4 → Payments |
| Advert display | An image/video after the photo | F4 → Advertising |
| Themes and colours | The look of the interface and graphics | configurator · F4 → Program |
+ FAQ - frequently asked questions ↑ top
How do I download the Fotillo software?
What is the activation code (token)?
Can I test Fotillo for free?
Why can't I see one of the features from the manual in my own program?
How do I change the program language?
Langs folder.Which printers does Fotillo support?
What is the difference between "photo sharing" and "printing from a phone"?
How do I install a new template (collage)?
Collages folder in the program directory. Fotillo will immediately show it to customers as a selectable option.How do I disable the image filter selection?
Where do I download the AI model for background replacement?
Model directory next to Fotillo.exe. Without the model file the program will not allow you to save settings with AI backgrounds enabled.What is Album Fotillo and how do I connect a photo booth to it?
Why does the screen say “Temporarily out of service”?
What is the difference between “Paper on roll” and “Purchased prints”?
Strip templates: how many photos does the photographer upload?
Does Fotillo rotate portrait photos?
What happens when the purchased prints run out?
Does the program lock the Windows desktop?
+ Contact ↑ top
Do you have a question that is not in the FAQ? Write to us - the message will go to contact@fotillo.com, and if you tick the option below we will send you a copy at your own address.